이 버전에는 잘못된 편집 사항이 있을 수 있습니다. 최신 확인된 스냅샷으로 전환하십시오.
필요한 것
-
이 단계는 번역되지 않았습니다. 번역을 도와주십시오
-
Position the device upside-down on a flat, level surface with the USB ports facing you.
-
-
이 단계는 번역되지 않았습니다. 번역을 도와주십시오
-
Using your metal spudger, lift and remove the 4 rubber “feet” from each corner.
-
-
이 단계는 번역되지 않았습니다. 번역을 도와주십시오
-
Using your Phillips head screwdriver, remove the four Phillips M2.5×4.0 screws that secure the bottom cover to the computer. In this step the usage of the magnetic mat will be helpful to keep up with the screws.
-
-
이 단계는 번역되지 않았습니다. 번역을 도와주십시오
-
Insert the flat end of your metal spudger under the bottom cover near the USB ports, then pry the bottom cover off the computer.
-
-
-
이 단계는 번역되지 않았습니다. 번역을 도와주십시오
-
Using your Phillips #1 screwdriver, remove the four Phillips M2.5×4.0 screws that hold the shield in place.
-
-
이 단계는 번역되지 않았습니다. 번역을 도와주십시오
-
Insert your spudger into the gap between the bottom shield and the ports and gently pry to lift and remove the shield.
-
-
이 단계는 번역되지 않았습니다. 번역을 도와주십시오
-
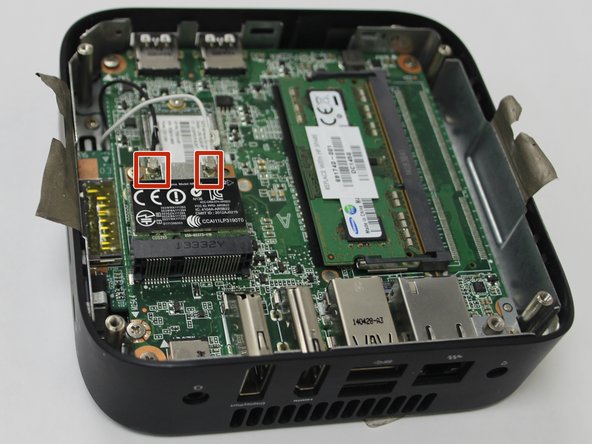
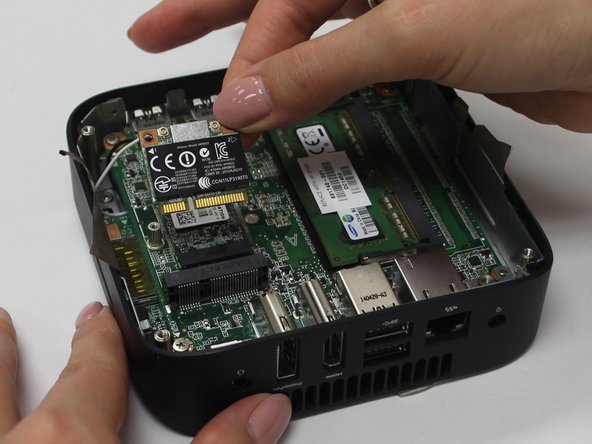
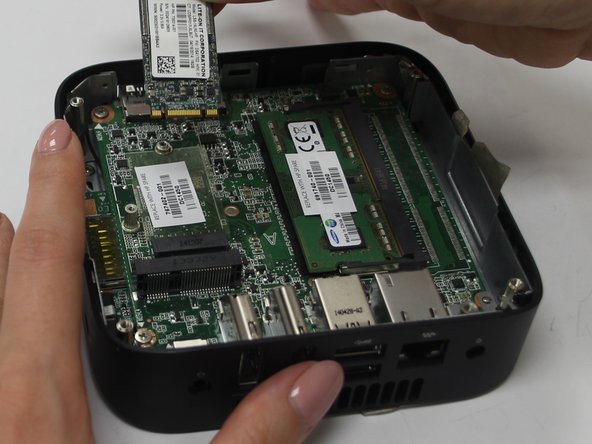
Using your Phillips #1 screwdriver, remove the M2.0×3.0 screw from the upper left corner of the module.
-


다른 3명이 해당 안내서를 완성하였습니다.
팀

Ohio State, Team S1-G3, Whitney Fall 2018 Ohio State, Team S1-G3, Whitney Fall 2018 회원
OSU-WHITNEY-F18S1G3
2 회원들
안내서 5개 작성하였습니다
댓글 2개
actually you can flip open metal bracket with just one mylar tape
and there is 5 screws, not 4. if you look, you will see triangle arrow stamped on bracket indicating which screws to remove.
you can swap the ssd without removing the wifi board
do this all the time, saves a lot of steps