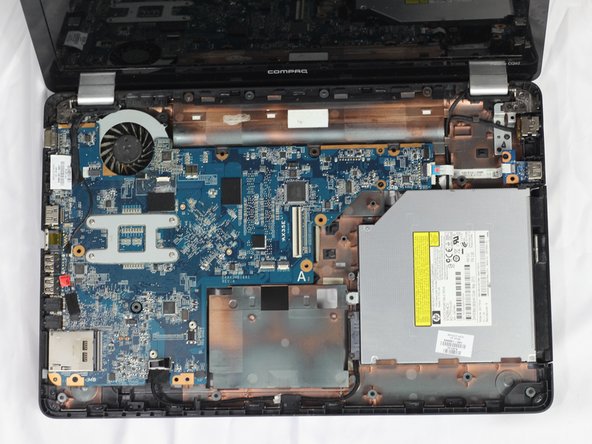
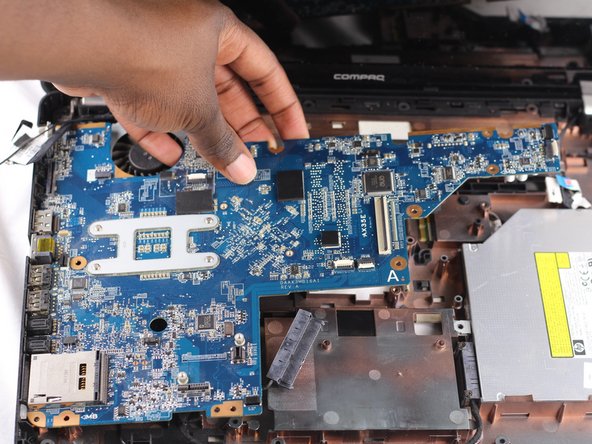
주요 콘텐츠로 건너뛰기

HP Compaq Presario cq62-214nr Motherboard Replacement

필요한 것

  1. HP Compaq Presario cq62-214nr Motherboard Replacement, Keyboard: 1 단계, 이미지 1/2 HP Compaq Presario cq62-214nr Motherboard Replacement, Keyboard: 1 단계, 이미지 2/2
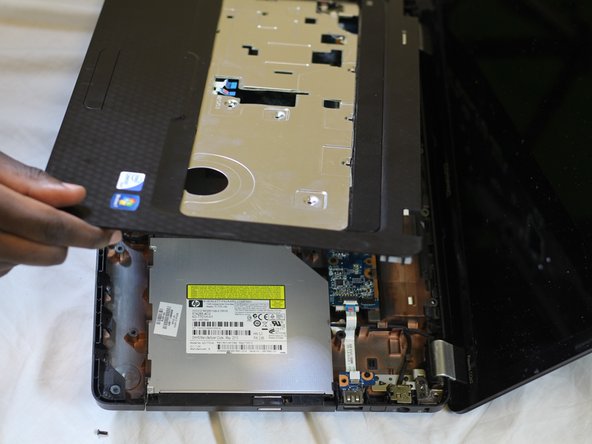
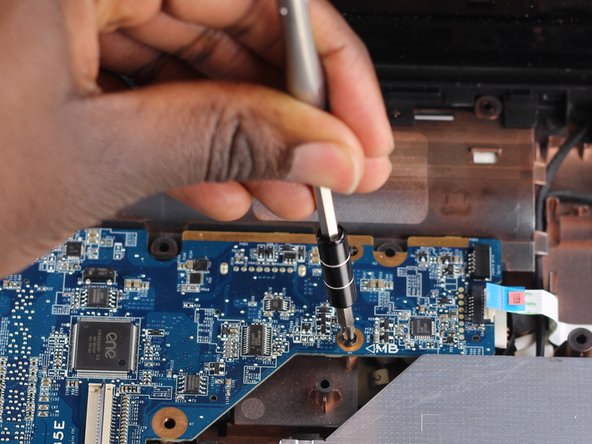
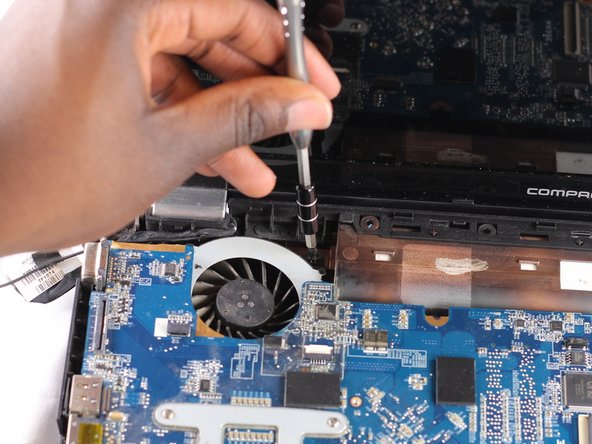
    • With all the screws removed from the previous guides. Remove the final eight M2.5X5 mm Philips screws on the back of the laptop

  2. HP Compaq Presario cq62-214nr Motherboard Replacement: 2 단계, 이미지 1/2 HP Compaq Presario cq62-214nr Motherboard Replacement: 2 단계, 이미지 2/2
    • In the battery housing, there are three screws that hold the keyboard on. These screws are located on the side near the front.

    • In the center of the bottom of the computer between the RAM and the wifi antenna is a 4th keyboard screw that also needs to be removed.

  3. HP Compaq Presario cq62-214nr Motherboard Replacement: 3 단계, 이미지 1/3 HP Compaq Presario cq62-214nr Motherboard Replacement: 3 단계, 이미지 2/3 HP Compaq Presario cq62-214nr Motherboard Replacement: 3 단계, 이미지 3/3
    • Open up the front of the laptop. Use a plastic opening tool to carefully pry open the keyboard from the edges.

  4. HP Compaq Presario cq62-214nr Motherboard Replacement: 4 단계, 이미지 1/1
    • Remove the keyboard by pulling on it with your hands.

    • There is a ribbon cable that is still connected on the back of the keyboard. Do not pull off the ribbon cable when pulling up the keyboard.

  5. HP Compaq Presario cq62-214nr Motherboard Replacement: 5 단계, 이미지 1/3 HP Compaq Presario cq62-214nr Motherboard Replacement: 5 단계, 이미지 2/3 HP Compaq Presario cq62-214nr Motherboard Replacement: 5 단계, 이미지 3/3
    • Locate the keyboard cable/wire that attaches the keyboard to the laptop .

    • Locate the latch of the wire connector

    • Unlatch the wire connector and gently pull out the wire with your hands

  6. HP Compaq Presario cq62-214nr Motherboard Replacement, Motherboard: 6 단계, 이미지 1/1
    • Remove the four M2.5x5 mm Phillips screws from the exposed keyboard cover.

  7. HP Compaq Presario cq62-214nr Motherboard Replacement: 7 단계, 이미지 1/3 HP Compaq Presario cq62-214nr Motherboard Replacement: 7 단계, 이미지 2/3 HP Compaq Presario cq62-214nr Motherboard Replacement: 7 단계, 이미지 3/3
    • Locate the three tab holding down the cover of the Motherboard.

    • Lift the tabs with using either a plastic opening tool or your fingers.

  8. HP Compaq Presario cq62-214nr Motherboard Replacement: 8 단계, 이미지 1/2 HP Compaq Presario cq62-214nr Motherboard Replacement: 8 단계, 이미지 2/2
    • Using a plastic opening tool to lift the sides of the cover.

  9. HP Compaq Presario cq62-214nr Motherboard Replacement: 9 단계, 이미지 1/3 HP Compaq Presario cq62-214nr Motherboard Replacement: 9 단계, 이미지 2/3 HP Compaq Presario cq62-214nr Motherboard Replacement: 9 단계, 이미지 3/3
    • Use your hands to gently lift the cover off.

  10. HP Compaq Presario cq62-214nr Motherboard Replacement: 10 단계, 이미지 1/3 HP Compaq Presario cq62-214nr Motherboard Replacement: 10 단계, 이미지 2/3 HP Compaq Presario cq62-214nr Motherboard Replacement: 10 단계, 이미지 3/3
    • Locate the four cables securing the Motherboard.

    • Gently pull cables to unsecure them.

  11. HP Compaq Presario cq62-214nr Motherboard Replacement: 11 단계, 이미지 1/3 HP Compaq Presario cq62-214nr Motherboard Replacement: 11 단계, 이미지 2/3 HP Compaq Presario cq62-214nr Motherboard Replacement: 11 단계, 이미지 3/3
    • Remove the three M2.25x5 mm Phillips screws.

  12. HP Compaq Presario cq62-214nr Motherboard Replacement: 12 단계, 이미지 1/3 HP Compaq Presario cq62-214nr Motherboard Replacement: 12 단계, 이미지 2/3 HP Compaq Presario cq62-214nr Motherboard Replacement: 12 단계, 이미지 3/3
    • Unlatch the final cable and gently remove the Motherboard.

결론

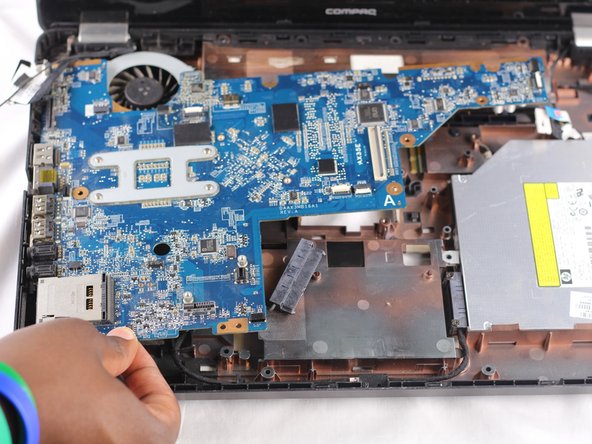
To reassemble your device, follow these instructions in reverse order.

다른 3명이 해당 안내서를 완성하였습니다.

Roth Marcelin

회원 가입일: 10/06/16

726 평판

안내서 6개 작성하였습니다

USF Tampa, Team 2-6, Sullivan Fall 2016 USF Tampa, Team 2-6, Sullivan Fall 2016 회원

USFT-SULLIVAN-F16S2G6

3 회원들

안내서 12개 작성하였습니다

댓글 0개

댓글 쓰기

조회 통계:

24 시간 전: 0

7일 전: 4

30일 전: 17

전체 시간: 1,068