주요 콘텐츠로 건너뛰기

HP Deskjet 1000 J110a Ink Carriage Motor Replacement

필요한 것

  1. HP Deskjet 1000 J110a Ink Carriage Motor Replacement, Cover Removal: 1 단계, 이미지 1/3 HP Deskjet 1000 J110a Ink Carriage Motor Replacement, Cover Removal: 1 단계, 이미지 2/3 HP Deskjet 1000 J110a Ink Carriage Motor Replacement, Cover Removal: 1 단계, 이미지 3/3
    • Remove the two 13 mm screws located on the back of the printer using a screwdriver with the T10 torx bit (star-shaped).

  2. HP Deskjet 1000 J110a Ink Carriage Motor Replacement: 2 단계, 이미지 1/3 HP Deskjet 1000 J110a Ink Carriage Motor Replacement: 2 단계, 이미지 2/3 HP Deskjet 1000 J110a Ink Carriage Motor Replacement: 2 단계, 이미지 3/3
    • In the front of the printer, open the tray where the paper comes out and remove the two 13 mm screws located under the top of the printer.

  3. HP Deskjet 1000 J110a Ink Carriage Motor Replacement: 3 단계, 이미지 1/1
    • With the front of the printer facing you, lift and raise the left side of the panel (like opening a book in reverse) until it disconnects from the clip on the right side of the panel.

  4. HP Deskjet 1000 J110a Ink Carriage Motor Replacement, Plug Ports: 4 단계, 이미지 1/3 HP Deskjet 1000 J110a Ink Carriage Motor Replacement, Plug Ports: 4 단계, 이미지 2/3 HP Deskjet 1000 J110a Ink Carriage Motor Replacement, Plug Ports: 4 단계, 이미지 3/3
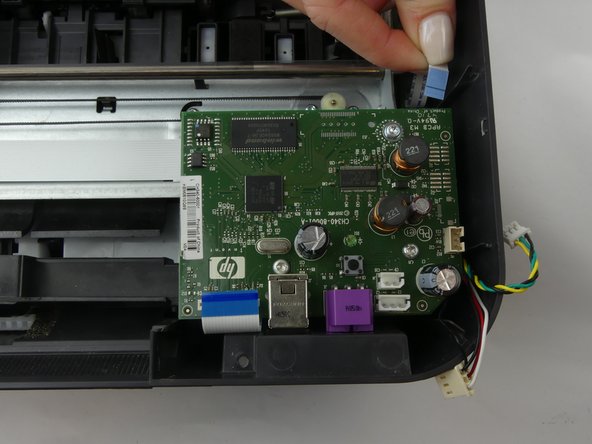
    • Locate and remove the two flat ribbon connectors which connect the circuit board to the other printer components.

    • Remove each connector using tweezers if it is too difficult to remove them by hand.

  5. HP Deskjet 1000 J110a Ink Carriage Motor Replacement: 5 단계, 이미지 1/2 HP Deskjet 1000 J110a Ink Carriage Motor Replacement: 5 단계, 이미지 2/2
    • Locate and remove the three multicolored wire connectors which connect the circuit board to the other printer components.

    • Remove each connector by hand, as shown. You can use tweezers if it is too difficult to remove them by hand.

  6. HP Deskjet 1000 J110a Ink Carriage Motor Replacement: 6 단계, 이미지 1/3 HP Deskjet 1000 J110a Ink Carriage Motor Replacement: 6 단계, 이미지 2/3 HP Deskjet 1000 J110a Ink Carriage Motor Replacement: 6 단계, 이미지 3/3
    • Remove the top two 13mm screws using a screwdriver with the T10 torx bit.

    • Remove the bottom 9mm screw using a screwdriver with the T10 torx bit, and remove the plug port circuit board.

  7. HP Deskjet 1000 J110a Ink Carriage Motor Replacement, Ink Carriage Motor: 7 단계, 이미지 1/2 HP Deskjet 1000 J110a Ink Carriage Motor Replacement, Ink Carriage Motor: 7 단계, 이미지 2/2
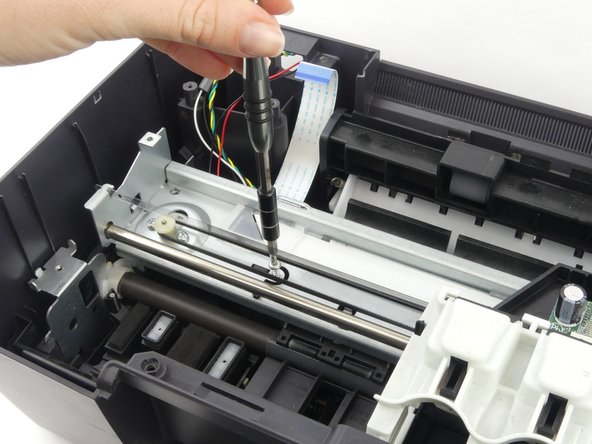
    • Remove the two 13mm screws with the screwdriver and a T10 torx bit.

    • Slide the ink dispenser to the center in order to reach the screws.

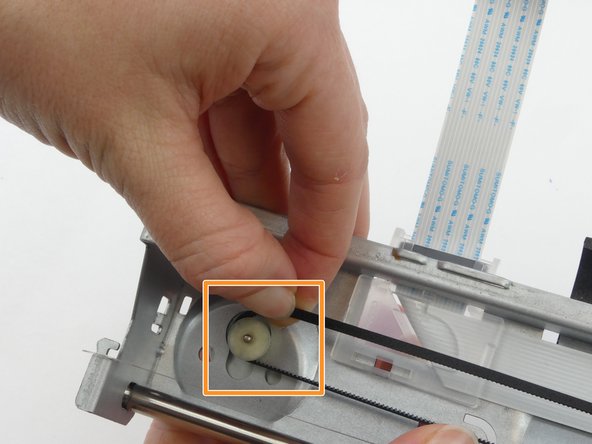
    • Remove the one 9mm screw with the screwdriver and a T10 torx bit.

  8. HP Deskjet 1000 J110a Ink Carriage Motor Replacement: 8 단계, 이미지 1/1
    • Lift the entire ink dispenser assembly out of the printer.

    • Ignore the following step if you are replacing the paper roller motor instead of the ink carriage motor.

  9. HP Deskjet 1000 J110a Ink Carriage Motor Replacement: 9 단계, 이미지 1/3 HP Deskjet 1000 J110a Ink Carriage Motor Replacement: 9 단계, 이미지 2/3 HP Deskjet 1000 J110a Ink Carriage Motor Replacement: 9 단계, 이미지 3/3
    • Remove the two 5mm screws which hold motor in place.

    • Remove the belt from the round motor gear, then remove the ink carriage motor.

    • Be careful not to allow pulley on right side of belt to fall out and become lost. It will remain in place if the assembly is handled gently.

    • Ignore these instructions if you are replacing the paper roller motor instead of the ink carriage motor.

결론

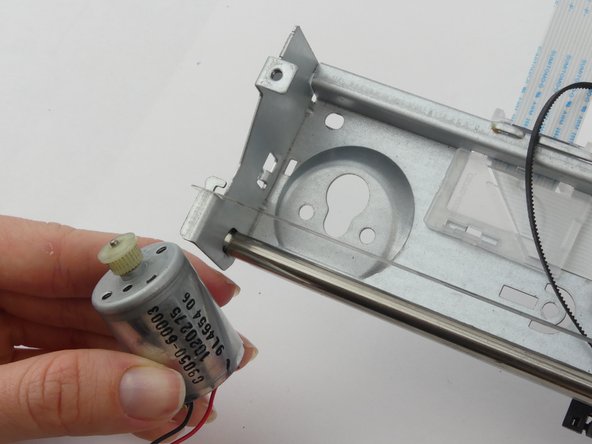
To reassemble your device, follow these instructions in reverse order.

다른 2명이 해당 안내서를 완성하였습니다.

Chris Perez

회원 가입일: 01/29/18

247 평판

안내서 2개 작성하였습니다

USF Tampa, Team S5-G3, Passmore Spring 2018 USF Tampa, Team S5-G3, Passmore Spring 2018 회원

USFT-PASSMORE-S18S5G3

4 회원들

안내서 12개 작성하였습니다

댓글 0개

댓글 쓰기

조회 통계:

24 시간 전: 0

7일 전: 0

30일 전: 5

전체 시간: 1,134