이 버전에는 잘못된 편집 사항이 있을 수 있습니다. 최신 확인된 스냅샷으로 전환하십시오.
필요한 것
-
이 단계는 번역되지 않았습니다. 번역을 도와주십시오
-
Remove the two 13 mm screws located on the back of the printer using a screwdriver with the T10 torx bit (star-shaped).
-
-
이 단계는 번역되지 않았습니다. 번역을 도와주십시오
-
In the front of the printer, open the tray where the paper comes out and remove the two 13 mm screws located under the top of the printer.
-
-
-
이 단계는 번역되지 않았습니다. 번역을 도와주십시오
-
With the front of the printer facing you, lift and raise the left side of the panel (like opening a book in reverse) until it disconnects from the clip on the right side of the panel.
-
-
이 단계는 번역되지 않았습니다. 번역을 도와주십시오
-
Locate and remove the two flat ribbon connectors which connect the circuit board to the other printer components.
-
-
이 단계는 번역되지 않았습니다. 번역을 도와주십시오
-
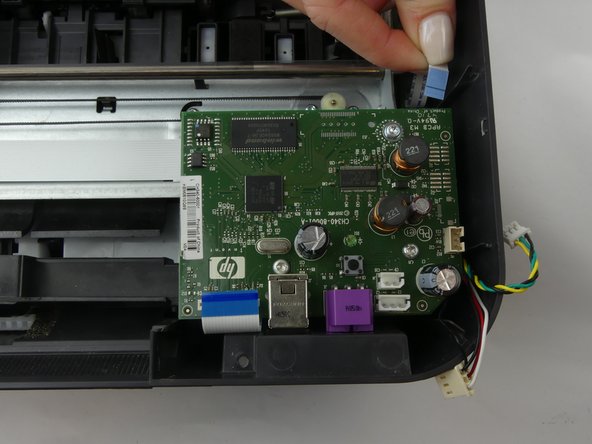
Locate and remove the three multicolored wire connectors which connect the circuit board to the other printer components.
-
-
이 단계는 번역되지 않았습니다. 번역을 도와주십시오
-
Remove the top two 13mm screws using a screwdriver with the T10 torx bit.
-
Remove the bottom 9mm screw using a screwdriver with the T10 torx bit, and remove the plug port circuit board.
-


다른 한 분이 해당 안내서를 완성하였습니다.
팀

USF Tampa, Team S5-G3, Passmore Spring 2018 USF Tampa, Team S5-G3, Passmore Spring 2018 회원
USFT-PASSMORE-S18S5G3
4 회원들
안내서 12개 작성하였습니다