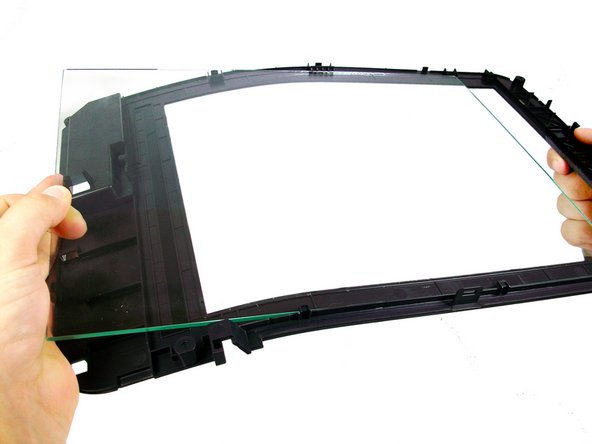
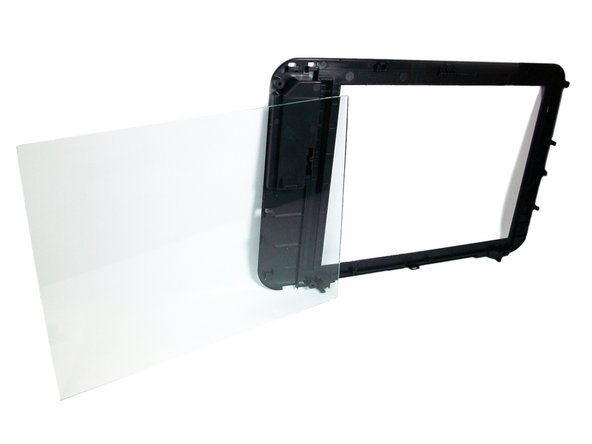
주요 콘텐츠로 건너뛰기

HP Deskjet 1055 Scanner Glass Pane Replacement

필요한 것

  1. HP Deskjet 1055 Scanner Glass Pane Replacement, Scanner Glass Pane: 1 단계, 이미지 1/1
    • Take all paper out of the paper tray. Unplug the printer.

    • Remove the plastic printer-control panel on the top left.

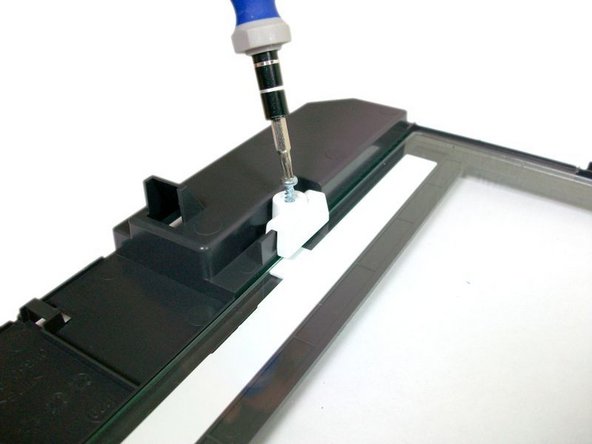
    • Then, forcefully lift up the bottom of the panel while applying downward pressure with your thumb-as shown.

  2. HP Deskjet 1055 Scanner Glass Pane Replacement: 2 단계, 이미지 1/2 HP Deskjet 1055 Scanner Glass Pane Replacement: 2 단계, 이미지 2/2
    • With your other hand, slide the top of the panel towards the back of the printer.

    • Do not rip the white cable that connects the panel with the main body of the printer.

    • Disconnect the ribbon by pinching the blue tab and pulling away from the green circuit board.

    • Lift the panel free and set to the side.

  3. HP Deskjet 1055 Scanner Glass Pane Replacement: 3 단계, 이미지 1/1
    • Place the plastic opening tool between the plastic cover and the mount on the printer.

    • Pry the plastic cover towards the center of the printer.

    • Pull up on the cover to remove it from the printer-as shown.

    • Repeat the process on the other side.

  4. HP Deskjet 1055 Scanner Glass Pane Replacement: 4 단계, 이미지 1/1
    • To remove the glass panel, take out the four 14 mm (1/2 inch) screws with a T10 Torx screwdriver.

    • Don't lift the glass panel completely off because there are cables plugged into the underside.

  5. HP Deskjet 1055 Scanner Glass Pane Replacement: 5 단계, 이미지 1/3 HP Deskjet 1055 Scanner Glass Pane Replacement: 5 단계, 이미지 2/3 HP Deskjet 1055 Scanner Glass Pane Replacement: 5 단계, 이미지 3/3
    • Disconnect the white cables from the green motherboard by pinching the cable where it connects to the green motherboard. Pull up, lightly.

    • Set the lower part of the printer aside.

  6. HP Deskjet 1055 Scanner Glass Pane Replacement: 6 단계, 이미지 1/2 HP Deskjet 1055 Scanner Glass Pane Replacement: 6 단계, 이미지 2/2
    • Place the glass panel, face down, on a smooth surface.

    • Remove the 14 mm (1/2 in.) screw from the white plastic tab on the side of the panel with a T10 Torx screwdriver.

  7. HP Deskjet 1055 Scanner Glass Pane Replacement: 7 단계, 이미지 1/3 HP Deskjet 1055 Scanner Glass Pane Replacement: 7 단계, 이미지 2/3 HP Deskjet 1055 Scanner Glass Pane Replacement: 7 단계, 이미지 3/3
    • Remove the glass pane by carefully bending the plastic frame down from the side and sliding the glass pane out from the side.

결론

To reassemble your device, follow these instructions in reverse order.

다른 한 분이 해당 안내서를 완성하였습니다.

Samuel Isbell

회원 가입일: 10/09/12

10 평판

안내서 1개 작성함

Cal Poly, Team 9-18, Amido Fall 2012 Cal Poly, Team 9-18, Amido Fall 2012 회원

CPSU-AMIDO-F12S9G18

4 회원들

안내서 10개 작성하였습니다

댓글 0개

댓글 쓰기

조회 통계:

24 시간 전: 0

7일 전: 10

30일 전: 27

전체 시간: 3,840