이 버전에는 잘못된 편집 사항이 있을 수 있습니다. 최신 확인된 스냅샷으로 전환하십시오.
필요한 것
-
이 단계는 번역되지 않았습니다. 번역을 도와주십시오
-
Open the front access panel by placing your finger in the front slot and pulling gently.
-
-
이 단계는 번역되지 않았습니다. 번역을 도와주십시오
-
Open the protective lid that is covering the glass. Press gently against the base of the panel to remove the lid from the rest of the printer.
-
-
이 단계는 번역되지 않았습니다. 번역을 도와주십시오
-
Carefully lift the top panel off of the printer.
-
Do not tear or damage the two cables that connect the top lid to the motherboard.
-
-
이 단계는 번역되지 않았습니다. 번역을 도와주십시오
-
Remove the two cables by gripping each one close to their connection ports on the motherboard and gently disconnecting them.
-
-
-
이 단계는 번역되지 않았습니다. 번역을 도와주십시오
-
Detach the white ribbon cable.
-
Remove the two 9mm Torx screws on either side of the white bracket.
-
-
이 단계는 번역되지 않았습니다. 번역을 도와주십시오
-
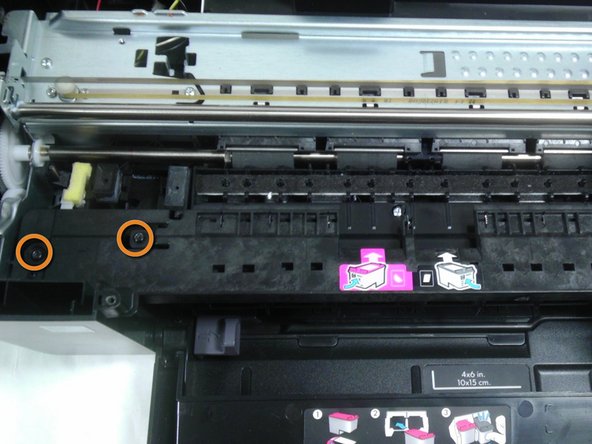
Remove the three black 9mm Torx screws and pull the black panel out from under the ink carriage.
-
-
이 단계는 번역되지 않았습니다. 번역을 도와주십시오
-
Remove the five 9mm Torx screws on the silver panel.
-
Pull out the silver panel.
-
-
이 단계는 번역되지 않았습니다. 번역을 도와주십시오
-
Turn the printer over.
-
Locate the gap at the bottom corner near the product information sticker.
-
Reach a flat head screwdriver inside the gap and unlatch the silver tab.
-
-
이 단계는 번역되지 않았습니다. 번역을 도와주십시오
-
Remove the two 9mm Torx screws in order to detach the roller assembly from the system.
-
다른 7명이 해당 안내서를 완성하였습니다.


