주요 콘텐츠로 건너뛰기

HP Deskjet GT-5821 Scanner Glass Replacement

필요한 것

  1. HP Deskjet GT-5821 Scanner Glass Replacement, Open front access panel: 1 단계, 이미지 1/1
    • Open the front access panel by placing your finger in the front slot and pulling gently.

  2. HP Deskjet GT-5821 Scanner Glass Replacement, Top Lid: 2 단계, 이미지 1/1
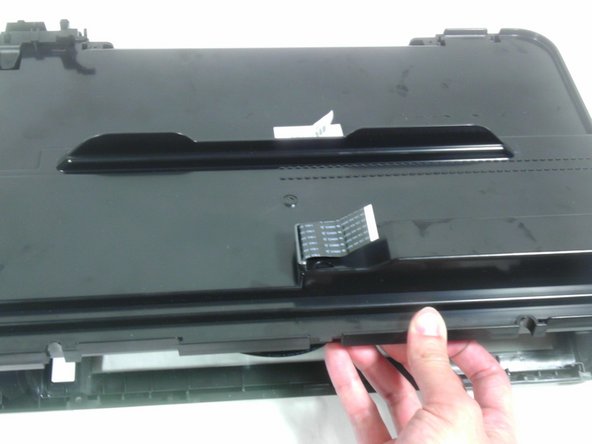
    • Open the protective lid that is covering the glass. Press gently against the base of the panel to remove the lid from the rest of the printer.

  3. HP Deskjet GT-5821 Scanner Glass Replacement: 3 단계, 이미지 1/3 HP Deskjet GT-5821 Scanner Glass Replacement: 3 단계, 이미지 2/3 HP Deskjet GT-5821 Scanner Glass Replacement: 3 단계, 이미지 3/3
    • Remove the four 9mm T10 Torx screws on the top.

  4. HP Deskjet GT-5821 Scanner Glass Replacement: 4 단계, 이미지 1/2 HP Deskjet GT-5821 Scanner Glass Replacement: 4 단계, 이미지 2/2
    • Carefully lift the top panel off of the printer.

    • Do not tear or damage the two cables that connect the top lid to the motherboard.

  5. HP Deskjet GT-5821 Scanner Glass Replacement: 5 단계, 이미지 1/3 HP Deskjet GT-5821 Scanner Glass Replacement: 5 단계, 이미지 2/3 HP Deskjet GT-5821 Scanner Glass Replacement: 5 단계, 이미지 3/3
    • Remove the two cables by gripping each one close to their connection ports on the motherboard and gently disconnecting them.

  6. HP Deskjet GT-5821 Scanner Glass Replacement, Remove Back Panel of Lid: 6 단계, 이미지 1/1
    • Remove one 9mm T10 Torx screw from the back of the printer lid.

  7. HP Deskjet GT-5821 Scanner Glass Replacement: 7 단계, 이미지 1/2 HP Deskjet GT-5821 Scanner Glass Replacement: 7 단계, 이미지 2/2
    • Press outward on the plastic tab holding the back panel in place.

  8. HP Deskjet GT-5821 Scanner Glass Replacement: 8 단계, 이미지 1/2 HP Deskjet GT-5821 Scanner Glass Replacement: 8 단계, 이미지 2/2
    • Pull the back panel towards you and lift it away from the rest of the printer cover.

    • Some ribbon cables may still be inserted through the back panel. Be careful not to damage these and they should slide out easily.

  9. HP Deskjet GT-5821 Scanner Glass Replacement, Scanner Glass: 9 단계, 이미지 1/1
    • Remove one 9mm T10 Torx screw from the white retaining tab.

  10. HP Deskjet GT-5821 Scanner Glass Replacement: 10 단계, 이미지 1/1
    • Remove the white retaining tab.

  11. HP Deskjet GT-5821 Scanner Glass Replacement: 11 단계, 이미지 1/1
    • To remove the scanner glass, gently push it towards you.

    • Slide glass panel until it is completely removed from printer.

    • Use caution when removing glass and be aware of any sharp edges.

결론

To reassemble your device, follow these instructions in reverse order.

다른 3명이 해당 안내서를 완성하였습니다.

Kevin Raives

회원 가입일: 01/15/13

93 평판

안내서 2개 작성하였습니다

Cal Poly, Team 18-35, Regan Winter 2013 Cal Poly, Team 18-35, Regan Winter 2013 회원

CPSU-REGAN-W13S18G35

5 회원들

안내서 15개 작성하였습니다

댓글 0개

댓글 쓰기

조회 통계:

24 시간 전: 1

7일 전: 1

30일 전: 12

전체 시간: 2,108