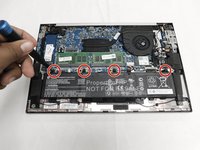
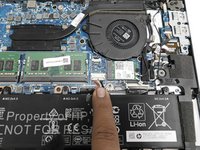
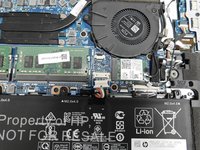
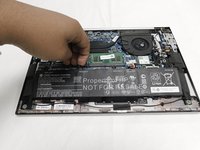
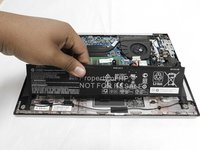
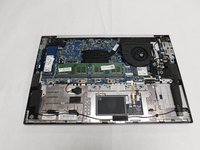
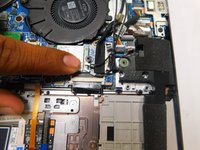
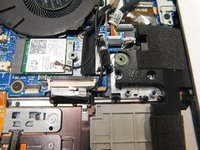
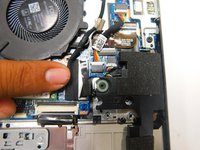
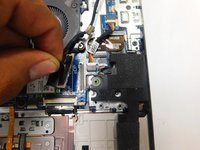
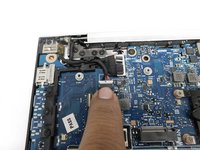
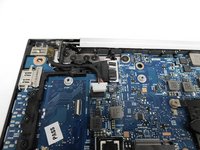
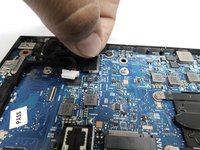
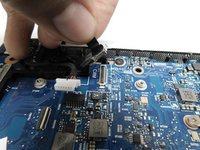
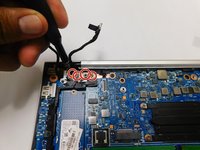
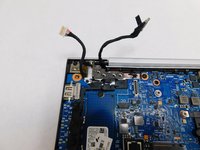
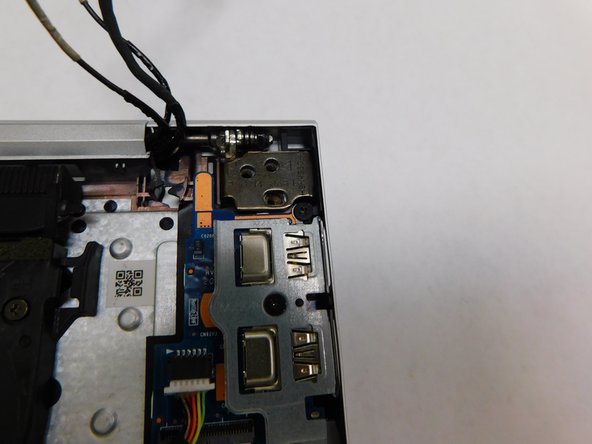
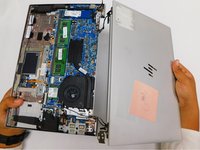
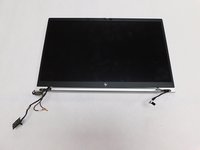
주요 콘텐츠로 건너뛰기

HP EliteBook 840 G7 Display Assembly Replacement

필요한 것

  1. HP EliteBook 840 G7 Display Assembly  Replacement, Battery: 1 단계, 이미지 1개 중 1개
    • Turn the laptop on its back.

  2. HP EliteBook 840 G7 Display Assembly  Replacement: 2 단계, 이미지 1개 중 1개
    • Use the Phillips # 1 screwdriver to remove the five 1.2 mm screws from the back cover of the laptop.

  3. HP EliteBook 840 G7 Display Assembly  Replacement: 3 단계, 이미지 1개 중 1개
    • Remove the back cover to expose the hardware.

  4. HP EliteBook 840 G7 Display Assembly  Replacement: 4 단계, 이미지 3개 중 1개 HP EliteBook 840 G7 Display Assembly  Replacement: 4 단계, 이미지 3개 중 2개 HP EliteBook 840 G7 Display Assembly  Replacement: 4 단계, 이미지 3개 중 3개
    • Use your Phillips #1 screwdriver and remove the four 1.2 mm screws that secures the battery into place.

    • Remove the connector that connects the battery to the motherboard.

  5. HP EliteBook 840 G7 Display Assembly  Replacement: 5 단계, 이미지 3개 중 1개 HP EliteBook 840 G7 Display Assembly  Replacement: 5 단계, 이미지 3개 중 2개 HP EliteBook 840 G7 Display Assembly  Replacement: 5 단계, 이미지 3개 중 3개
    • Lift up the battery with you hands or tools.

  6. HP EliteBook 840 G7 Display Assembly  Replacement, Display Assembly: 6 단계, 이미지 2개 중 1개 HP EliteBook 840 G7 Display Assembly  Replacement, Display Assembly: 6 단계, 이미지 2개 중 2개
    • Pull up to remove the two coaxial Wi-Fi card connectors.

  7. HP EliteBook 840 G7 Display Assembly  Replacement: 7 단계, 이미지 2개 중 1개 HP EliteBook 840 G7 Display Assembly  Replacement: 7 단계, 이미지 2개 중 2개
    • Pull upwards on the display connector to remove.

  8. HP EliteBook 840 G7 Display Assembly  Replacement: 8 단계, 이미지 2개 중 1개 HP EliteBook 840 G7 Display Assembly  Replacement: 8 단계, 이미지 2개 중 2개
    • Pull or push to remove the bundled cable connector.

  9. HP EliteBook 840 G7 Display Assembly  Replacement: 9 단계, 이미지 2개 중 1개 HP EliteBook 840 G7 Display Assembly  Replacement: 9 단계, 이미지 2개 중 2개
    • Pull upwards to remove the webcam connector.

  10. HP EliteBook 840 G7 Display Assembly  Replacement: 10 단계, 이미지 1개 중 1개
    • Once you've disconnected all cables from their sockets, gently move them to the top of the laptop.

  11. HP EliteBook 840 G7 Display Assembly  Replacement: 11 단계, 이미지 2개 중 1개 HP EliteBook 840 G7 Display Assembly  Replacement: 11 단계, 이미지 2개 중 2개
    • Use your Phillips # 1 screwdriver to remove the four 1.2 mm screws.

  12. HP EliteBook 840 G7 Display Assembly  Replacement: 12 단계, 이미지 2개 중 1개 HP EliteBook 840 G7 Display Assembly  Replacement: 12 단계, 이미지 2개 중 2개
    • Use your Phillips # 1 screwdriver to remove the two 1.2mm screws.

  13. HP EliteBook 840 G7 Display Assembly  Replacement: 13 단계, 이미지 3개 중 1개 HP EliteBook 840 G7 Display Assembly  Replacement: 13 단계, 이미지 3개 중 2개 HP EliteBook 840 G7 Display Assembly  Replacement: 13 단계, 이미지 3개 중 3개
    • Open the laptop to a 90 degree angle.

    • Slide the display hinges away to remove the display assembly.

결승점

다른 2명이 해당 안내서를 완성하였습니다.

작성자

2다른 기여자 명과 함께

Pedro Ramos Espinoza

회원 가입일: 02/10/22

895 평판

안내서 4개를 작성함

Gateway, Team 1-1, Pee Spring 2022 Gateway, Team 1-1, Pee Spring 2022 회원

GCC-PEE-S22S1G1

4 회원들

안내서 12개를 작성함

댓글 0개

댓글 쓰기

조회 통계:

지난 24시간: 0

지난 7일: 24

지난 30일: 158

전체 시간: 3,878