주요 콘텐츠로 건너뛰기

HP EliteOne 800 G1 RAM Replacement

  1. HP EliteOne 800 G1 RAM Replacement, Removing the Back Cover: 1 단계, 이미지 1/3 HP EliteOne 800 G1 RAM Replacement, Removing the Back Cover: 1 단계, 이미지 2/3 HP EliteOne 800 G1 RAM Replacement, Removing the Back Cover: 1 단계, 이미지 3/3
    • Place computer with the screen down on a flat surface.

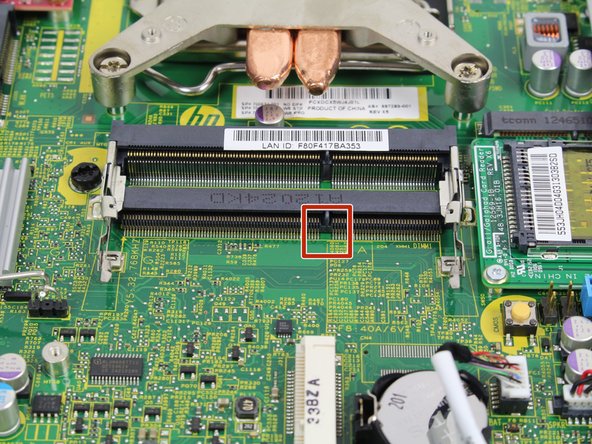
    • Push the two locking latches to the unlocked position.

    • Push the cover toward the top of the computer and lift up.

  2. HP EliteOne 800 G1 RAM Replacement, RAM: 2 단계, 이미지 1/2 HP EliteOne 800 G1 RAM Replacement, RAM: 2 단계, 이미지 2/2
    • Notice the 2 latches on either side of the RAM stick.

    • Press latches outward and RAM stick will flip up to about a 30 degree angle.

  3. HP EliteOne 800 G1 RAM Replacement: 3 단계, 이미지 1/1
    • Gently pull the RAM stick up at an angle. You may need to wiggle the stick up and down or side to side in order to get it loose.

  4. HP EliteOne 800 G1 RAM Replacement: 4 단계, 이미지 1/2 HP EliteOne 800 G1 RAM Replacement: 4 단계, 이미지 2/2
    • When replacing the RAM stick, take note of where the small notch on the stick is and where there is a similar notch on the slot. Make sure you position the new stick so that the notches line up.

결론

To reassemble your device, follow these instructions in reverse order.

다른 2명이 해당 안내서를 완성하였습니다.

Kyle Koivuniemi

회원 가입일: 10/01/15

605 평판

안내서 3개 작성하였습니다

Cal Poly, Team 1-24, Maness Fall 2015 Cal Poly, Team 1-24, Maness Fall 2015 회원

CPSU-MANESS-F15S1G24

4 회원들

안내서 14개 작성하였습니다

댓글 0개

댓글 쓰기

조회 통계:

24 시간 전: 0

7일 전: 4

30일 전: 26

전체 시간: 2,919