주요 콘텐츠로 건너뛰기

HP Elitebook x360 1040 G5 Touchpad Replacement

필요한 것

  1. HP Elitebook x360 1040 G5 Touchpad Replacement, Lower Case: 1 단계, 이미지 1/2 HP Elitebook x360 1040 G5 Touchpad Replacement, Lower Case: 1 단계, 이미지 2/2
    • Power off device before disassembly.

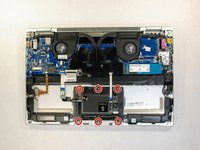
    • Use the T5 Torx screwdriver to remove the six 4 mm screws from the underside of the laptop.

  2. HP Elitebook x360 1040 G5 Touchpad Replacement: 2 단계, 이미지 1/2 HP Elitebook x360 1040 G5 Touchpad Replacement: 2 단계, 이미지 2/2
    • Pry open the lower case from where it meets the laptop base.

    • Remove the lower case from the work area.

  3. HP Elitebook x360 1040 G5 Touchpad Replacement, Battery: 3 단계, 이미지 1/2 HP Elitebook x360 1040 G5 Touchpad Replacement, Battery: 3 단계, 이미지 2/2
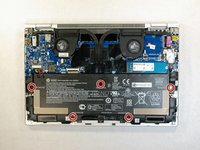
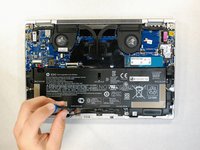
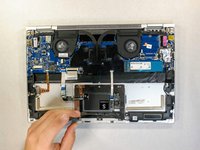
    • Use the Phillips 1 screwdriver to remove the five 3mm Phillips screws from the battery assembly.

  4. HP Elitebook x360 1040 G5 Touchpad Replacement: 4 단계, 이미지 1/3 HP Elitebook x360 1040 G5 Touchpad Replacement: 4 단계, 이미지 2/3 HP Elitebook x360 1040 G5 Touchpad Replacement: 4 단계, 이미지 3/3
    • Carefully remove the power supply connector by pulling on both sides of its head.

    • Do not tug on the wires as they may become damaged.

    • Lift the battery from its position, removing it from the device.

  5. HP Elitebook x360 1040 G5 Touchpad Replacement, Touchpad: 5 단계, 이미지 1/2 HP Elitebook x360 1040 G5 Touchpad Replacement, Touchpad: 5 단계, 이미지 2/2
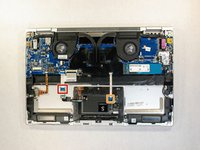
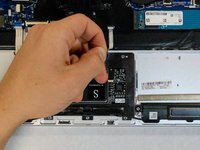
    • Use the Phillips 0 screwdriver to remove the six 3mm Phillips screws from the touchpad assembly.

  6. HP Elitebook x360 1040 G5 Touchpad Replacement: 6 단계, 이미지 1/3 HP Elitebook x360 1040 G5 Touchpad Replacement: 6 단계, 이미지 2/3 HP Elitebook x360 1040 G5 Touchpad Replacement: 6 단계, 이미지 3/3
    • Gently pull on the blue tab to remove the ribbon connecting the touchpad to the motherboard on the left hand side.

    • Gently pull on the blue tab to remove the ribbon connecting the touchpad to the motherboard on the right hand side.

  7. HP Elitebook x360 1040 G5 Touchpad Replacement: 7 단계, 이미지 1/1
    • Gently pull up on the top two corners of the touchpad and remove it from the laptop.

결론

To reassemble your device, follow these instructions in reverse order.

다른 한 분이 해당 안내서를 완성하였습니다.

Corey Agena

회원 가입일: 04/21/19

833 평판

안내서 6개 작성하였습니다

Cal Poly, Team S1-G4, Maness Spring 2019 Cal Poly, Team S1-G4, Maness Spring 2019 회원

CPSU-MANESS-S19S1G4

4 회원들

안내서 12개 작성하였습니다

댓글 0개

댓글 쓰기

조회 통계:

24 시간 전: 1

7일 전: 5

30일 전: 19

전체 시간: 688