주요 콘텐츠로 건너뛰기

HP Envy 17m-ae111dx CPU Fan Replacement

필요한 것

  1. HP Envy 17m-ae111dx CPU Fan Replacement, Back Cover: 1 단계, 이미지 1/1
    • Power off your laptop before beginning disassembly.

    • Place the laptop on its back.

  2. HP Envy 17m-ae111dx CPU Fan Replacement: 2 단계, 이미지 1/3 HP Envy 17m-ae111dx CPU Fan Replacement: 2 단계, 이미지 2/3 HP Envy 17m-ae111dx CPU Fan Replacement: 2 단계, 이미지 3/3
    • Remove the plastic covering to the Disk Reader.

    • Locate the small hole on the side of the disk reader. Insert the T5 Torx head screwdriver (or device of similar thickness) to release the covering for the disk reader.

    • If the button on the side is jammed, pry off the covering by using the iFixit Opening Tool.

  3. HP Envy 17m-ae111dx CPU Fan Replacement: 3 단계, 이미지 1/3 HP Envy 17m-ae111dx CPU Fan Replacement: 3 단계, 이미지 2/3 HP Envy 17m-ae111dx CPU Fan Replacement: 3 단계, 이미지 3/3
    • Unscrew all visible screws.

    • Use the T5 Torx Screwdriver and remove the four visible 6.5mm screws on the bottom of the laptop.

    • One 2.5mm screw, is located where the disk reader was once located. Use a Phillips #00 screwdriver to remove the single screw that connects the bottom cover of the laptop to the bottom frame.

  4. HP Envy 17m-ae111dx CPU Fan Replacement: 4 단계, 이미지 1/2 HP Envy 17m-ae111dx CPU Fan Replacement: 4 단계, 이미지 2/2
    • Pry the gripper completely off to expose the two screws.

    • Remove the 2.5mm screws under the gripper nearest to the hinge using the Phillips #00 screwdriver.

  5. HP Envy 17m-ae111dx CPU Fan Replacement: 5 단계, 이미지 1/3 HP Envy 17m-ae111dx CPU Fan Replacement: 5 단계, 이미지 2/3 HP Envy 17m-ae111dx CPU Fan Replacement: 5 단계, 이미지 3/3
    • Use the iFixit opening tool to pry off the back cover.

    • Ensure that you go all the way around the laptop with the tool to take it off.

  6. HP Envy 17m-ae111dx CPU Fan Replacement, CPU Fan: 6 단계, 이미지 1/3 HP Envy 17m-ae111dx CPU Fan Replacement, CPU Fan: 6 단계, 이미지 2/3 HP Envy 17m-ae111dx CPU Fan Replacement, CPU Fan: 6 단계, 이미지 3/3
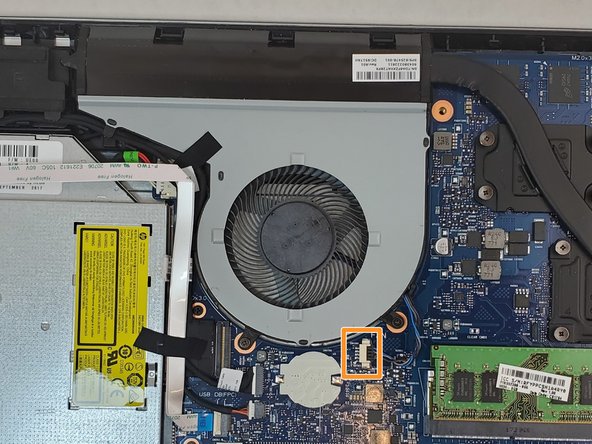
    • Use the Phillips #00 screwdriver to remove the three 5.5mm screws that secure the fan.

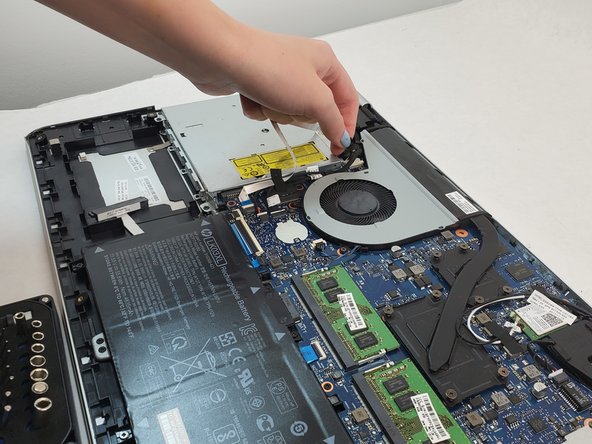
    • Unplug the wire that is connected to the fan and move the wires so they are out of the way of the fan.

    • Remove the tape off of the fan that is holding the wires in place against the fan.

  7. HP Envy 17m-ae111dx CPU Fan Replacement: 7 단계, 이미지 1/2 HP Envy 17m-ae111dx CPU Fan Replacement: 7 단계, 이미지 2/2
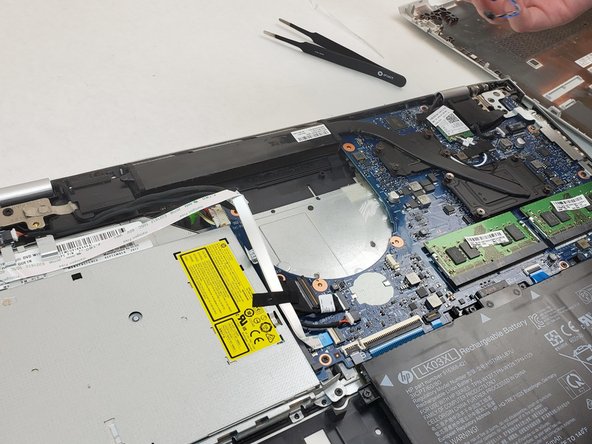
    • Remove the fan from the laptop, ensuring the wires are properly disconnected.

결론

To reassemble your device, follow these instructions in reverse order.

다른 3명이 해당 안내서를 완성하였습니다.

Austin Greene

회원 가입일: 09/16/19

420 평판

안내서 2개 작성하였습니다

댓글 한 개

Excellent video...extremely helpful...thank you

Frank D - 답글

댓글 쓰기

조회 통계:

24 시간 전: 0

7일 전: 0

30일 전: 25

전체 시간: 1,809