주요 콘텐츠로 건너뛰기

HP Envy dv7t-7200 RAM Replacement

필요한 것

  1. HP Envy dv7t-7200 RAM Replacement, Battery: 1 단계, 이미지 1/1
    • Turn the power off and disconnect all cables and cords from the laptop.

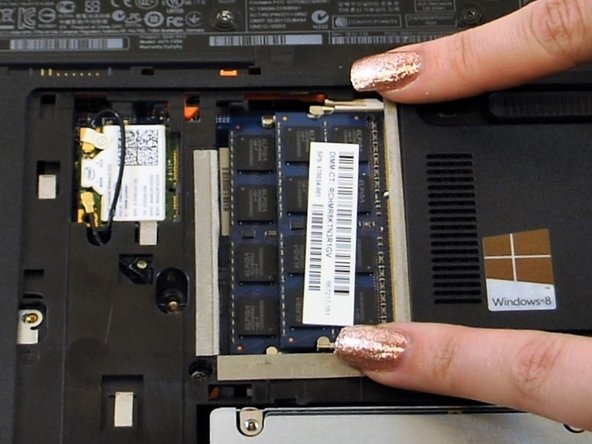
    • Place the computer on its top on a flat surface with the hinges facing away from you.

  2. HP Envy dv7t-7200 RAM Replacement: 2 단계, 이미지 1/3 HP Envy dv7t-7200 RAM Replacement: 2 단계, 이미지 2/3 HP Envy dv7t-7200 RAM Replacement: 2 단계, 이미지 3/3
    • Slide the battery release latch to the left which is located on the right-hand side of the battery.

  3. HP Envy dv7t-7200 RAM Replacement: 3 단계, 이미지 1/1
    • Tilt the battery away from you and lift out.

  4. HP Envy dv7t-7200 RAM Replacement, Service Cover: 4 단계, 이미지 1/1
    • Using a Phillips #01 screwdriver, remove the Phillips PM2.5×5.5 screw on the service cover.

    • This screw does not come out of the service cover completely once loosened.

  5. HP Envy dv7t-7200 RAM Replacement: 5 단계, 이미지 1/2 HP Envy dv7t-7200 RAM Replacement: 5 단계, 이미지 2/2
    • Slide the service cover toward the front of the laptop.

    • Lift the service cover to remove it from the laptop.

  6. HP Envy dv7t-7200 RAM Replacement, RAM: 6 단계, 이미지 1/2 HP Envy dv7t-7200 RAM Replacement, RAM: 6 단계, 이미지 2/2
    • Press down and away from the ram cards on the tabs surrounding the ram cards.

  7. HP Envy dv7t-7200 RAM Replacement: 7 단계, 이미지 1/2 HP Envy dv7t-7200 RAM Replacement: 7 단계, 이미지 2/2
    • The first ram card will pop up, and now you will slide it out of its slot.

  8. HP Envy dv7t-7200 RAM Replacement: 8 단계, 이미지 1/3 HP Envy dv7t-7200 RAM Replacement: 8 단계, 이미지 2/3 HP Envy dv7t-7200 RAM Replacement: 8 단계, 이미지 3/3
    • Repeat this process for the second ram card.

결론

To reassemble your device, follow these instructions in reverse order.

Krystal

회원 가입일: 10/16/17

882 평판

안내서 8개 작성하였습니다

UW Tacoma, Team S3-G3, Liner Fall 2017 UW Tacoma, Team S3-G3, Liner Fall 2017 회원

UWT-LINER-F17S3G3

5 회원들

안내서 8개 작성하였습니다

댓글 0개

댓글 쓰기

조회 통계:

24 시간 전: 1

7일 전: 5

30일 전: 7

전체 시간: 165