주요 콘텐츠로 건너뛰기

HP Envy m6-n010dx Hard Drive Replacement

필요한 것

  1. HP Envy m6-n010dx Hard Drive Replacement, Battery: 1 단계, 이미지 1/3 HP Envy m6-n010dx Hard Drive Replacement, Battery: 1 단계, 이미지 2/3 HP Envy m6-n010dx Hard Drive Replacement, Battery: 1 단계, 이미지 3/3
    • Find the battery removal slider.

    • Slide it across while simultaneously popping out and removing the device's battery.

  2. HP Envy m6-n010dx Hard Drive Replacement, Hard Drive: 2 단계, 이미지 1/1
    • Remove the five marked screws found under the battery using a philips head screwdriver.

  3. HP Envy m6-n010dx Hard Drive Replacement: 3 단계, 이미지 1/2 HP Envy m6-n010dx Hard Drive Replacement: 3 단계, 이미지 2/2
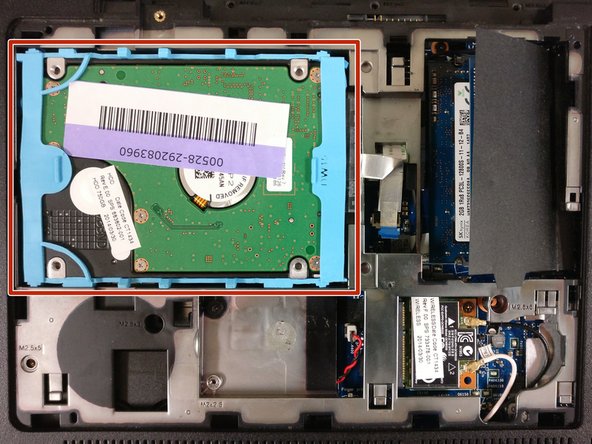
    • Remove the small panel on the back by prying it off. This should reveal the hard drive.

  4. HP Envy m6-n010dx Hard Drive Replacement: 4 단계, 이미지 1/3 HP Envy m6-n010dx Hard Drive Replacement: 4 단계, 이미지 2/3 HP Envy m6-n010dx Hard Drive Replacement: 4 단계, 이미지 3/3
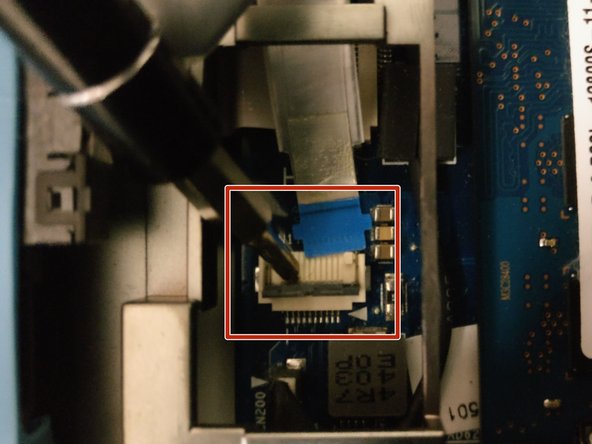
    • The hard drive is connected to the motherboard via this blue-tabbed cable, highlighted in red.

    • Gently pry off the cover to release the cable.

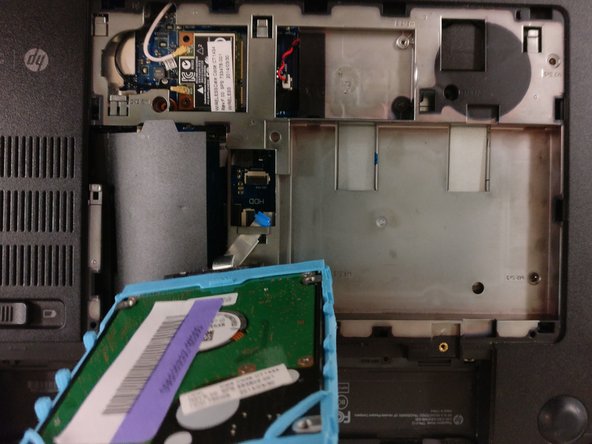
    • Slowly lift the hard drive out and away from the device.

결론

To reassemble your device, follow these instructions in reverse order.

다른 한 분이 해당 안내서를 완성하였습니다.

Johnathan Morales

회원 가입일: 02/08/18

393 평판

안내서 3개 작성하였습니다

댓글 0개

댓글 쓰기

조회 통계:

24 시간 전: 2

7일 전: 5

30일 전: 7

전체 시간: 1,268