주요 콘텐츠로 건너뛰기

HP Envy x360 m6-aq003dx Hard Drive Replacement

필요한 것

  1. HP Envy x360 m6-aq003dx Hard Drive Replacement, Back Panel: 1 단계, 이미지 1/3 HP Envy x360 m6-aq003dx Hard Drive Replacement, Back Panel: 1 단계, 이미지 2/3 HP Envy x360 m6-aq003dx Hard Drive Replacement, Back Panel: 1 단계, 이미지 3/3
    • Turn the laptop over and use the plastic opening tool to take off the rubber pads. You only need to take off the two pads at the top for this device.

  2. HP Envy x360 m6-aq003dx Hard Drive Replacement: 2 단계, 이미지 1/3 HP Envy x360 m6-aq003dx Hard Drive Replacement: 2 단계, 이미지 2/3 HP Envy x360 m6-aq003dx Hard Drive Replacement: 2 단계, 이미지 3/3
    • Use the Torx T5 screwdriver to remove the six small screws.

    • Use the Phillips #0 screwdriver to remove the screws under the rubber pads in step 1.

  3. HP Envy x360 m6-aq003dx Hard Drive Replacement: 3 단계, 이미지 1/1
    • Go slowly around the edge with the opening tool. The noises you will hear are due to the small joints popping open. Continue this until you have made your way around the entire laptop.

  4. HP Envy x360 m6-aq003dx Hard Drive Replacement, Battery: 4 단계, 이미지 1/2 HP Envy x360 m6-aq003dx Hard Drive Replacement, Battery: 4 단계, 이미지 2/2
    • Remove the six 4mm screws around the battery using a Phillips #0 screwdriver.

  5. HP Envy x360 m6-aq003dx Hard Drive Replacement: 5 단계, 이미지 1/1
    • Disconnect the white connector from the battery to the board. (It is recommended to use pliers to remove the cord to avoid touching the board).

    • Once the connector and screws are both removed, lift the battery up and remove it from the laptop.

    • The removal of the connector and the screws can be done in either order.

  6. HP Envy x360 m6-aq003dx Hard Drive Replacement, Hard Drive: 6 단계, 이미지 1/2 HP Envy x360 m6-aq003dx Hard Drive Replacement, Hard Drive: 6 단계, 이미지 2/2
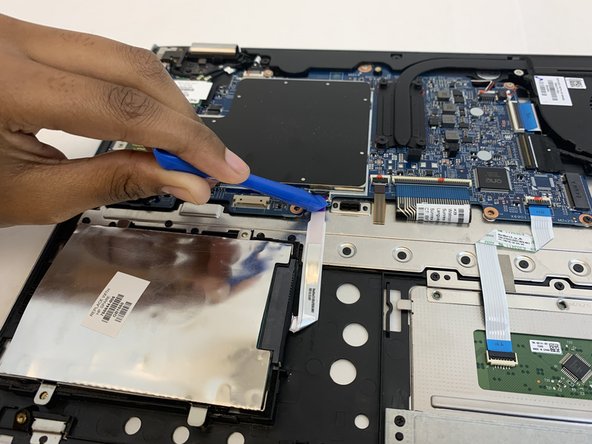
    • Disconnect the ribbon cable by flipping the black tab with the plastic opening tool.

    • Gently pull the ribbon cable away from the connector with your fingers.

  7. HP Envy x360 m6-aq003dx Hard Drive Replacement: 7 단계, 이미지 1/1
    • Remove the two screws (5mm) using the Phillip's head #1 screwdriver.

    • Unplug the hard drive from the motherboard and remove it from the device.

결론

To reassemble your device, follow these instructions in reverse order.

다른 2명이 해당 안내서를 완성하였습니다.

Ukeyvia Beckwith

회원 가입일: 09/24/19

482 평판

안내서 2개 작성하였습니다

댓글 0개

댓글 쓰기

조회 통계:

24 시간 전: 0

7일 전: 1

30일 전: 2

전체 시간: 590