주요 콘텐츠로 건너뛰기

HP Envy x360 m6-aq103dx CPU Fan Replacement

필요한 것

  1. HP Envy x360 m6-aq103dx CPU Fan Replacement, Bottom Cover: 1 단계, 이미지 3개 중 1개 HP Envy x360 m6-aq103dx CPU Fan Replacement, Bottom Cover: 1 단계, 이미지 3개 중 2개 HP Envy x360 m6-aq103dx CPU Fan Replacement, Bottom Cover: 1 단계, 이미지 3개 중 3개
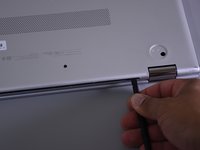
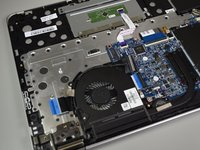
    • Flip the laptop over to expose the underside.

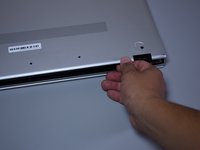
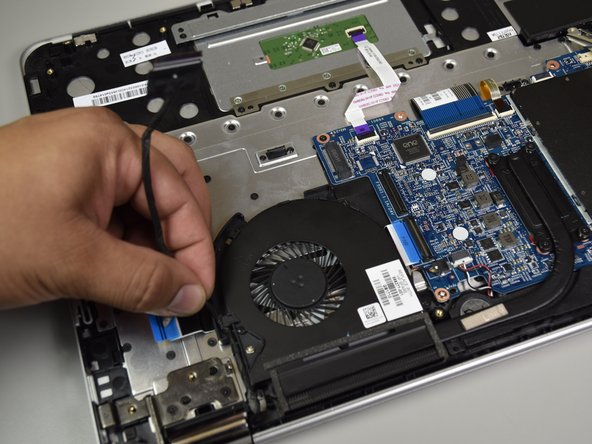
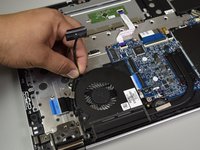
    • Remove the two grip pads with blue plastic opening tool by inserting the tool between the laptop and the pads and slowly lifting up.

    • The grip pads are tacky, remove slowly to avoid separating the adhesive.

  2. HP Envy x360 m6-aq103dx CPU Fan Replacement: 2 단계, 이미지 1개 중 1개
    • Remove the two 8 mm Phillips Head screws that were under the grip pads using a Phillip's Head 1 Screwdriver.

  3. HP Envy x360 m6-aq103dx CPU Fan Replacement: 3 단계, 이미지 1개 중 1개
    • Remove the six 5 mm Torx screws using a T5 Torx Screwdriver.

  4. HP Envy x360 m6-aq103dx CPU Fan Replacement: 4 단계, 이미지 3개 중 1개 HP Envy x360 m6-aq103dx CPU Fan Replacement: 4 단계, 이미지 3개 중 2개 HP Envy x360 m6-aq103dx CPU Fan Replacement: 4 단계, 이미지 3개 중 3개
    • Use the nylon spudger to pop off the bottom cover by inserting it into the heat vent and twisting to the left or right.

    • You may hear a slight clicking or popping, but that is normal.

  5. HP Envy x360 m6-aq103dx CPU Fan Replacement, CPU Fan: 5 단계, 이미지 3개 중 1개 HP Envy x360 m6-aq103dx CPU Fan Replacement, CPU Fan: 5 단계, 이미지 3개 중 2개 HP Envy x360 m6-aq103dx CPU Fan Replacement, CPU Fan: 5 단계, 이미지 3개 중 3개
    • Put on the anti-static wristband first

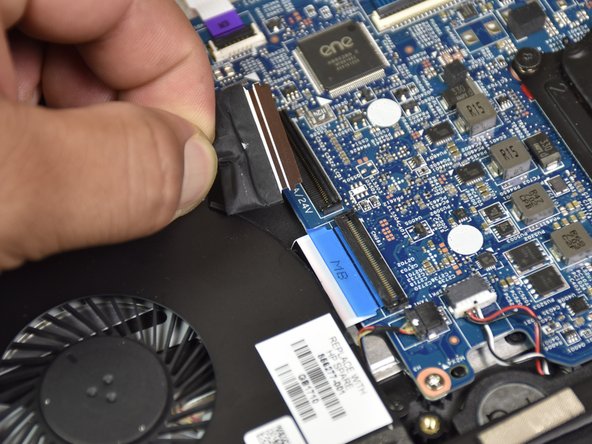
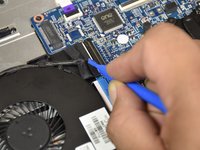
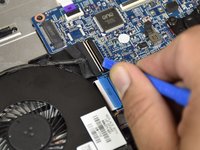
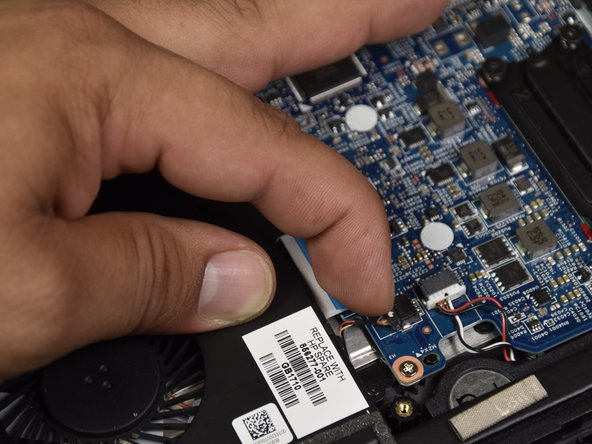
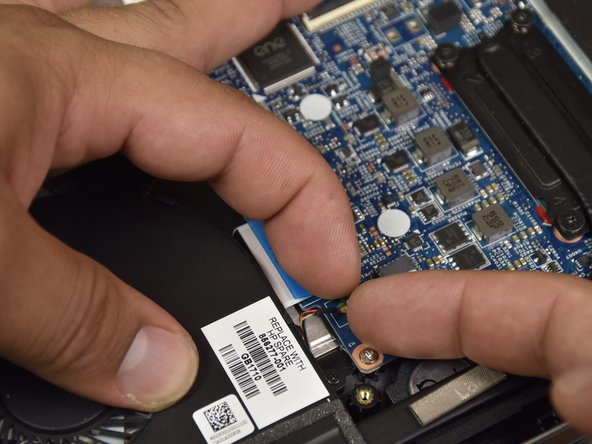
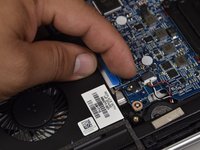
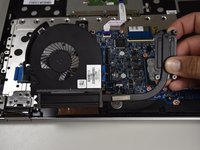
    • Disconnect the port of the fan by flipping the black tab with the small blue plastic opening tool.

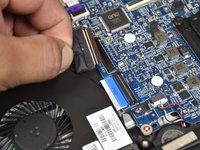
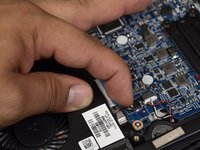
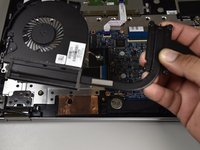
    • Remove the cable from the connector.

  6. HP Envy x360 m6-aq103dx CPU Fan Replacement: 6 단계, 이미지 3개 중 1개 HP Envy x360 m6-aq103dx CPU Fan Replacement: 6 단계, 이미지 3개 중 2개 HP Envy x360 m6-aq103dx CPU Fan Replacement: 6 단계, 이미지 3개 중 3개
    • Peel back a little bit of the grey tape connected to the round cable with the big blue opening tool.

    • Using your fingers, peel the tape off of the body of the computer.

    • Peel slowly to avoid separating the adhesive.

  7. HP Envy x360 m6-aq103dx CPU Fan Replacement: 7 단계, 이미지 2개 중 1개 HP Envy x360 m6-aq103dx CPU Fan Replacement: 7 단계, 이미지 2개 중 2개
    • Remove the black cable from the fan by unclicking it from the plastic body of the fan with your fingers and move it out of the area.

    • There will be clicking sounds when the black cable is removed.

  8. HP Envy x360 m6-aq103dx CPU Fan Replacement: 8 단계, 이미지 3개 중 1개 HP Envy x360 m6-aq103dx CPU Fan Replacement: 8 단계, 이미지 3개 중 2개 HP Envy x360 m6-aq103dx CPU Fan Replacement: 8 단계, 이미지 3개 중 3개
    • Disconnect the port with the red yellow and blue wires by dislodging the wires with your fingers.

  9. HP Envy x360 m6-aq103dx CPU Fan Replacement: 9 단계, 이미지 1개 중 1개
    • Remove the two 4.5mm Phillips #1 screws.

  10. HP Envy x360 m6-aq103dx CPU Fan Replacement: 10 단계, 이미지 1개 중 1개
    • Loosen the four black screws by the curved heat sink with a Phillips head 1 screwdriver.

    • These screws do not come off.

  11. HP Envy x360 m6-aq103dx CPU Fan Replacement: 11 단계, 이미지 3개 중 1개 HP Envy x360 m6-aq103dx CPU Fan Replacement: 11 단계, 이미지 3개 중 2개 HP Envy x360 m6-aq103dx CPU Fan Replacement: 11 단계, 이미지 3개 중 3개
    • Lift the CPU fan out with your hand.

결론

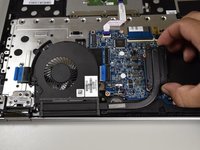
To reassemble your device, follow these instructions in reverse order.

다른 4명이 해당 안내서를 완성하였습니다.

작성자

3다른 기여자 명과 함께

Jordan Eremeyeff

회원 가입일: 10/01/17

612 평판

안내서 3개를 작성함

Cal Poly, Team S4-G3, Livingston Fall 2017 Cal Poly, Team S4-G3, Livingston Fall 2017 회원

CPSU-LIVINGSTON-F17S4G3

4 회원들

안내서 9개를 작성함

3가이드 댓글

Step 5-7 can be bypassed I didn’t need to do it

diego.montenegro23 - 답글

My first home repair so far. Really easy to follow guide. Great job!

Caleb Robinson - 답글

Purchased tools and did the steps, no issues. worth the tools to use later. Worked in iT anyways.

Roy Rodgers - 답글

댓글 쓰기

조회 통계:

지난 24시간: 1

지난 7일: 7

지난 30일: 23

전체 시간: 4,826