이 버전에는 잘못된 편집 사항이 있을 수 있습니다. 최신 확인된 스냅샷으로 전환하십시오.
필요한 것
-
이 단계는 번역되지 않았습니다. 번역을 도와주십시오
-
Remove the 2 panels and the battery at the bottom of the laptop.
-
After removing these panels, you'll see the RAM, HDD, and Wi-Fi module.
-
-
이 단계는 번역되지 않았습니다. 번역을 도와주십시오
-
Carefully remove the Wi-Fi antennas from the mini Pci-e adapter.
-
Note for reassembly: The black antenna attaches to 1 and the gray attaches to 2.
-
Remove the mini Pci-e Wi-Fi adapter by removing the small screw. Lift the screw side gently, then pull out.
-
-
이 단계는 번역되지 않았습니다. 번역을 도와주십시오
-
Now remove the HDD and the RAM
-
Remove the HDD by removing the three screws and pulling the Sata connector from the motherboard.
-
Remove the RAM by pulling apart the clips on either side of the top stick. The stick should pop up, then pull it out. Repeat for the bottom stick.
-
-
이 단계는 번역되지 않았습니다. 번역을 도와주십시오
-
Remove the DVD drive bay by prying a little spudger between the case and the drive cover. Then gently pull it out.
-
-
이 단계는 번역되지 않았습니다. 번역을 도와주십시오
-
Next, we will remove the screws from the rest of the case.
-
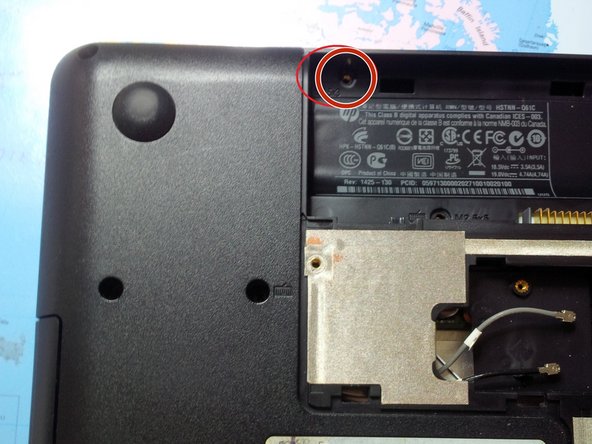
Start by removing the screws hidden in the battery compartment (M2.5x3).
-
-
이 단계는 번역되지 않았습니다. 번역을 도와주십시오
-
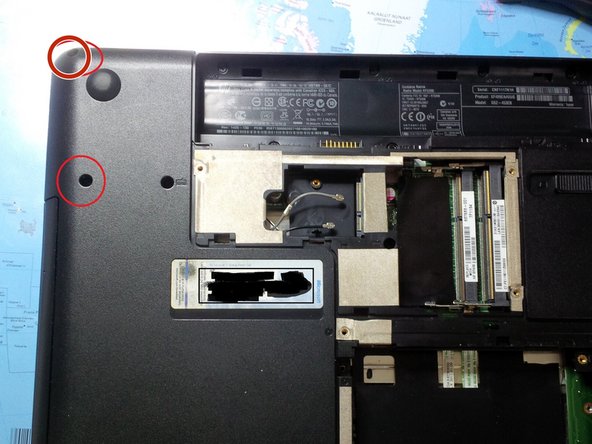
Now remove the 10 remaining case screws (M2.5x6.5).
-
There are 2 hidden screws in the HDD compartment (see last picture).
-
-
-
이 단계는 번역되지 않았습니다. 번역을 도와주십시오
-
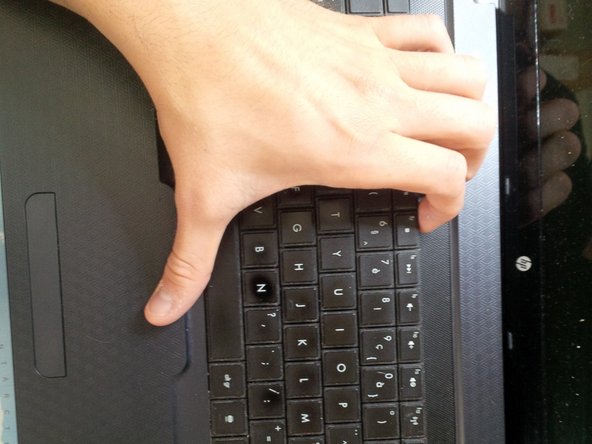
After removing all the screws, we can remove the keyboard.
-
Use a spudger to pry and search for the "locks"
-
use your hand to gently remove the keyboard. You will here clicks.
-
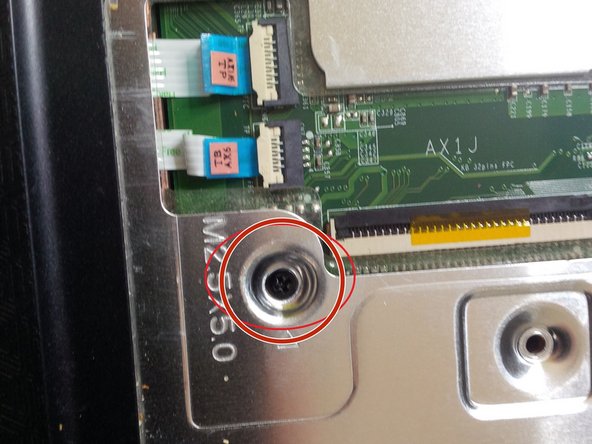
open the socket by clicking it up. pull the connector gently away from the socket.
-
-
이 단계는 번역되지 않았습니다. 번역을 도와주십시오
-
Now gently remove the case with a spudger and a isesamo opener.
-
Gently slide the spudger/opening tool to open the case.
-
You will hear clicks.
-
be careful for the connectors.
-
-
이 단계는 번역되지 않았습니다. 번역을 도와주십시오
-
After you've removed the case you will see the motherboard.
-
Remove the screws from the motherboard.
-
-
이 단계는 번역되지 않았습니다. 번역을 도와주십시오
-
remove the connectors of the screen.
-
Remove the sticker ( HP spare) And pull the connector out of the socket.
-
-
이 단계는 번역되지 않았습니다. 번역을 도와주십시오
-
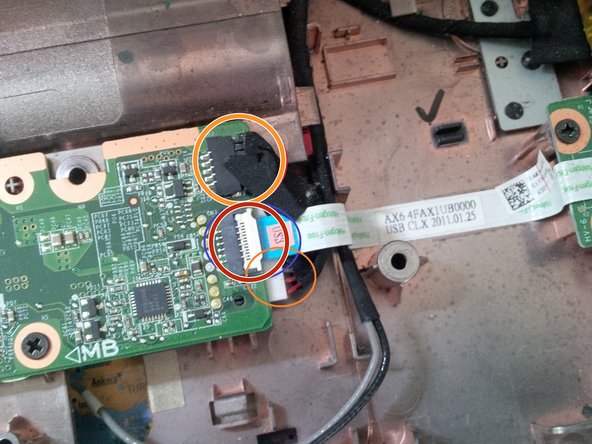
now we will remove the sata dock from the dvd player.
-
like the other connectors , just pull it out the socket. but be gentle.
-
-
이 단계는 번역되지 않았습니다. 번역을 도와주십시오
-
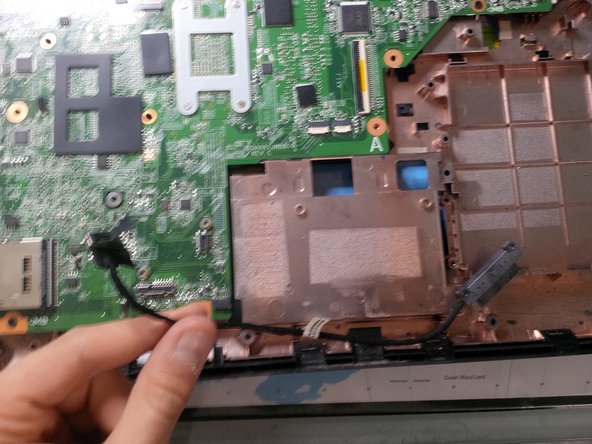
now remove the usb conncetor + the dc jack connector.
-
you can remove the dc jack (head) by pulling it out (sliding). if it's loose, then you can remove the connector from the motherboard.
-
if you remove the usb connector, be careful because the cable is taped to the case. pull gently
-
-
이 단계는 번역되지 않았습니다. 번역을 도와주십시오
-
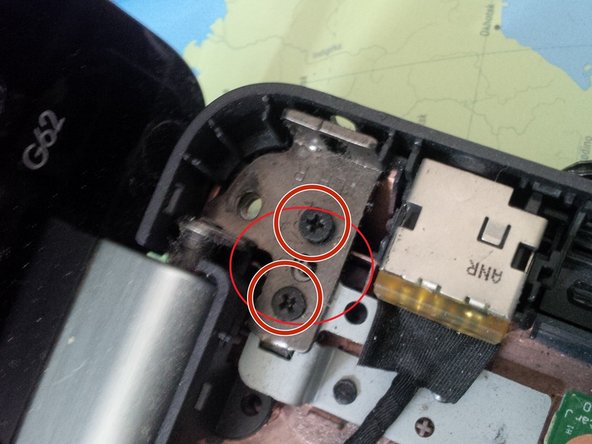
after removing all the cables/ wires and screws, we can remove the screws from the screen hinges.
-
after removing the screws from the hinges, put the entire screen apart.
-
we will remove the motherboard first. see picture 3. you can remove the motherboard by pulling it up and sliding it to the right.
-
-
이 단계는 번역되지 않았습니다. 번역을 도와주십시오
-
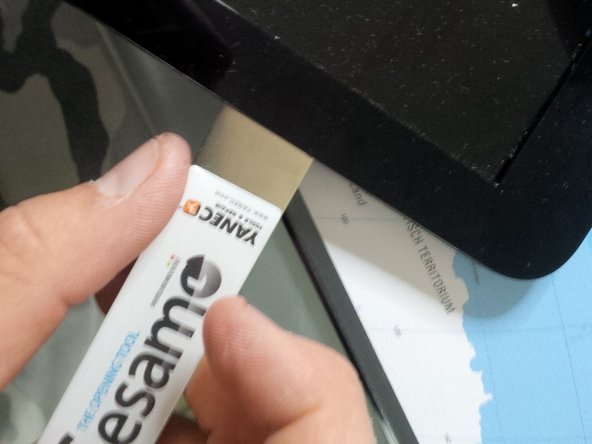
if you have to remove the LCD screen connector you have to remove the case arround the screen. same thing if you have a broken screen..
-
after removing the screws , slide the spudger arround the case, you will hear the clicks
-
-
이 단계는 번역되지 않았습니다. 번역을 도와주십시오
-
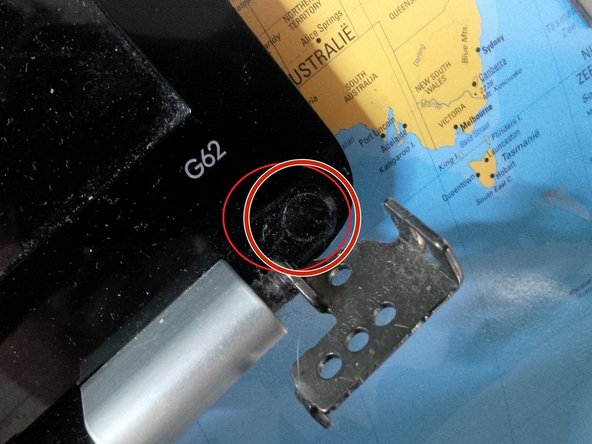
after removing the case. this is the screen internal.
-
above you will see the camera, the wifi antenna's . under you'll see the hinges and at the left the lcd connector.
-
you can remove the grey plastic caps by removing the screw(s), under the plastic cap you will find the cables running trough..
-
-
이 단계는 번역되지 않았습니다. 번역을 도와주십시오
-
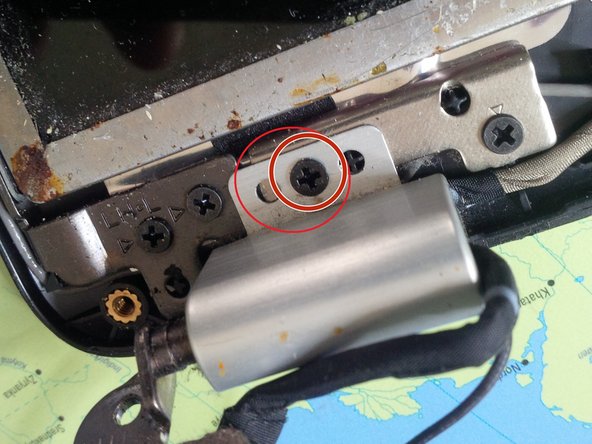
you do the same thing at the other side.
-
At the second picture you see the wires after removing the plastic grey cap. if you have problems with screen failure ( like a black screen or bad connection) its best to check this cable first before buying a new one. The wires are sliding to the cap and sometimes they get cut.
-
-
이 단계는 번역되지 않았습니다. 번역을 도와주십시오
-
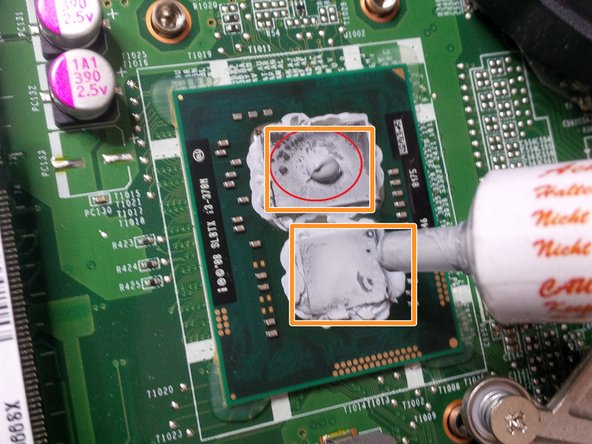
Now the last steps.. we will put some new coolpaste to the soldered CPU and GPU
-
first remove the 4 screws of the cooling socket.
-
remove the socket, be carefull for the little power socket attached at the motherboard, running to the cooling fan.
-
and than put some drop of cooling paste on the CPU/GPU
-


다른 13명이 해당 안내서를 완성하였습니다.

댓글 16개
Would it be beneficial to remove old CPU and GPU thermal paste?
Show reverse for HP56 Cq notebook
Ray Walker - 답글
Please put together cq 56 notebookPc
Ray Walker - 답글
Great instructions thank you!
I reassembled mine but now I cannot turn on the WiFi via the function button.
Everything else works.
I checked the two antenna cable are attached to the correct ones but still cannot turn on WiFi. Any suggestions appreciated