주요 콘텐츠로 건너뛰기

HP Mini 210-2070NR Hard Drive Replacement

필요한 것

  1. HP Mini 210-2070NR Hard Drive Replacement, Battery and Service Access Cover: 1 단계, 이미지 1/1
    • Before beginning, make sure that your computer is turned off and all external power cords are disconnected.

    • Close the laptop and turn it over so that the underside is up and the silver battery bay is facing towards you.

  2. HP Mini 210-2070NR Hard Drive Replacement: 2 단계, 이미지 1/3 HP Mini 210-2070NR Hard Drive Replacement: 2 단계, 이미지 2/3 HP Mini 210-2070NR Hard Drive Replacement: 2 단계, 이미지 3/3
    • The battery locking latch is on the bottom right corner; slide it inward to unlock the battery.

    • Slide the battery release latch inwards.

    • Pull the battery towards you to remove it.

  3. HP Mini 210-2070NR Hard Drive Replacement: 3 단계, 이미지 1/3 HP Mini 210-2070NR Hard Drive Replacement: 3 단계, 이미지 2/3 HP Mini 210-2070NR Hard Drive Replacement: 3 단계, 이미지 3/3
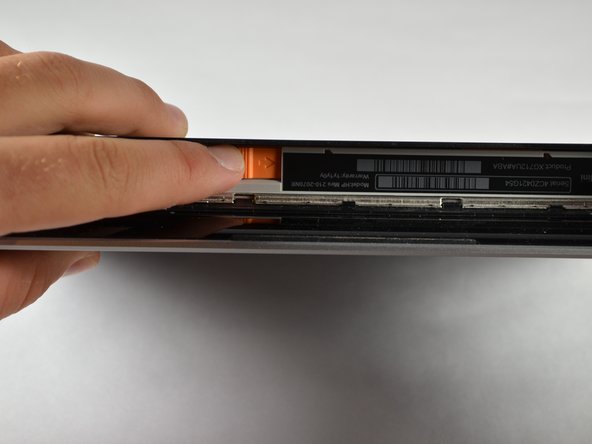
    • Slide the service access cover release lever to the right.

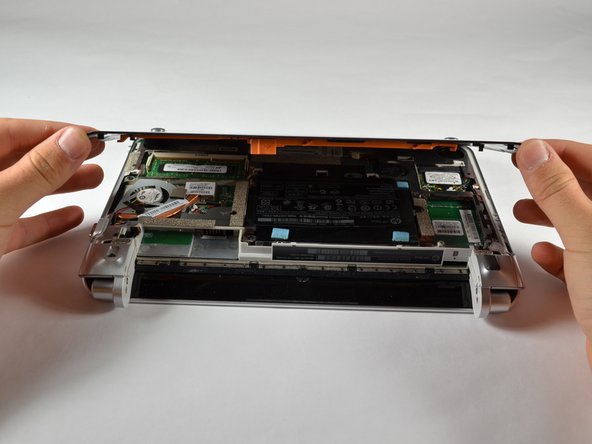
    • While holding the lever to the right, lift up the laptop's bottom cover gently and remove the cover.

  4. HP Mini 210-2070NR Hard Drive Replacement: 4 단계, 이미지 1/1
    • Orient the computer as shown in the picture.

  5. HP Mini 210-2070NR Hard Drive Replacement, Hard Drive: 5 단계, 이미지 1/3 HP Mini 210-2070NR Hard Drive Replacement, Hard Drive: 5 단계, 이미지 2/3 HP Mini 210-2070NR Hard Drive Replacement, Hard Drive: 5 단계, 이미지 3/3
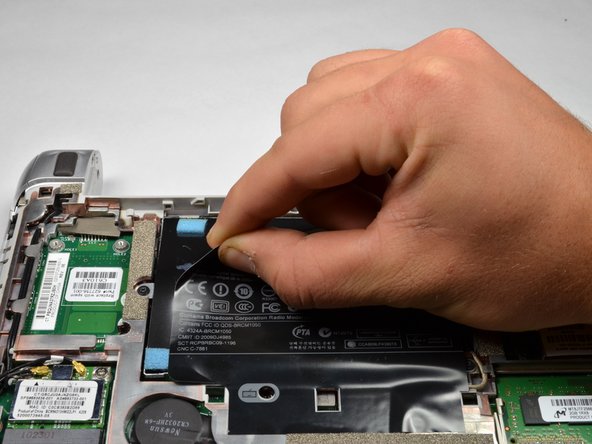
    • Remove the HP product sticker.

    • Be careful not to pull up the black hard drive plastic connector with the sticker. Also, removing this sticker will void your warranty.

  6. HP Mini 210-2070NR Hard Drive Replacement: 6 단계, 이미지 1/2 HP Mini 210-2070NR Hard Drive Replacement: 6 단계, 이미지 2/2
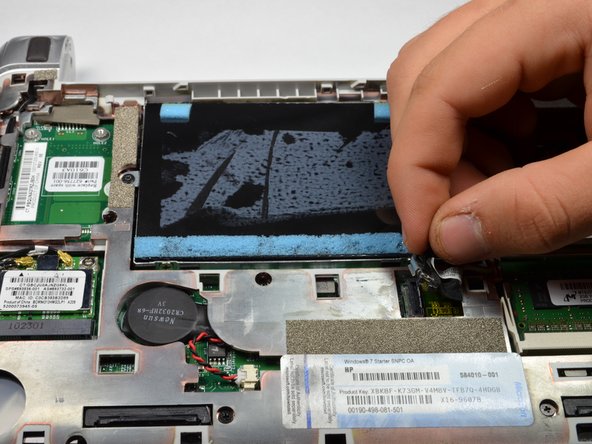
    • Locate the hard drive, where the HP Product sticker used to be.

    • Locate the hard drive cable, connected to the hard drive.

    • Disconnect the hard drive cable by gently pulling upward.

  7. HP Mini 210-2070NR Hard Drive Replacement: 7 단계, 이미지 1/2 HP Mini 210-2070NR Hard Drive Replacement: 7 단계, 이미지 2/2
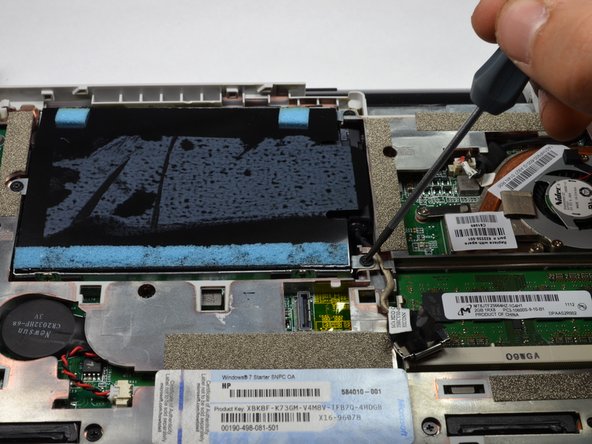
    • Using a #00 Phillips screwdriver, unscrew and remove the three 2.0 x 4.0 Philips screws holding the hard drive in place.

  8. HP Mini 210-2070NR Hard Drive Replacement: 8 단계, 이미지 1/2 HP Mini 210-2070NR Hard Drive Replacement: 8 단계, 이미지 2/2
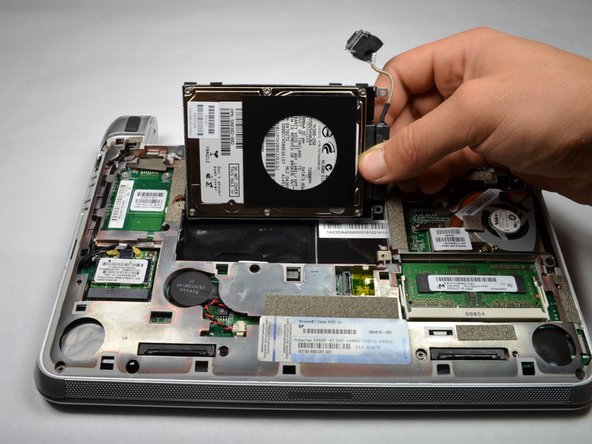
    • Use the Mylar Tab located on the right side of the hard drive to pry up the hard drive.

    • Remove the hard drive.

  9. HP Mini 210-2070NR Hard Drive Replacement: 9 단계, 이미지 1/1
    • Lay the hard drive down with the underside facing up.

    • Pull and remove the hard drive pin connector from the hard drive.

결론

To reassemble your device, follow these instructions in reverse order.

다른 4명이 해당 안내서를 완성하였습니다.

Alek Linquist

회원 가입일: 10/05/12

123 평판

안내서 2개 작성하였습니다

Cal Poly, Team 3-23, Amido Fall 2012 Cal Poly, Team 3-23, Amido Fall 2012 회원

CPSU-AMIDO-F12S3G23

4 회원들

안내서 6개 작성하였습니다

댓글 0개

댓글 쓰기

조회 통계:

24 시간 전: 0

7일 전: 1

30일 전: 2

전체 시간: 2,253