주요 콘텐츠로 건너뛰기

HP Omen 15-ax243dx Screen Replacement

필요한 것

  1. HP Omen 15-ax243dx Screen Replacement, Battery: 1 단계, 이미지 1/2 HP Omen 15-ax243dx Screen Replacement, Battery: 1 단계, 이미지 2/2
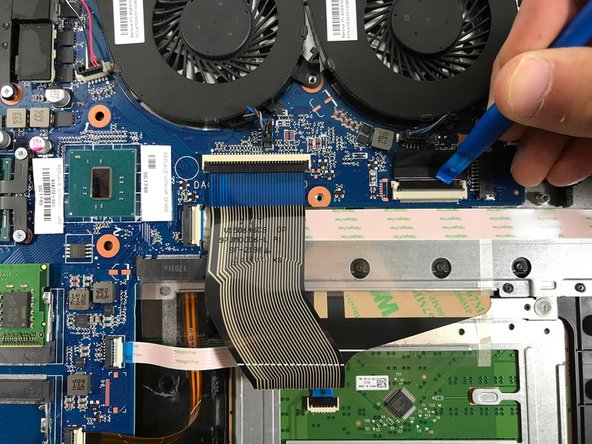
    • The rear panel is secured by 10 screws. Using a #00 Phillips Screwdriver, remove the ten 1.2 mm screws.

    • The screwdriver should be inserted at the same angle as the screws.

    • Be sure to keep track of the screws and where they came from. Some only fit in to one spot.

  2. HP Omen 15-ax243dx Screen Replacement: 2 단계, 이미지 1/2 HP Omen 15-ax243dx Screen Replacement: 2 단계, 이미지 2/2
    • Insert a plastic opening tool between the rear panel and the top case. Pry the opening tool upwards to separate the top case from the bottom case.

    • Slide the opening tool along the case perimeter to loosen the bottom case.

    • Gently pull the bottom case away from the laptop.

  3. HP Omen 15-ax243dx Screen Replacement: 3 단계, 이미지 1/2 HP Omen 15-ax243dx Screen Replacement: 3 단계, 이미지 2/2
    • Remove the four 1.2 mm Phillips #00 screws around the battery.

  4. HP Omen 15-ax243dx Screen Replacement: 4 단계, 이미지 1/2 HP Omen 15-ax243dx Screen Replacement: 4 단계, 이미지 2/2
    • Pull the battery cable out from its motherboard socket.

    • Pull parallel to the motherboard, not straight up.

    • Remove the battery.

    • Disconnect the power cord from the battery and transfer it to your replacement battery.

  5. HP Omen 15-ax243dx Screen Replacement, Screen: 5 단계, 이미지 1/2 HP Omen 15-ax243dx Screen Replacement, Screen: 5 단계, 이미지 2/2
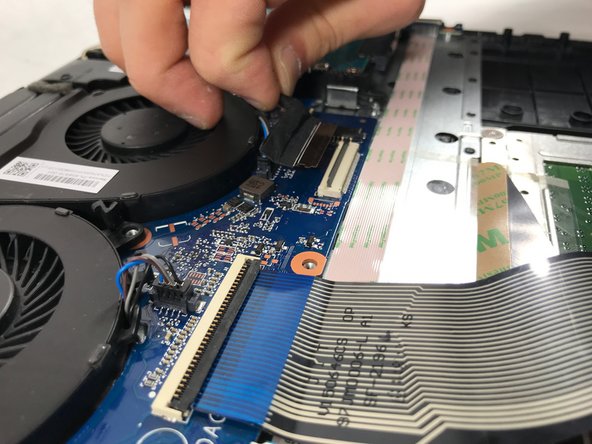
    • Unscrew the six 1.2 mm screws connecting the screen to the body using the #00 Phillips screwdriver head.

    • Be cautious of where the screws come out from, some will only fit in the same location.

  6. HP Omen 15-ax243dx Screen Replacement: 6 단계, 이미지 1/3 HP Omen 15-ax243dx Screen Replacement: 6 단계, 이미지 2/3 HP Omen 15-ax243dx Screen Replacement: 6 단계, 이미지 3/3
    • Remove the tape holding the wires down

    • Disconnect the wires from the wifi chip

    • When removing the wires from the wifi chip, be careful to not damage the connectors.

  7. HP Omen 15-ax243dx Screen Replacement: 7 단계, 이미지 1/3 HP Omen 15-ax243dx Screen Replacement: 7 단계, 이미지 2/3 HP Omen 15-ax243dx Screen Replacement: 7 단계, 이미지 3/3
    • Flip the switch up that holds the screen cable in place

    • Lift up and pull back the cable from the insert

  8. HP Omen 15-ax243dx Screen Replacement: 8 단계, 이미지 1/2 HP Omen 15-ax243dx Screen Replacement: 8 단계, 이미지 2/2
    • Lift the base of the device up to separate the hinges from the body of the device

  9. HP Omen 15-ax243dx Screen Replacement: 9 단계, 이미지 1/1
    • Slide the base of the device out from under the hinges

    • The screen can now be replaced

결론

To reassemble your device, follow these instructions in reverse order.

vangnam

회원 가입일: 10/19/17

594 평판

안내서 4개 작성하였습니다

UMass Dartmouth, Team S6-G7, Rockett Fall 2017 UMass Dartmouth, Team S6-G7, Rockett Fall 2017 회원

UMASSD-ROCKETT-F17S6G7

3 회원들

안내서 7개 작성하였습니다

댓글 0개

댓글 쓰기

조회 통계:

24 시간 전: 1

7일 전: 3

30일 전: 17

전체 시간: 5,137