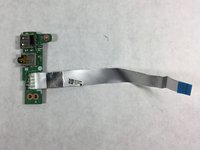
주요 콘텐츠로 건너뛰기

HP Pavilion 14-b120dx Audio Port/USB Drive Replacement

필요한 것

  1. HP Pavilion 14-b120dx Audio Port/USB Drive Replacement, Battery: 1 단계, 이미지 1/1
    • Power down the laptop and detach the charging cord (failure to do so can result in electrical shock).

  2. HP Pavilion 14-b120dx Audio Port/USB Drive Replacement: 2 단계, 이미지 1/3 HP Pavilion 14-b120dx Audio Port/USB Drive Replacement: 2 단계, 이미지 2/3 HP Pavilion 14-b120dx Audio Port/USB Drive Replacement: 2 단계, 이미지 3/3
    • Flip the laptop upside down so that the bottom is facing you.

    • Push the slide on the right toward the center of the laptop, releasing the battery latch.

    • Lift the battery up and away from the laptop.

  3. HP Pavilion 14-b120dx Audio Port/USB Drive Replacement, Keyboard: 3 단계, 이미지 1/3 HP Pavilion 14-b120dx Audio Port/USB Drive Replacement, Keyboard: 3 단계, 이미지 2/3 HP Pavilion 14-b120dx Audio Port/USB Drive Replacement, Keyboard: 3 단계, 이미지 3/3
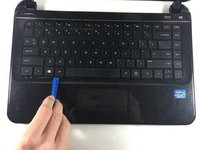
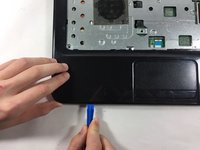
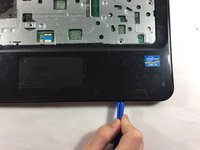
    • Insert the plastic opening tool between the keyboard and the palm rest.

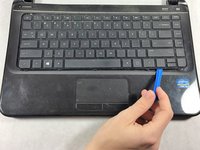
    • Pry upwards until the keyboard section detaches from the laptop.

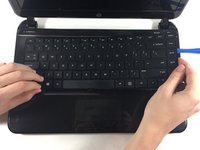
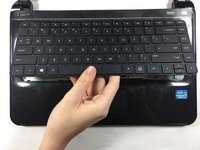
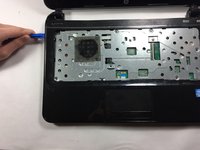
    • Repeat this around the edge of the entire keyboard.

    • Sections will make loud snapping noises as they detach from the palm rest - this is normal.

  4. HP Pavilion 14-b120dx Audio Port/USB Drive Replacement: 4 단계, 이미지 1/2 HP Pavilion 14-b120dx Audio Port/USB Drive Replacement: 4 단계, 이미지 2/2
    • Lift the keyboard slowly up until the connecting cable is exposed.

    • Carefully lift the flap on the ZIF connector using a fingernail or plastic opening tool. This will release the cable.

    • Detach the cable.

  5. HP Pavilion 14-b120dx Audio Port/USB Drive Replacement, Palm Rest: 5 단계, 이미지 1/2 HP Pavilion 14-b120dx Audio Port/USB Drive Replacement, Palm Rest: 5 단계, 이미지 2/2
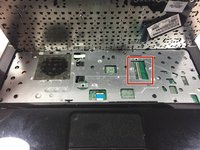
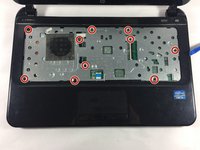
    • Unscrew the 10 6.0 mm screws under the keyboard housing with a Philips #0 head screwdriver.

  6. HP Pavilion 14-b120dx Audio Port/USB Drive Replacement: 6 단계, 이미지 1/3 HP Pavilion 14-b120dx Audio Port/USB Drive Replacement: 6 단계, 이미지 2/3 HP Pavilion 14-b120dx Audio Port/USB Drive Replacement: 6 단계, 이미지 3/3
    • Insert the plastic opening tool into the seam between the palm rest and the laptop.

    • Pry upwards until the palm rest separates from the laptop.

    • Repeat this process around the entire computer.

    • These steps will be similar to the ones you took to remove the keyboard. Again, you will hear snapping noises.

  7. HP Pavilion 14-b120dx Audio Port/USB Drive Replacement: 7 단계, 이미지 1/1
    • Lift upwards to remove the palm rest.

  8. HP Pavilion 14-b120dx Audio Port/USB Drive Replacement, Audio Port and USB drive: 8 단계, 이미지 1/2 HP Pavilion 14-b120dx Audio Port/USB Drive Replacement, Audio Port and USB drive: 8 단계, 이미지 2/2
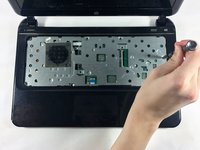
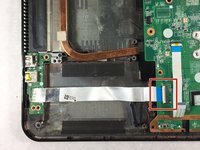
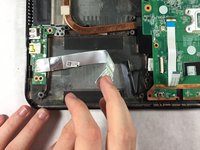
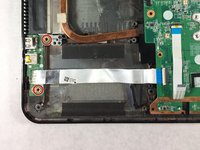
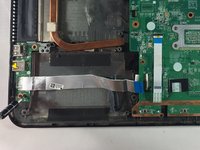
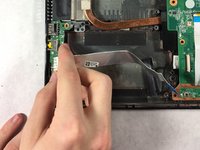
    • Carefully disconnect the cable connecting the ports to the motherboard from the right side.

  9. HP Pavilion 14-b120dx Audio Port/USB Drive Replacement: 9 단계, 이미지 1/3 HP Pavilion 14-b120dx Audio Port/USB Drive Replacement: 9 단계, 이미지 2/3 HP Pavilion 14-b120dx Audio Port/USB Drive Replacement: 9 단계, 이미지 3/3
    • Remove the two 6.0 mm screws from the ports.

  10. HP Pavilion 14-b120dx Audio Port/USB Drive Replacement: 10 단계, 이미지 1/2 HP Pavilion 14-b120dx Audio Port/USB Drive Replacement: 10 단계, 이미지 2/2
    • Push the ports to the left and lift upward to remove them safely.

결론

To reassemble your device, follow these instructions in reverse order.

다른 2명이 해당 안내서를 완성하였습니다.

Erin Lavalla

회원 가입일: 10/18/16

458 평판

안내서 4개 작성하였습니다

UMass Dartmouth, Team 4-4, Catania Fall 2016 UMass Dartmouth, Team 4-4, Catania Fall 2016 회원

UMASSD-CATANIA-F16S4G4

3 회원들

안내서 6개 작성하였습니다

댓글 2개

where can I find the replacement part?

edwin abraham - 답글

Hello, first I just wanted to say thank you so much for writing these guides! You’re a super hero…. now then, I find myself in quite a pickle. I have an HP 15-b123cl with a screen that’s broken. I need to resolder one of the connectors. I have a picture that will show you which connector I need to fix, but I can’t post a picture in this comment section… all I need is a picture of the display connector on the top left of the motherboard. I even checked ifixit for some way of messaging you directly, but no luck :(… all I can think to do is give you my personal email address and hope that you send me something! Anyways… THANKS ERIN

Ethan

ejstepanianATgmail.com

Ethan Stepanian - 답글

댓글 쓰기

조회 통계:

24 시간 전: 0

7일 전: 0

30일 전: 6

전체 시간: 779