이 버전에는 잘못된 편집 사항이 있을 수 있습니다. 최신 확인된 스냅샷으로 전환하십시오.
필요한 것
-
이 단계는 번역되지 않았습니다. 번역을 도와주십시오
-
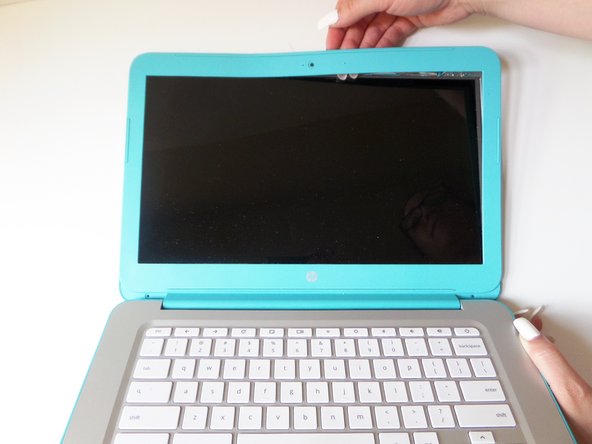
With the laptop facing you, open the clamshell. Be sure to turn the power off using a long press before beginning.
-
Remove the screw covers on both sides of the screen bezel by sliding a metal spudger into the crevice and gently peeling the cover away.
-
-
이 단계는 번역되지 않았습니다. 번역을 도와주십시오
-
Snap off the screen bezel by prying with your fingers in between the bezel and the screen.
-
Continue around the screen, gently prying and lifting.
-
-
-
이 단계는 번역되지 않았습니다. 번역을 도와주십시오
-
Carefully loosen the bottom bezel. Eventually it will snap free from the rest of the clamshell.
-
Pull hinge up and forward to detach it from the Chromebook. The bezel and hinge cover will remain attached.
-
-
이 단계는 번역되지 않았습니다. 번역을 도와주십시오
-
Remove the four 4mm screws within the metal tabs on the top and bottom of the screen using a Phillips Head 1 screwdriver.
-
-
이 단계는 번역되지 않았습니다. 번역을 도와주십시오
-
Gently pry the metal tabs off of the screen assembly while holding the screen to unlock them.
-
Grab the screen by its unlocked tabs and tilt it down and away from the screen assembly, laying it down.
-
-
이 단계는 번역되지 않았습니다. 번역을 도와주십시오
-
Slide the connector out from its plug on the screen using your fingers to completely disconnect the screen.
-
Using your fingers, slide the connector out from its plug attached to the screen to completely disconnect the old screen panel
-


팀

CSU Fullerton, Team S2-G2, Bruce Fall 2017 CSU Fullerton, Team S2-G2, Bruce Fall 2017 회원
CSUF-BRUCE-F17S2G2
3 회원들
안내서 6개 작성하였습니다
댓글 4개
Where did you find a replacement screen?
We are only showing how to replace the screen, we did not actually purchase a new screen for this guide.
i have a multi layered line going down the middle of my screen how would i go about fixing something like that?
Sorry, we are only knowledgeable on how to replace the screen, not on the issues.