주요 콘텐츠로 건너뛰기

HP Pavilion 15-ab243cl CMOS Battery Replacement

필요한 것

  1. HP Pavilion 15-ab243cl CMOS Battery Replacement, Battery: 1 단계, 이미지 1/2 HP Pavilion 15-ab243cl CMOS Battery Replacement, Battery: 1 단계, 이미지 2/2
    • Slide the battery lock tab toward the center of the battery to the unlock position.

  2. HP Pavilion 15-ab243cl CMOS Battery Replacement: 2 단계, 이미지 1/3 HP Pavilion 15-ab243cl CMOS Battery Replacement: 2 단계, 이미지 2/3 HP Pavilion 15-ab243cl CMOS Battery Replacement: 2 단계, 이미지 3/3
    • Slide the battery release switch to the right until the battery pops out.

  3. HP Pavilion 15-ab243cl CMOS Battery Replacement: 3 단계, 이미지 1/2 HP Pavilion 15-ab243cl CMOS Battery Replacement: 3 단계, 이미지 2/2
    • Grabbing the top edge of the battery, rotate it toward you and then lift upward to relieve the battery from its slot.

  4. HP Pavilion 15-ab243cl CMOS Battery Replacement, Laptop Case: 4 단계, 이미지 1/3 HP Pavilion 15-ab243cl CMOS Battery Replacement, Laptop Case: 4 단계, 이미지 2/3 HP Pavilion 15-ab243cl CMOS Battery Replacement, Laptop Case: 4 단계, 이미지 3/3
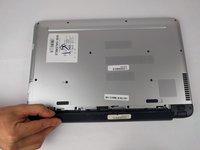
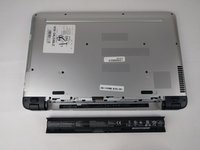
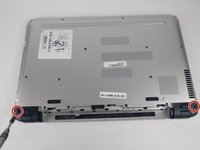
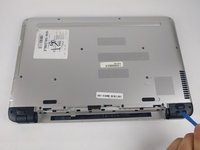
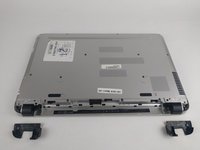
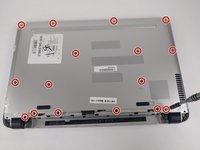
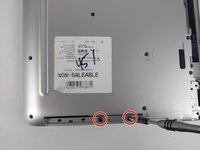
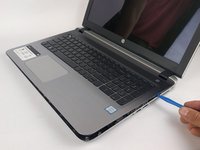
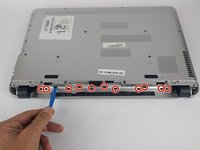
    • With the battery removed, remove both black plastic covers with a plastic opening tool. Unscrew both 7.5 mm screws from the tabs, using a PH1 screw driver. Using a plastic opening tool, pry off both covers.
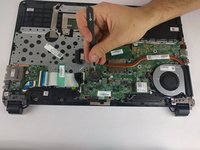
  5. HP Pavilion 15-ab243cl CMOS Battery Replacement: 5 단계, 이미지 1/3 HP Pavilion 15-ab243cl CMOS Battery Replacement: 5 단계, 이미지 2/3 HP Pavilion 15-ab243cl CMOS Battery Replacement: 5 단계, 이미지 3/3
    • Remove all 16 of the 3.5 mm screws with a PH1 screwdriver and pry/slide the CD drive out of laptop.

  6. HP Pavilion 15-ab243cl CMOS Battery Replacement: 6 단계, 이미지 1/2 HP Pavilion 15-ab243cl CMOS Battery Replacement: 6 단계, 이미지 2/2
    • With the CD drive removed, unscrew the two 2mm silver screws with a PH00.

    • These can strip easily, so take your time removing.

  7. HP Pavilion 15-ab243cl CMOS Battery Replacement: 7 단계, 이미지 1/3 HP Pavilion 15-ab243cl CMOS Battery Replacement: 7 단계, 이미지 2/3 HP Pavilion 15-ab243cl CMOS Battery Replacement: 7 단계, 이미지 3/3
    • Using a plastic opening tool, begin to pry edge of case away from the laptop. Work around the edges until all sides, except back, are open.

  8. HP Pavilion 15-ab243cl CMOS Battery Replacement: 8 단계, 이미지 1/3 HP Pavilion 15-ab243cl CMOS Battery Replacement: 8 단계, 이미지 2/3 HP Pavilion 15-ab243cl CMOS Battery Replacement: 8 단계, 이미지 3/3
    • On the back side of the laptop, where the battery is, there are 12 black plastic clips. Use a plastic opening tool and pry all of these clips, unlatching them from the case.

    • Once clips are free, open the laptop. Rotating the case off, around the hinges, works best to remove the case.

  9. HP Pavilion 15-ab243cl CMOS Battery Replacement, CMOS Battery: 9 단계, 이미지 1/2 HP Pavilion 15-ab243cl CMOS Battery Replacement, CMOS Battery: 9 단계, 이미지 2/2
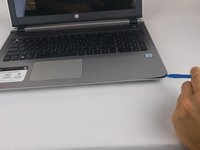
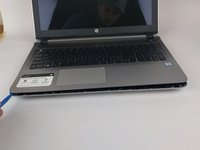
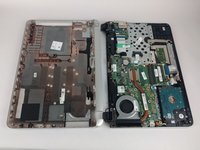
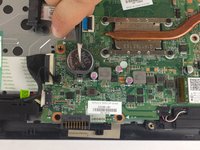
    • Use long nose tweezers to reach under battery and lift up.

  10. HP Pavilion 15-ab243cl CMOS Battery Replacement: 10 단계, 이미지 1/2 HP Pavilion 15-ab243cl CMOS Battery Replacement: 10 단계, 이미지 2/2
    • Lift up until battery pops out, remove battery

결론

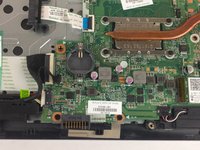
To reassemble your device, follow these instructions in reverse order.

다른 한 분이 해당 안내서를 완성하였습니다.

Alexander Bicigo

회원 가입일: 02/14/18

942 평판

안내서 6개 작성하였습니다

USF Tampa, Team S6-G3, Eyestone Spring 2018 USF Tampa, Team S6-G3, Eyestone Spring 2018 회원

USFT-EYESTONE-S18S6G3

3 회원들

안내서 7개 작성하였습니다

댓글 0개

댓글 쓰기

조회 통계:

24 시간 전: 0

7일 전: 7

30일 전: 23

전체 시간: 1,213