주요 콘텐츠로 건너뛰기

HP Pavilion 15-ay041wm Optical Disc Drive Replacement

필요한 것

  1. HP Pavilion 15-ay041wm Optical Disc Drive Replacement, Battery: 1 단계, 이미지 1/2 HP Pavilion 15-ay041wm Optical Disc Drive Replacement, Battery: 1 단계, 이미지 2/2
    • Place the laptop upside down.

  2. HP Pavilion 15-ay041wm Optical Disc Drive Replacement: 2 단계, 이미지 1/2 HP Pavilion 15-ay041wm Optical Disc Drive Replacement: 2 단계, 이미지 2/2
    • Find the battery lock latch on the top left corner.

    • Slide the latch to the right position.

  3. HP Pavilion 15-ay041wm Optical Disc Drive Replacement: 3 단계, 이미지 1/3 HP Pavilion 15-ay041wm Optical Disc Drive Replacement: 3 단계, 이미지 2/3 HP Pavilion 15-ay041wm Optical Disc Drive Replacement: 3 단계, 이미지 3/3
    • Find the battery release latch on the top right corner.

    • Slide and hold the latch towards the left to cover the battery icon.

    • Carefully slide the battery outwards.

  4. HP Pavilion 15-ay041wm Optical Disc Drive Replacement, Disc Drive: 4 단계, 이미지 1/1
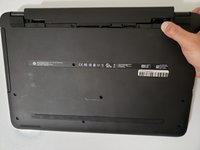
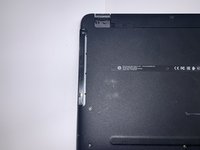
    • Turn the laptop upside down with the base of the laptop facing you.

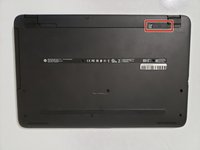
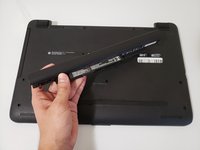
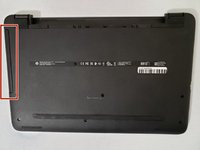
    • Remove the grippers positioned at the top right and top left of the laptop to access the two additional screws.

    • Use a 1.5mm Hex screwdriver to remove twelve 10mm screws.

  5. HP Pavilion 15-ay041wm Optical Disc Drive Replacement: 5 단계, 이미지 1/3 HP Pavilion 15-ay041wm Optical Disc Drive Replacement: 5 단계, 이미지 2/3 HP Pavilion 15-ay041wm Optical Disc Drive Replacement: 5 단계, 이미지 3/3
    • Press the eject button.

    • Hold and carefully slide the disc drive out of the laptop.

결론

To reassemble your device, follow these instructions in reverse order.

다른 한 분이 해당 안내서를 완성하였습니다.

Kristen Gismondi

회원 가입일: 11/12/14

81,663 평판

안내서 200개 작성하였습니다

iFixit iFixit 회원

Staff

135 회원들

안내서 16,732개 작성하였습니다

댓글 한 개

Might add “Optical” to drive title to save some confusion.

mike - 답글

댓글 쓰기

조회 통계:

24 시간 전: 1

7일 전: 5

30일 전: 10

전체 시간: 570