주요 콘텐츠로 건너뛰기

HP Pavilion 15-d017cl Hard Drive Replacement

필요한 것

  1. HP Pavilion 15-d017cl Hard Drive Replacement, Hard Drive: 1 단계, 이미지 1/2 HP Pavilion 15-d017cl Hard Drive Replacement, Hard Drive: 1 단계, 이미지 2/2
    • Flip the laptop onto its back in order to have access to the back "L" shaped panel.

    • Using a Phillips #1 Screwdriver, unscrew the 5mm screw until the L-shaped panel feels like it can be removed.

  2. HP Pavilion 15-d017cl Hard Drive Replacement: 2 단계, 이미지 1/2 HP Pavilion 15-d017cl Hard Drive Replacement: 2 단계, 이미지 2/2
    • To remove the L-shaped panel, use the plastic opening tool to pry the panel from the back of the laptop. Make sure to move the tool the entire way around the panel.

    • This may require a good amount of strength to loosen the panel. As the opening tool is moving around the panel, clicking noises will be heard.

  3. HP Pavilion 15-d017cl Hard Drive Replacement: 3 단계, 이미지 1/1
    • Remove the fifteen (15) 5 mm screws using the Phillips #1 Screwdriver.

  4. HP Pavilion 15-d017cl Hard Drive Replacement: 4 단계, 이미지 1/3 HP Pavilion 15-d017cl Hard Drive Replacement: 4 단계, 이미지 2/3 HP Pavilion 15-d017cl Hard Drive Replacement: 4 단계, 이미지 3/3
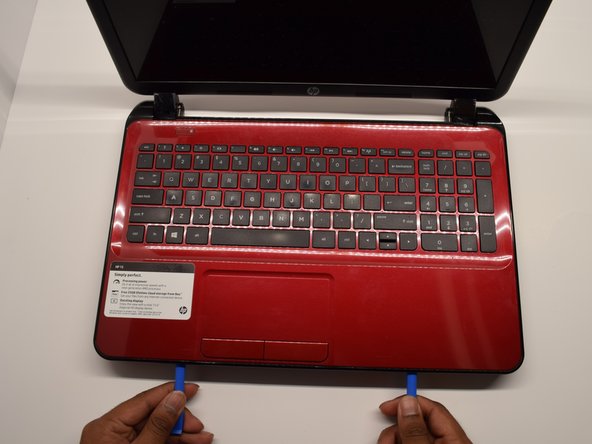
    • Flip the computer over so the screen and keyboard are showing.

    • Using the opener tools, pry around the edges of the computer in between the keyboard and the base.

    • Apply enough pressure to unlatch the keyboard but be cautious of the parts under it.

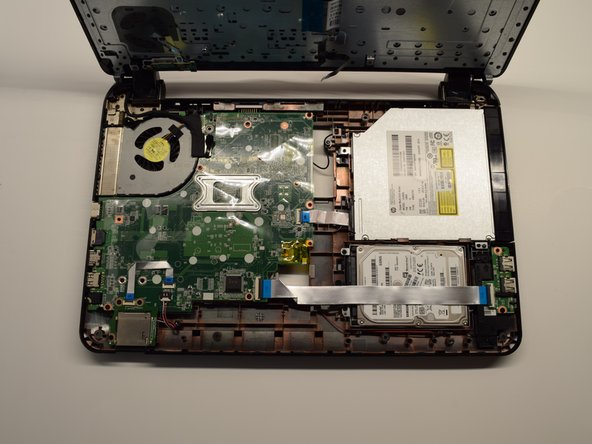
    • Flip the keyboard up toward the screen to access the motherboard.

  5. HP Pavilion 15-d017cl Hard Drive Replacement: 5 단계, 이미지 1/3 HP Pavilion 15-d017cl Hard Drive Replacement: 5 단계, 이미지 2/3 HP Pavilion 15-d017cl Hard Drive Replacement: 5 단계, 이미지 3/3
    이 단계에 사용된 도구:
    Tweezers
    $4.99
    구매
    • Using the Spudger, press into the silver latch and lift it up.

    • Using the Tweezers, pull the Ribbon Cable out of the silver latch.

  6. HP Pavilion 15-d017cl Hard Drive Replacement: 6 단계, 이미지 1/3 HP Pavilion 15-d017cl Hard Drive Replacement: 6 단계, 이미지 2/3 HP Pavilion 15-d017cl Hard Drive Replacement: 6 단계, 이미지 3/3
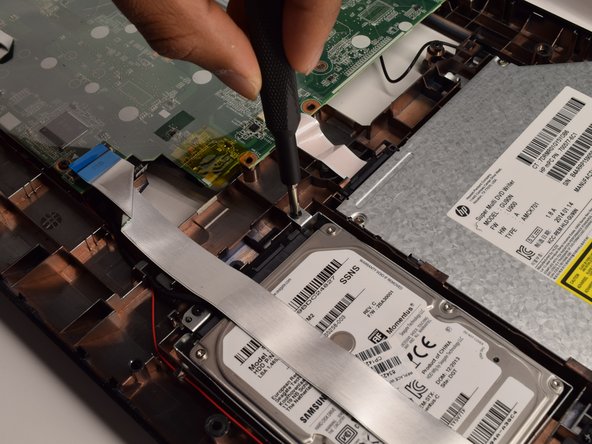
    • Using a Phillips #1 screwdriver, remove the three screws located around the hard drive.

    • When finished unscrewing, pull the hard drive out.

결론

To reassemble your device, follow these instructions in reverse order.

다른 4명이 해당 안내서를 완성하였습니다.

Noah Pecor

회원 가입일: 09/24/19

646 평판

안내서 2개 작성하였습니다

댓글 0개

댓글 쓰기

조회 통계:

24 시간 전: 0

7일 전: 0

30일 전: 19

전체 시간: 1,203