주요 콘텐츠로 건너뛰기
HP Pavilion DV9700 Digital Media Control Panel  Replacement

HP Pavilion DV9700 Digital Media Control Panel Replacement

Max Shangraw

Max Shangraw2 다른 기여자

최종 수정일 June 11, 2018

5 분
조정

After years of device usage, parts start to malfunction or wear out. If you are experiencing problems with your digital media control panel consult this repair guide to restore your device to working order. To start this guide all you will need is a screwdriver and a spudger tool.

필요한 것

도구

  • Phillips #0 Screwdriver
    Phillips #0 Screwdriver
  • Spudger
    Spudger
  1. HP Pavilion DV9700 Digital Media Control Panel  Replacement, Digital Media Control Panel: 1 단계, 이미지 2개 중 1개 HP Pavilion DV9700 Digital Media Control Panel  Replacement, Digital Media Control Panel: 1 단계, 이미지 2개 중 2개
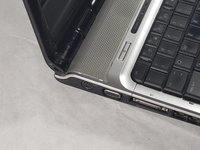
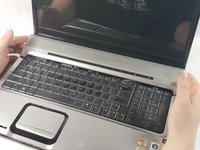
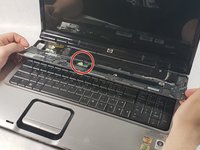
    • First turn the device so that the back is facing upward.

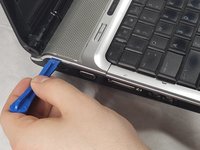
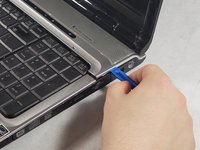
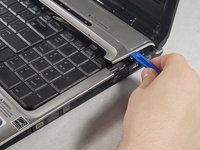
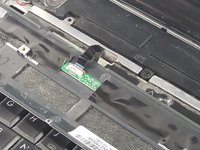
    • There is a tab located near the top left portion of the device.

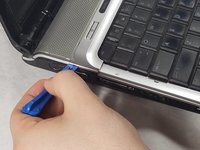
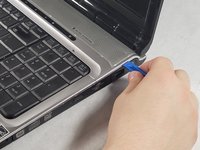
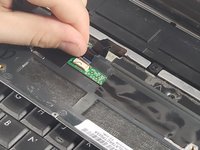
    • Push the tab and pull the battery upward to remove the battery from the device.

  2. HP Pavilion DV9700 Digital Media Control Panel  Replacement: 2 단계, 이미지 2개 중 1개 HP Pavilion DV9700 Digital Media Control Panel  Replacement: 2 단계, 이미지 2개 중 2개
    • In the battery compartment there are 6 4mm screws.

    • Unscrew these screws using a Philips #0 head screwdriver.

    • These screws are very small, make sure to have an organized place to put them.

  3. HP Pavilion DV9700 Digital Media Control Panel  Replacement: 3 단계, 이미지 3개 중 1개 HP Pavilion DV9700 Digital Media Control Panel  Replacement: 3 단계, 이미지 3개 중 2개 HP Pavilion DV9700 Digital Media Control Panel  Replacement: 3 단계, 이미지 3개 중 3개
    • Turn the laptop over to it's resting position.

    • Open the laptop and locate the media bar across the top of the keyboard.

    • On the left side of the media bar, insert a spudger under the media bar near the top.

    • Move the spudger toward the bottom of the media bar, releasing the clips.

  4. HP Pavilion DV9700 Digital Media Control Panel  Replacement: 4 단계, 이미지 3개 중 1개 HP Pavilion DV9700 Digital Media Control Panel  Replacement: 4 단계, 이미지 3개 중 2개 HP Pavilion DV9700 Digital Media Control Panel  Replacement: 4 단계, 이미지 3개 중 3개
    • On the right of the media bar insert the spudger near the top.

    • Move the spudger toward the bottom of the media to release the clips

  5. HP Pavilion DV9700 Digital Media Control Panel  Replacement: 5 단계, 이미지 2개 중 1개 HP Pavilion DV9700 Digital Media Control Panel  Replacement: 5 단계, 이미지 2개 중 2개
    • Carefully pull the media bar upward about an inch.

    • Flip the media bar toward yourself to expose the cable still attached.

    • Make sure not to pull the media bar too far away from the device. This could cause damage to the cable or the cable port.

  6. HP Pavilion DV9700 Digital Media Control Panel  Replacement: 6 단계, 이미지 3개 중 1개 HP Pavilion DV9700 Digital Media Control Panel  Replacement: 6 단계, 이미지 3개 중 2개 HP Pavilion DV9700 Digital Media Control Panel  Replacement: 6 단계, 이미지 3개 중 3개
    • The ribbon cable is located near the left side of the media bar.

    • The ribbon cable is held down by a brown clip.

    • Using a fingernail pry one of the sides of the clip to release it.

    • The clip is fragile, be careful not to use too much pressure.

  7. HP Pavilion DV9700 Digital Media Control Panel  Replacement: 7 단계, 이미지 1개 중 1개
    • With the ribbon cable successfully detached you may now replace the media bar with a new, functioning one.

결론

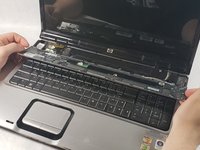
To reassemble your device, follow these instructions in reverse order.

작성자

2다른 기여자 명과 함께

Max Shangraw

회원 가입일: 03/19/18

507 평판

안내서 4개를 작성함

UMass Dartmouth, Team S6-G1, Bernier Spring 2018 UMass Dartmouth, Team S6-G1, Bernier Spring 2018 회원

UMASSD-BERNIER-S18S6G1

3 회원들

안내서 4개를 작성함

댓글 0개

댓글 쓰기

조회 통계:

지난 24시간: 0

지난 7일: 1

지난 30일: 4

전체 시간: 625