주요 콘텐츠로 건너뛰기

HP Pavilion G6-1d16dx Screen hinges Replacement

필요한 것

  1. HP Pavilion G6-1d16dx Screen hinges Replacement, Battery: 1 단계, 이미지 1/1
    • Flip the computer so that the bottom side is facing up, and locate the battery above the screen hinges.

  2. HP Pavilion G6-1d16dx Screen hinges Replacement: 2 단계, 이미지 1/1
    • Slide the switch under the battery compartment to release the battery.

  3. HP Pavilion G6-1d16dx Screen hinges Replacement: 3 단계, 이미지 1/1
    • Remove the battery.

    • The battery will have popped out of the compartment when it was released.

  4. HP Pavilion G6-1d16dx Screen hinges Replacement, Motherboard: 4 단계, 이미지 1/1
    • Unscrew the two silver screws holding the protective cover in place until they make a clicking noise.

    • The screws do not remove from the cover.

  5. HP Pavilion G6-1d16dx Screen hinges Replacement: 5 단계, 이미지 1/2 HP Pavilion G6-1d16dx Screen hinges Replacement: 5 단계, 이미지 2/2
    • Unsnap the Cover by lifting the edge along the battery compartment.

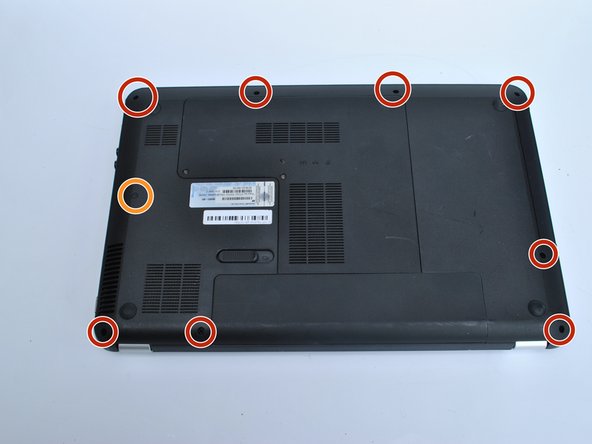
    • Remove all of the body screws.

    • Remove the rubber cap and the screw underneath it.

  6. HP Pavilion G6-1d16dx Screen hinges Replacement: 6 단계, 이미지 1/3 HP Pavilion G6-1d16dx Screen hinges Replacement: 6 단계, 이미지 2/3 HP Pavilion G6-1d16dx Screen hinges Replacement: 6 단계, 이미지 3/3
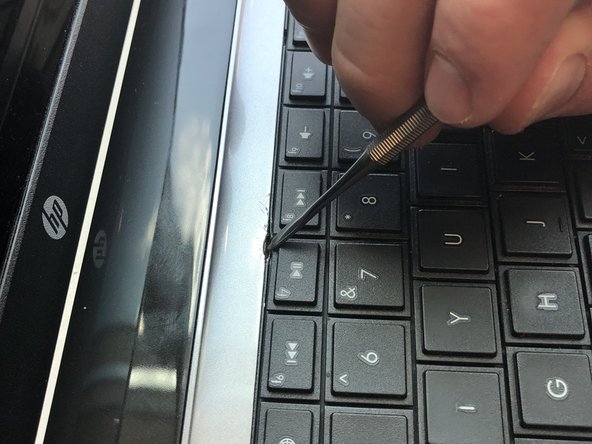
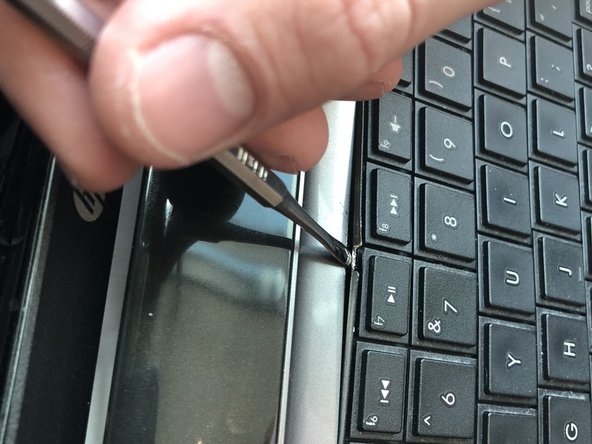
    • The keyboard is held in by nine tabs

    • Using a metal tool, depress the center tab and pry up the keyboard by pivoting the tool towards the screen.

  7. HP Pavilion G6-1d16dx Screen hinges Replacement: 7 단계, 이미지 1/2 HP Pavilion G6-1d16dx Screen hinges Replacement: 7 단계, 이미지 2/2
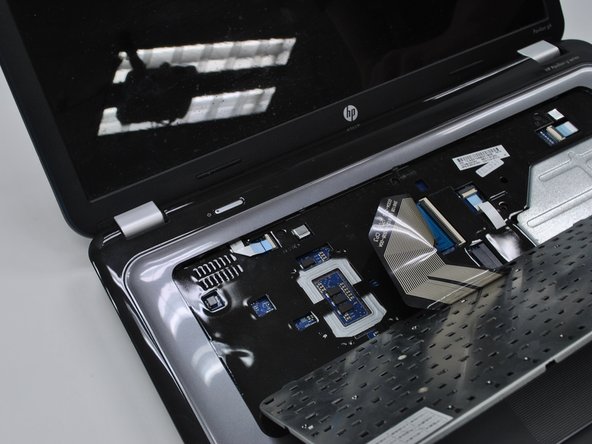
    • Slide the tool that is now under the keyboard sideways along the edge and use another tool to depress the other tabs along the edge of the keyboard.

    • As you depress the tabs, the edges of the keyboard will pop up.

    • Lift off the keyboard

  8. HP Pavilion G6-1d16dx Screen hinges Replacement: 8 단계, 이미지 1/1
    • Flip up the black tab holding the keyboard in place via the ribbon cable and pull out the cable

  9. HP Pavilion G6-1d16dx Screen hinges Replacement: 9 단계, 이미지 1/3 HP Pavilion G6-1d16dx Screen hinges Replacement: 9 단계, 이미지 2/3 HP Pavilion G6-1d16dx Screen hinges Replacement: 9 단계, 이미지 3/3
    • Remove the two remaining ribbon cables.

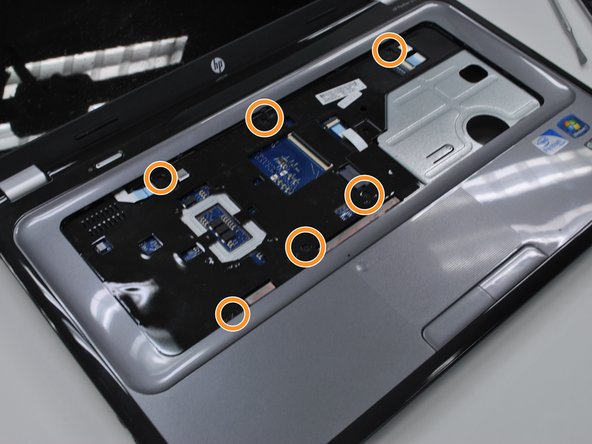
    • Remove the screws holding in the protective cover underneath the keyboard.

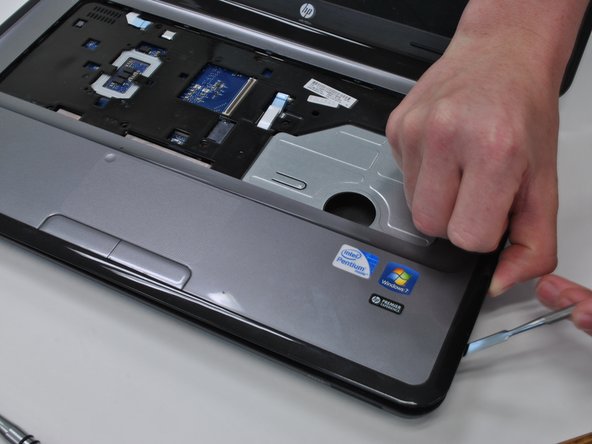
    • Pop the cover off using any flat metal tool, starting with where you took out the optical drive

    • It will be very sticky near the edge closest to the screen. This is where the sticker in the battery compartment is stuck to. just use a little more force.

  10. HP Pavilion G6-1d16dx Screen hinges Replacement: 10 단계, 이미지 1/1
    • Unplug the ribbon cable on the right side of the motherboard.

  11. HP Pavilion G6-1d16dx Screen hinges Replacement: 11 단계, 이미지 1/2 HP Pavilion G6-1d16dx Screen hinges Replacement: 11 단계, 이미지 2/2
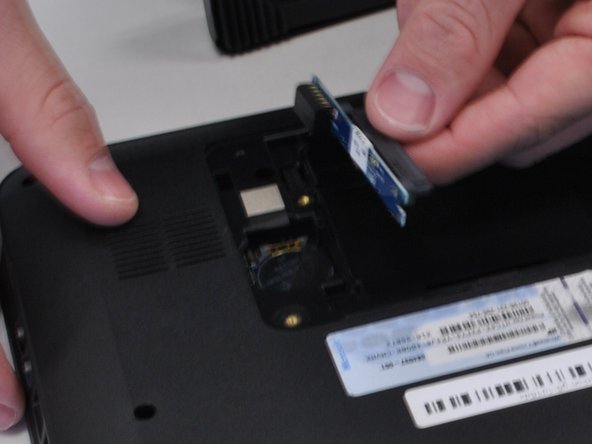
    • Underneath the computer, unscrew the hard drive connector screw, and pop out the hard drive plug-in.

  12. HP Pavilion G6-1d16dx Screen hinges Replacement: 12 단계, 이미지 1/1
    • Unscrew all mother board screws and lift the motherboard out of the body.

    • For replacing the screen hinges and screen, skip this step

  13. HP Pavilion G6-1d16dx Screen hinges Replacement, Screen hinges: 13 단계, 이미지 1/1
    • Remove the five screws holding hinges to base.

    • Do not unscrew the motherboard screws

  14. HP Pavilion G6-1d16dx Screen hinges Replacement: 14 단계, 이미지 1/2 HP Pavilion G6-1d16dx Screen hinges Replacement: 14 단계, 이미지 2/2
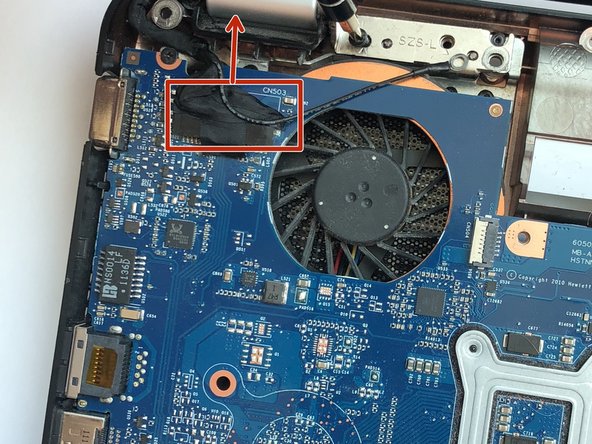
    • Lift the tape tab up from the screen plug, and unplug the screen from the motherboard.

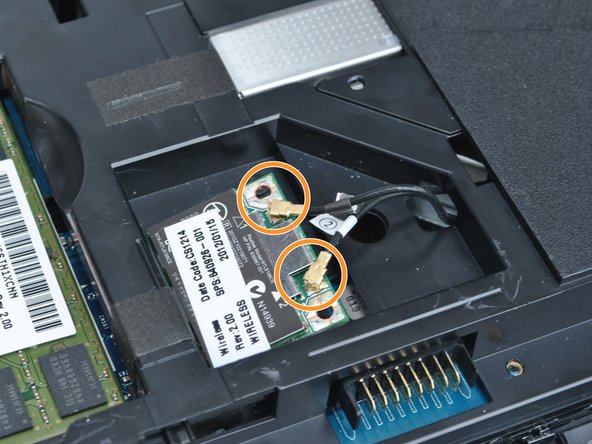
    • Unplug the wires from the wireless card and pull them through the body.

  15. HP Pavilion G6-1d16dx Screen hinges Replacement: 15 단계, 이미지 1/1
    • Remove the sticky tabs on the bottom of the screen just outside the hinges, and remove the two screws underneath.

  16. HP Pavilion G6-1d16dx Screen hinges Replacement: 16 단계, 이미지 1/1
    • Pry off the plastic surrounding the screen with any flat metal tool.

  17. HP Pavilion G6-1d16dx Screen hinges Replacement: 17 단계, 이미지 1/1
    • Remove the screws holding the hinge covers in place.

    • Remove the hinge covers.

  18. HP Pavilion G6-1d16dx Screen hinges Replacement: 18 단계, 이미지 1/1
    • Use a pair of pliers to unscrew the nut and pull out the hinge.

결론

To reassemble your device, follow these instructions in reverse order.

다른 2명이 해당 안내서를 완성하였습니다.

Calvin Kerr

회원 가입일: 04/05/18

878 평판

안내서 5개 작성하였습니다

댓글 한 개

Not so good a manual. See my remarks.

This laptop is of extremely poor building quality. Disaster lures in every badly made detail.

Eveline Bernard - 답글

댓글 쓰기

조회 통계:

24 시간 전: 0

7일 전: 2

30일 전: 13

전체 시간: 3,403