주요 콘텐츠로 건너뛰기

HP Pavilion dv4-4141us Fan Replacement

필요한 것

  1. HP Pavilion dv4-4141us Fan Replacement, Back Panel: 1 단계, 이미지 1/1
    • Lift up the back panel using a spudger, and remove it from the device.

  2. HP Pavilion dv4-4141us Fan Replacement: 2 단계, 이미지 1/3 HP Pavilion dv4-4141us Fan Replacement: 2 단계, 이미지 2/3 HP Pavilion dv4-4141us Fan Replacement: 2 단계, 이미지 3/3
    • Using the Phillips #1 screwdriver unscrew the panel from the computer.

    • Lift the panel up and remove it from the laptop.

  3. HP Pavilion dv4-4141us Fan Replacement, Hard Drive: 3 단계, 이미지 1/3 HP Pavilion dv4-4141us Fan Replacement, Hard Drive: 3 단계, 이미지 2/3 HP Pavilion dv4-4141us Fan Replacement, Hard Drive: 3 단계, 이미지 3/3
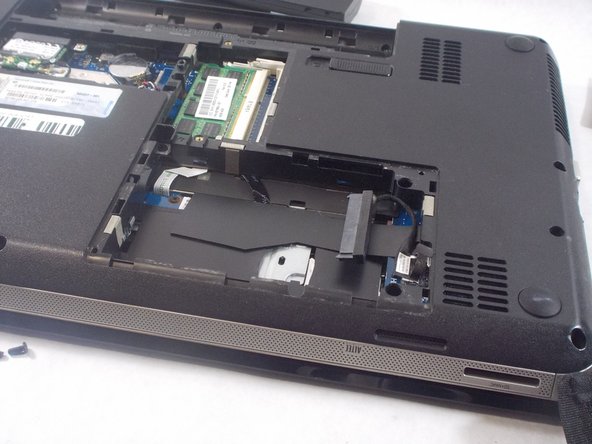
    • Use the spudger to lift the left side of the hard drive.

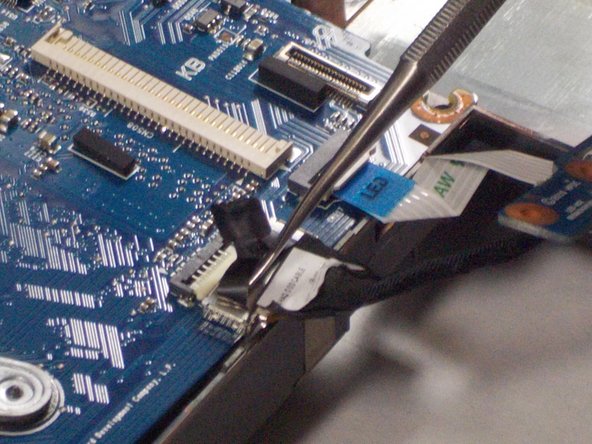
    • Unplug the hard drive and remove it from the device.

  4. HP Pavilion dv4-4141us Fan Replacement, Fan: 4 단계, 이미지 1/2 HP Pavilion dv4-4141us Fan Replacement, Fan: 4 단계, 이미지 2/2
    • Use a Phillips #1 Screwdriver to remove all the screws indicated in the pictures.

  5. HP Pavilion dv4-4141us Fan Replacement: 5 단계, 이미지 1/1
    • Use opening tool to separate the Key board and mouse pad.

    • It would be best to find a tool that is small enough to fit and start on the bottom at either corner and slide across lifting the panel up.

    • Be careful not to push too far underneath to not damage the interior and also it is advised to not bend or crack the plastic back cover.

  6. HP Pavilion dv4-4141us Fan Replacement: 6 단계, 이미지 1/1
    • Use a spudger to gently lift the white plastic flap and release the ribbon cable holding the keyboard in place.

  7. HP Pavilion dv4-4141us Fan Replacement: 7 단계, 이미지 1/2 HP Pavilion dv4-4141us Fan Replacement: 7 단계, 이미지 2/2
    • Use the spudger to lift up the flap and release the cable for both of these two separate components.

    • Be extra careful not to break these clips as they are fragile and are a part of the motherboard.

  8. HP Pavilion dv4-4141us Fan Replacement: 8 단계, 이미지 1/1
    • Unclip the last wire holding the motherboard in place. To do this pull down on the wire in the direction of the arrow.

  9. HP Pavilion dv4-4141us Fan Replacement: 9 단계, 이미지 1/2 HP Pavilion dv4-4141us Fan Replacement: 9 단계, 이미지 2/2
    • Take out the mother board and flip it over so that you can access the fan.

    • Unscrew the two screws holding the fan in place.

  10. HP Pavilion dv4-4141us Fan Replacement: 10 단계, 이미지 1/1
    • Release the fan from the motherboard by disconnecting the wire from the fan.

결론

To reassemble your device, follow these instructions in reverse order.

다른 한 분이 해당 안내서를 완성하였습니다.

Vincent Gardner

회원 가입일: 10/25/21

390 평판

안내서 3개 작성하였습니다

UMass Dartmouth, Team 2-3, Sinclaire Fall 2021 UMass Dartmouth, Team 2-3, Sinclaire Fall 2021 회원

UMASSD-SINCLAIRE-F21S2G3

3 회원들

안내서 7개 작성하였습니다

댓글 한 개

Thanks! I was able to upgrade my Intel Core i3 2330m to a considerably more powerful core i5 2410m! The instructions were very easy to follow. This fixed my problem!

Sam Watson - 답글

댓글 쓰기

조회 통계:

24 시간 전: 1

7일 전: 1

30일 전: 8

전체 시간: 283