주요 콘텐츠로 건너뛰기

이 안내서에는 최근 변경 사항이 더 있습니다. 최신 비검증 버전으로 전환하십시오.

HP Pavilion dv6-1245dx RAM Replacement

필요한 것

  1. HP Pavilion dv6-1245dx RAM Replacement, RAM: 1 단계, 이미지 1/1
    • Shut down the computer and unplug it from the outlet.

    • All screws removed in this guide will require a Phillips #00 screwdriver.

  2. HP Pavilion dv6-1245dx RAM Replacement: 2 단계, 이미지 1/1
    • Turn the computer upside down.

  3. HP Pavilion dv6-1245dx RAM Replacement: 3 단계, 이미지 1/1
    • Loosen the three screws from the memory module compartment cover

    • Screws will not come all the way out.

  4. HP Pavilion dv6-1245dx RAM Replacement: 4 단계, 이미지 1/1
    • Remove the memory module compartment cover.

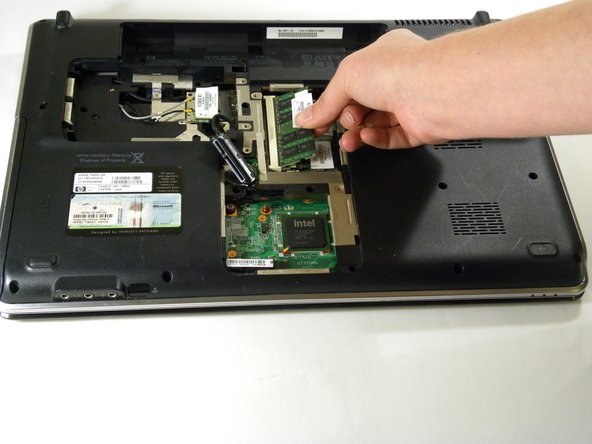
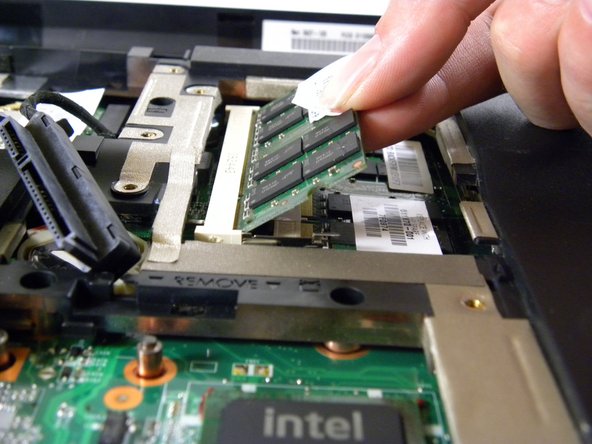
  5. HP Pavilion dv6-1245dx RAM Replacement: 5 단계, 이미지 1/3 HP Pavilion dv6-1245dx RAM Replacement: 5 단계, 이미지 2/3 HP Pavilion dv6-1245dx RAM Replacement: 5 단계, 이미지 3/3
    • Remove the first memory module by spreading apart the two silver retaining tabs, using your thumb and index finger.

    • Pull and lift the green memory module upward at a 45-degree angle, and then pull the memory module out of the computer.

    • If you are replacing both memory cards, repeat this step with the bottom memory card.

  6. HP Pavilion dv6-1245dx RAM Replacement: 6 단계, 이미지 1/1
    • To replace the memory card, insert the card at a 45-degree angle, then push into slot.

    • Push down gently so the silver retaining tabs click back into place.

    • If you are replacing both memory cards, replace the bottom card (closest to the system board) first.

결론

To reassemble your device, follow these instructions in reverse order.

다른 4명이 해당 안내서를 완성하였습니다.

Jaime

회원 가입일: 01/23/14

562 평판

안내서 1개 작성함

New Mexico State, Team 1-3, Sheppard Spring 2014 New Mexico State, Team 1-3, Sheppard Spring 2014 회원

NMSU-SHEPPARD-S14S1G3

4 회원들

안내서 4개 작성하였습니다

댓글 0개

댓글 쓰기

조회 통계:

24 시간 전: 2

7일 전: 2

30일 전: 4

전체 시간: 2,333