이 안내서에는 최근 변경 사항이 더 있습니다. 최신 비검증 버전으로 전환하십시오.
소개
Changing a keyboard on the HP dv6-1355dx is simple, mostly removing screws, but does involve a careful hand. The screws are extremely small, so I suggest using a bowl or muffin pan or something else to keep screws safe and sound. In addition, a screwdriver with a magnetized tip can help in making sure the screws don't fall into the case.
As with anything delicate, check to make sure there isn't anything keeping something from being pulled or pushed apart, like the speakers or a ribbon cable. The only tools I needed were a Phillips #00 screwdriver, but a spudger can also be used when pulling or pushing things apart.
필요한 것
-
-
Firstly, remove the battery. Next, you'll need to take out 7 screws (in red), 2 in the holes at the laptop corners and 5 in the battery enclosure.
-
Next, you'll need to unscrew 2 screws (in orange) in the hard drive cover, to the bottom left of the battery enclosure. These screws won't come all the way out of the panel, so when they won't come up anymore gently pull the panel off.
-
-
-
With the hard drive cover off, you'll need to remove 1 screw (in red) down in the hole between the two screws that held the cover on.
-
Search for a flap on the left side of the hard drive (in green rectangle) that is pushed down between the two metal bars on the left. Pull the tab and the hard drive out of the hole and lay the hard drive gently to the side.
-
-
-
-
Next, undo 2 screws (in red) holding the keyboard in place. You'll notice that there is a small keyboard icon next to them.
-
Put the hard drive back into the slot, ensuring that the the blue tabs on the corners of the hard drive are snug against the case and that the wire on the bottom right doesn't kink or get damaged.
-
The laptop will need to be turned over at this point. Support the hard drive as you turn the laptop right-side-up and lift the screen up.
-
-
-
Position your fingers into the gap between the speaker and the screen. There should be a ledge you can pull up on, or the crevice between the speaker and case. Slowly pull up with your fingers.
-
The speaker should mostly pop out on the left side and center, but the right side may need a little encouragement to pop out. A spudger can be helpful in pushing stubborn parts up and out of the case, but I used my fingers. Let the speaker gently rest against the screen, being careful not to pull or damage the 2 black ribbon cables.
-
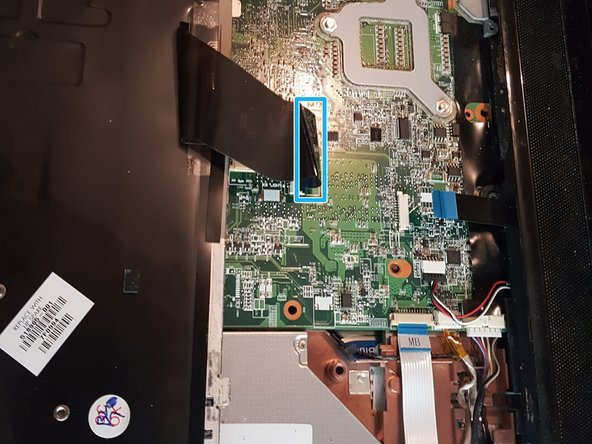
There are 3 final screws (in red) holding the keyboard to the laptop. Undo those and you can slide the keyboard out. However, it is still attached to a ribbon cable (in blue).
-
-
-
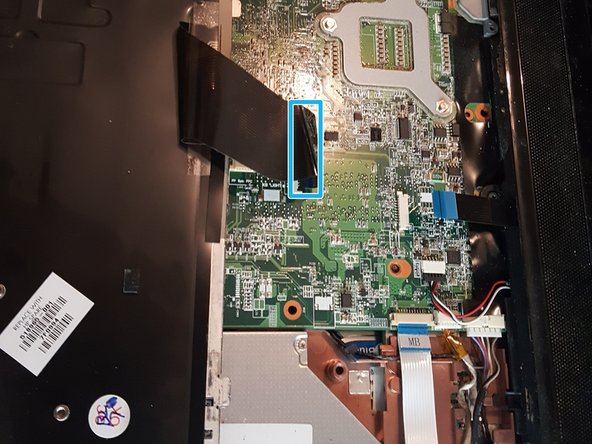
With the ribbon cable (in blue), gently lift the black bar holding the ribbon cable in place in the connector attached to the circuit board. Carefully slide it out, don't try to force it, and you should be able to pull the keyboard out of the laptop at this point.
-
Congratulations! You're over the hill at this point, get yourself a cookie and glass of milk.
-
Before and After
-


To reassemble your device, follow these instructions in reverse order.
To reassemble your device, follow these instructions in reverse order.
다른 4명이 해당 안내서를 완성하였습니다.
