이 버전에는 잘못된 편집 사항이 있을 수 있습니다. 최신 확인된 스냅샷으로 전환하십시오.
필요한 것
-
이 단계는 번역되지 않았습니다. 번역을 도와주십시오
-
Locate the battery on the bottom side of the laptop.
-
Slide the release switch and the battery will pop out.
-
Remove the battery
-
-
이 단계는 번역되지 않았습니다. 번역을 도와주십시오
-
Using a Philips #1 Loosen the three 7mm captive screws that secure the memory module compartment cover to the computer.
-
Lift the rear edge of the cover, swing it up and to the front, and remove the cover.
-
-
이 단계는 번역되지 않았습니다. 번역을 도와주십시오
-
Loosen the two 6mm captive screws that secure the hard drive port bezel cover to the computer, using a Philips #1.
-
Lift the right side of the hard drive port bezel cover, swing it up and to the left, and remove the cover.
-
-
이 단계는 번역되지 않았습니다. 번역을 도와주십시오
-
Use the Mylar tab to lift the hard drive up, and then slide it to the left to release it from the hard drive bay.
-
-
-
이 단계는 번역되지 않았습니다. 번역을 도와주십시오
-
Disconnect the hard drive cable from the system board.
-
Remove the hard drive from the hard drive bay and set it aside.
-
-
이 단계는 번역되지 않았습니다. 번역을 도와주십시오
-
With laptop upside down locate the three sets of screws that fasten the keyboard and switch cover.
-
Two Phillips 7mm screws that secure the switch cover to the computer.
-
Four Phillips 4.0mm screws that secure the switch cover to the computer. (these are inside the battery bay)
-
Four Philips 7mm screws that secure the keyboard to the computer.
-
Remove all ten screws.
-
-
이 단계는 번역되지 않았습니다. 번역을 도와주십시오
-
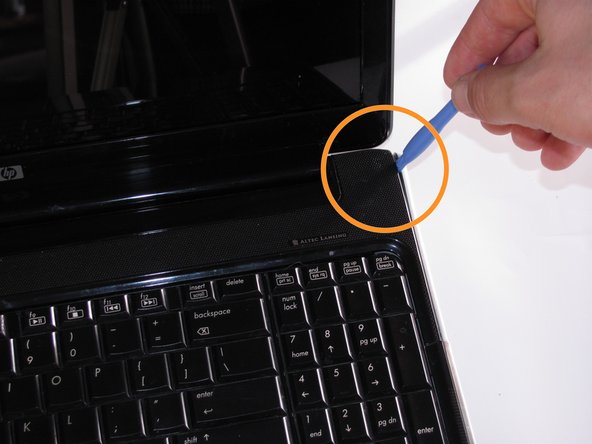
Turn the computer over, and locate the Switch Cover.
-
Using the Safe Pry Tool, un-clip the Switch Cover until it detaches from the computer.
-
-
이 단계는 번역되지 않았습니다. 번역을 도와주십시오
-
Slide the Switch Cover onto the LCD Monitor, exposing the Speaker Assembly.
-
Detach the two ribbon cables from the speaker assembly.
-
-
이 단계는 번역되지 않았습니다. 번역을 도와주십시오
-
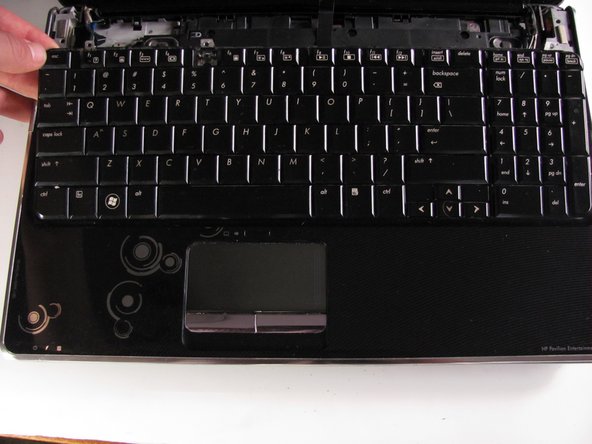
Remove the three silver Phillips 3.5mm screws that secure the keyboard to the computer.
-
Lift the rear edge of the keyboard and slide the keyboard back until the keyboard connector on the system board is accessible.
-
-
이 단계는 번역되지 않았습니다. 번역을 도와주십시오
-
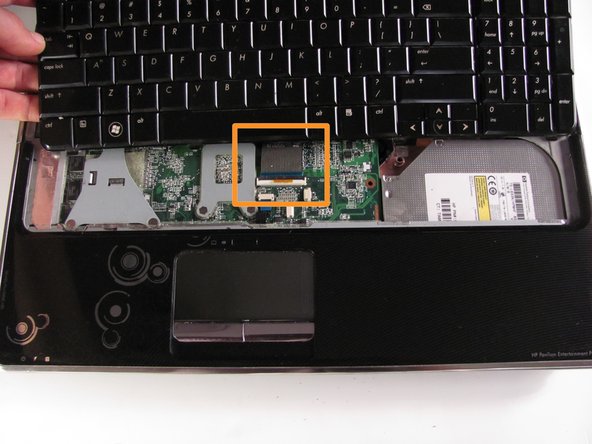
Unhinge the zero insertion force (ZIF) connector to release the ribbon cable then pull gently on the cable to release.
-
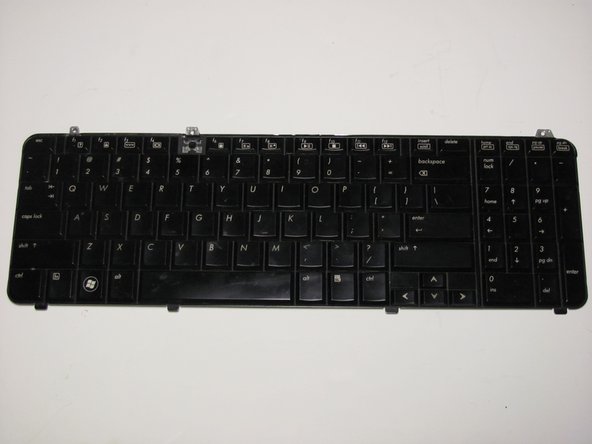
The keyboard can now be lifted off and set aside.
-


다른 6명이 해당 안내서를 완성하였습니다.

팀

Cal Poly, Team 10-34, Maness Winter 2014 Cal Poly, Team 10-34, Maness Winter 2014 회원
CPSU-MANESS-W14S10G34
4 회원들
안내서 6개 작성하였습니다