주요 콘텐츠로 건너뛰기

HP Pavilion dv7-4285dx Hard Drive Replacement

필요한 것

  1. HP Pavilion dv7-4285dx Hard Drive Replacement, Battery: 1 단계, 이미지 1/2 HP Pavilion dv7-4285dx Hard Drive Replacement, Battery: 1 단계, 이미지 2/2
    • Slide the battery release switch to the left. The battery pack will then subsequently release.

  2. HP Pavilion dv7-4285dx Hard Drive Replacement: 2 단계, 이미지 1/1
    • Remove the battery pack from the socket.

  3. HP Pavilion dv7-4285dx Hard Drive Replacement, Hard Drive: 3 단계, 이미지 1/3 HP Pavilion dv7-4285dx Hard Drive Replacement, Hard Drive: 3 단계, 이미지 2/3 HP Pavilion dv7-4285dx Hard Drive Replacement, Hard Drive: 3 단계, 이미지 3/3
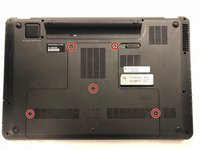
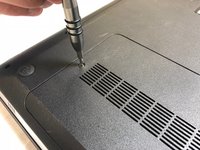
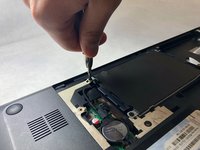
    • Unscrew the 5 back plate screws using a Phillips #0 screwdriver.

    • During the removal process, the back plate will retain the 5 back plate screws.

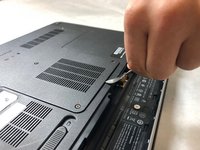
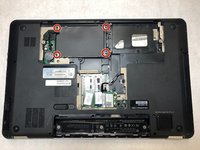
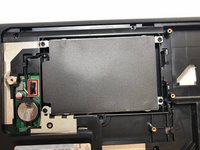
    • Remove back plate using a metal spudger.

  4. HP Pavilion dv7-4285dx Hard Drive Replacement: 4 단계, 이미지 1/2 HP Pavilion dv7-4285dx Hard Drive Replacement: 4 단계, 이미지 2/2
    • Remove the four 5.7 mm screws, holding down the hard drive, using a Phillips #0 screwdriver.

  5. HP Pavilion dv7-4285dx Hard Drive Replacement: 5 단계, 이미지 1/3 HP Pavilion dv7-4285dx Hard Drive Replacement: 5 단계, 이미지 2/3 HP Pavilion dv7-4285dx Hard Drive Replacement: 5 단계, 이미지 3/3
    • Pull up carefully on tab hooking the hard drive to the mother board.

    • Remove the hard drive.

결론

To reassemble your device, follow these instructions in reverse order.

Austin Sandel

회원 가입일: 11/05/18

363 평판

안내서 3개 작성하였습니다

IUPUI, Team S1-G2, Baechle Fall 2018 IUPUI, Team S1-G2, Baechle Fall 2018 회원

IUPUI-BAECHLE-F18S1G2

3 회원들

안내서 3개 작성하였습니다

댓글 0개

댓글 쓰기

조회 통계:

24 시간 전: 2

7일 전: 2

30일 전: 6

전체 시간: 766