주요 콘텐츠로 건너뛰기

HP Pavilion g7-1365dx RAM Replacement

필요한 것

  1. HP Pavilion g7-1365dx RAM Replacement, Battery: 1 단계, 이미지 1/1
    • To prevent injury, make sure the laptop is powered off before removing the battery.

    • Flip the laptop so that it is upside down and opens away from you. This exposes the battery, it will be centered at the bottom of the laptop .

    • Push the switch above the battery towards the center of the laptop .

  2. HP Pavilion g7-1365dx RAM Replacement: 2 단계, 이미지 1/1
    • While pushing the switch, lift the battery by the side closest to the switch up and away from the laptop.

  3. HP Pavilion g7-1365dx RAM Replacement, Service Door: 3 단계, 이미지 1/2 HP Pavilion g7-1365dx RAM Replacement, Service Door: 3 단계, 이미지 2/2
    • Using a Phillips size 0 screwdriver, unscrew the 2 Phillips screws.

    • Use the opening tool around the edges of the service door to loosen it and remove it.

  4. HP Pavilion g7-1365dx RAM Replacement, RAM: 4 단계, 이미지 1/2 HP Pavilion g7-1365dx RAM Replacement, RAM: 4 단계, 이미지 2/2
    • Use your fingers to simultaneously pull apart both tabs holding the module.

    • The memory module will pop up once the tabs are pulled so that it can be removed.

  5. HP Pavilion g7-1365dx RAM Replacement: 5 단계, 이미지 1/1
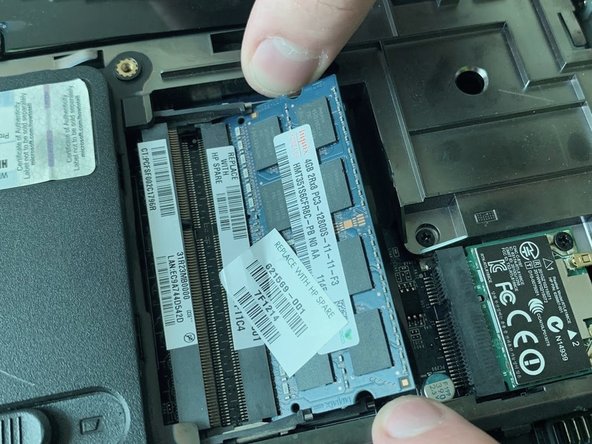
    • Directly pull out the memory module as shown.

결론

To reassemble your device, follow these instructions in reverse order.

Rafal Szmyd

회원 가입일: 03/22/19

181 평판

안내서 2개 작성하였습니다

UMass Dartmouth, Team S1-G1, Simcock Spring 2019 UMass Dartmouth, Team S1-G1, Simcock Spring 2019 회원

UMASSD-SIMCOCK-S19S1G1

4 회원들

안내서 8개 작성하였습니다

댓글 0개

댓글 쓰기

조회 통계:

24 시간 전: 1

7일 전: 4

30일 전: 7

전체 시간: 293