주요 콘텐츠로 건너뛰기

HP Pavilion x2 10-n113dx Hinge Connector Replacement

보관된 가이드
해당 안내서는 단지 역사적인 목적으로 보관됩니다. 최신 버전 안내서를 사용하여 수리 하십시오.

필요한 것

  1. HP Pavilion x2 10-n113dx Hinge Connector Replacement, Battery: 1 단계, 이미지 1/3 HP Pavilion x2 10-n113dx Hinge Connector Replacement, Battery: 1 단계, 이미지 2/3 HP Pavilion x2 10-n113dx Hinge Connector Replacement, Battery: 1 단계, 이미지 3/3
    • Before starting, please turn off your laptop.

    • Using the blue plastic opening tool or a flat bladed tool, carefully slide the blade in between the display panel and gently slide to prop open the assembly.

  2. HP Pavilion x2 10-n113dx Hinge Connector Replacement: 2 단계, 이미지 1/2 HP Pavilion x2 10-n113dx Hinge Connector Replacement: 2 단계, 이미지 2/2
    • Gently lift and remove the display panel from the assembly.

    • Remove the translucent yellow tape that covers the battery connector on the mainboard.

    • The tape will be in the way for a future step.

  3. HP Pavilion x2 10-n113dx Hinge Connector Replacement: 3 단계, 이미지 1/3 HP Pavilion x2 10-n113dx Hinge Connector Replacement: 3 단계, 이미지 2/3 HP Pavilion x2 10-n113dx Hinge Connector Replacement: 3 단계, 이미지 3/3
    • Flip up the small white colored locking flap using the tip of a spudger or your fingernail. Then the ribbon cable can be removed easily without much effort.

    • Carefully disconnect the white ribbon cable from the mainboard.

  4. HP Pavilion x2 10-n113dx Hinge Connector Replacement: 4 단계, 이미지 1/3 HP Pavilion x2 10-n113dx Hinge Connector Replacement: 4 단계, 이미지 2/3 HP Pavilion x2 10-n113dx Hinge Connector Replacement: 4 단계, 이미지 3/3
    • Carefully disconnect the battery cable from its connector on the mainboard.

  5. HP Pavilion x2 10-n113dx Hinge Connector Replacement: 5 단계, 이미지 1/3 HP Pavilion x2 10-n113dx Hinge Connector Replacement: 5 단계, 이미지 2/3 HP Pavilion x2 10-n113dx Hinge Connector Replacement: 5 단계, 이미지 3/3
    • Using the Phillips #0 screwdriver, carefully remove the 4 corner screws that hold the battery to the display panel.

    • 3 screws are 3.12 mm head, 2.40 mm length, and 1 screw is 5.85mm head, 2.5mm length.

    • Remove the battery from the device.

  6. HP Pavilion x2 10-n113dx Hinge Connector Replacement, Screen: 6 단계, 이미지 1/3 HP Pavilion x2 10-n113dx Hinge Connector Replacement, Screen: 6 단계, 이미지 2/3 HP Pavilion x2 10-n113dx Hinge Connector Replacement, Screen: 6 단계, 이미지 3/3
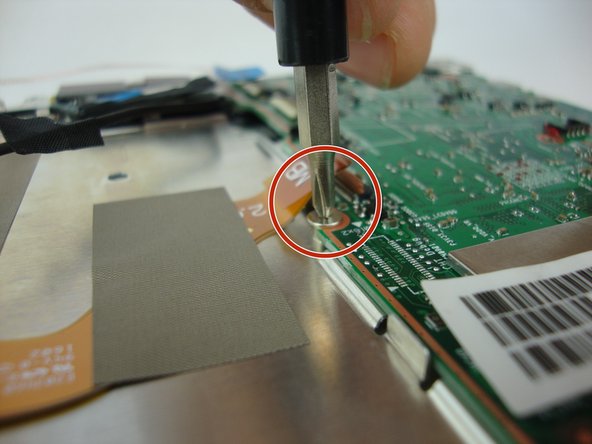
    • Using the Phillips #0 screwdriver, carefully remove the 21 screws that hold the screen to the display panel. 3.32 mm head, 3.99 mm length (RED) , 2.82 head 3.5 mm length (YELLOW), and 4.15 mm head, 2.35 mm length (BLUE).

    • 3.32 mm head, 3.99 mm length.

    • 2.82 head 3.5 mm length.

    • 4.15 mm head, 2.35 mm length.

  7. HP Pavilion x2 10-n113dx Hinge Connector Replacement: 7 단계, 이미지 1/3 HP Pavilion x2 10-n113dx Hinge Connector Replacement: 7 단계, 이미지 2/3 HP Pavilion x2 10-n113dx Hinge Connector Replacement: 7 단계, 이미지 3/3
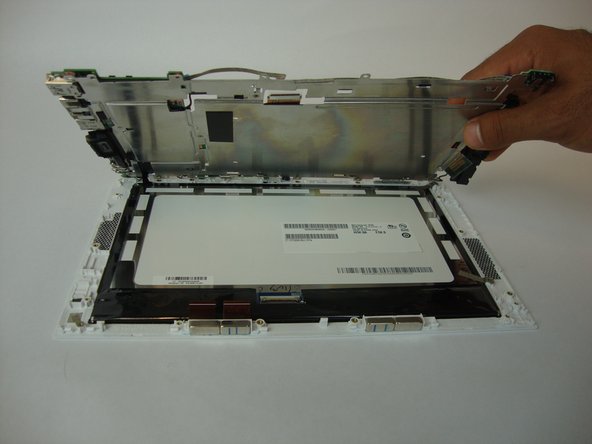
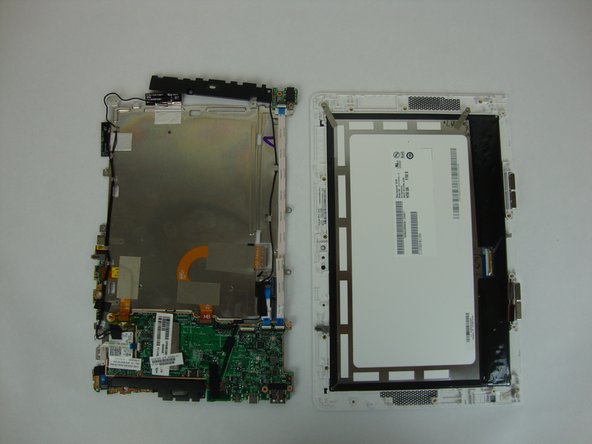
    • Very carefully lift the circuit board in order to keep everything attached. Be careful with any cables that may still be connected.

  8. HP Pavilion x2 10-n113dx Hinge Connector Replacement, Hinge connector: 8 단계, 이미지 1/2 HP Pavilion x2 10-n113dx Hinge Connector Replacement, Hinge connector: 8 단계, 이미지 2/2
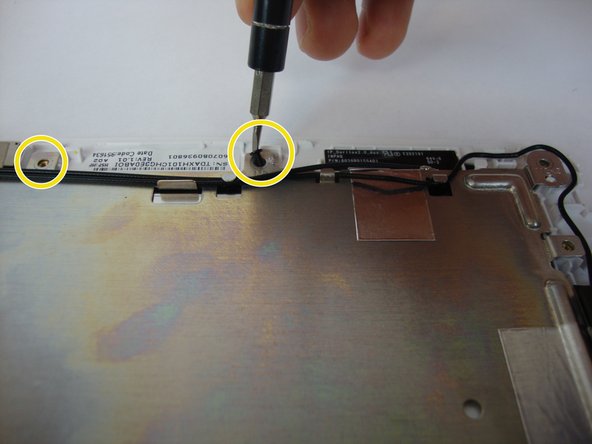
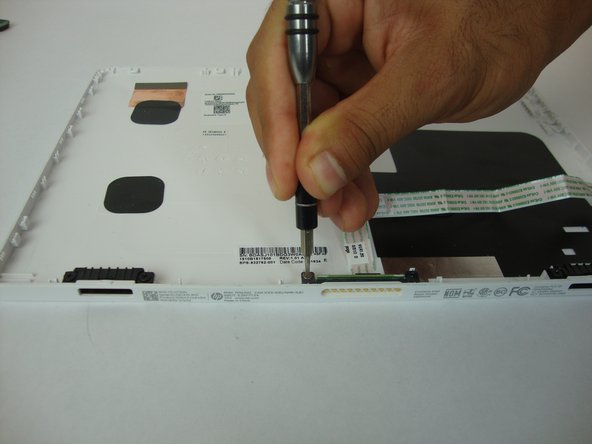
    • Use the Phillips #0 screwdriver to unscrew 2 screws 2.82 mm head 3.5 mm length from the hinge connector

  9. HP Pavilion x2 10-n113dx Hinge Connector Replacement: 9 단계, 이미지 1/2 HP Pavilion x2 10-n113dx Hinge Connector Replacement: 9 단계, 이미지 2/2
    이 단계에 사용된 도구:
    Tweezers
    $4.99
    구매
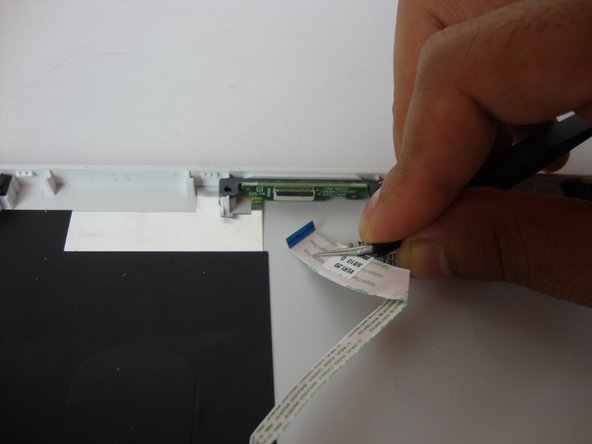
    • Use the tweezers to gently remove the white pogo board ribbon from the hinge connector.

  10. HP Pavilion x2 10-n113dx Hinge Connector Replacement: 10 단계, 이미지 1/2 HP Pavilion x2 10-n113dx Hinge Connector Replacement: 10 단계, 이미지 2/2
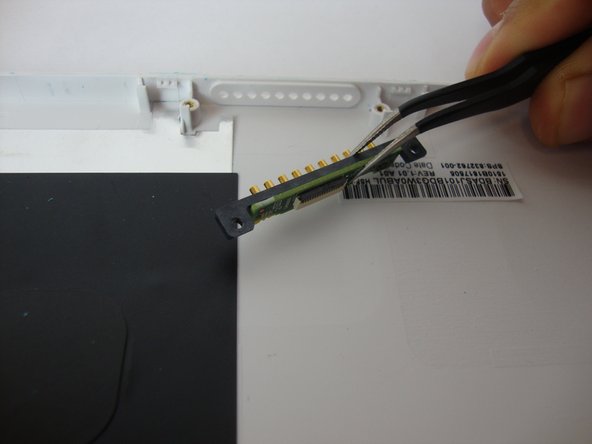
    • Gently remove the hinge connector from the display panel.

결론

To reassemble your device, follow these instructions in reverse order.

다른 한 분이 해당 안내서를 완성하였습니다.

David Zambrano

회원 가입일: 09/28/17

822 평판

안내서 5개 작성하였습니다

USF Tampa, Team S13-G4, Boczar Fall 2017 USF Tampa, Team S13-G4, Boczar Fall 2017 회원

USFT-BOCZAR-F17S13G4

4 회원들

안내서 5개 작성하였습니다

댓글 한 개

THANK YOU SO MUTCH !!! My keyboard was broken but this is just that the cable wasn’t connected ! but i have only make step 1,2,3 and 4

baptiste.r1807 - 답글

댓글 쓰기

조회 통계:

24 시간 전: 0

7일 전: 2

30일 전: 8

전체 시간: 651