소개
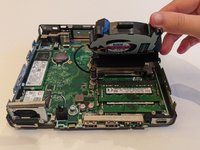
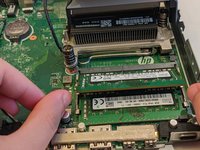
This guide will help you easily replace and/or upgrade the RAM on your HP ProDesk 400 G5 Desktop Mini PC. This repair may be needed if you have troubleshot your computer and found that the RAM is corrupted or out space. You may also want to upgrade your RAM for faster speed. Overall, it can help your computer run more quickly and smoothly. Upgrading and replacing your existing RAM is the same process.
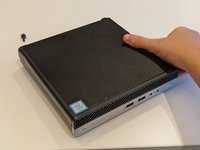
Before beginning this repair, turn off your computer and disconnect from all peripherals and the AC adapter.
필요한 것


To reassemble your device, follow these instructions in reverse order.
다른 4명이 해당 안내서를 완성하였습니다.

1가이드 댓글
I wish someone wouldcome up with a version of this guide that is the small formfactor pc as the ram is under the space whre the drives are.