이 버전에는 잘못된 편집 사항이 있을 수 있습니다. 최신 확인된 스냅샷으로 전환하십시오.
필요한 것
-
이 단계는 번역되지 않았습니다. 번역을 도와주십시오
-
Begin your replacement by using a T3 or T4 Torx screwdriver.
-
Remove the two 1.4mm x 3mm Torx Head screws at the top of the device.
-
-
이 단계는 번역되지 않았습니다. 번역을 도와주십시오
-
Locate and remove the yellow tape covering the red and white speaker wires.
-
-
이 단계는 번역되지 않았습니다. 번역을 도와주십시오
-
Using the pointed end of the spudger, push both sides of the speaker wire connector out of its base.
-
-
이 단계는 번역되지 않았습니다. 번역을 도와주십시오
-
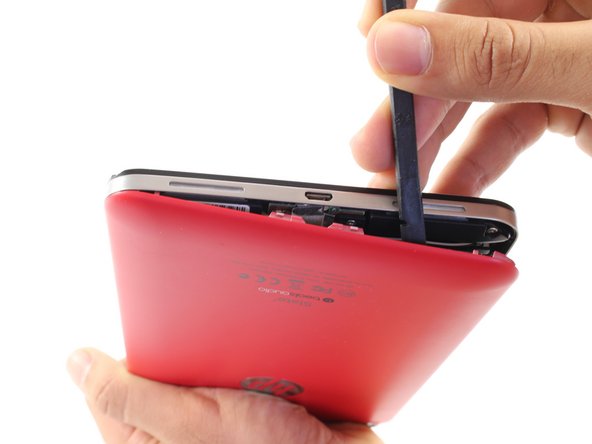
Using the flat end of the spudger, lift up the black panel covering the charging port connector.
-
Gently slide the charging port ribbon out from its housing.
-
-
-
이 단계는 번역되지 않았습니다. 번역을 도와주십시오
-
Push the white battery connector out of its housing using the pointed end of the spudger.
-
-
이 단계는 번역되지 않았습니다. 번역을 도와주십시오
-
Using the #00 Phillips Head screwdriver, remove the 5 screws holding the battery in place.
-
The four 1.75mm x 3mm silver Phillips Head screws circled in red are interchangeable.
-
The black 1.75mm x 4mm Phillips Head screw must go back to the same spot during reassembly.
-
-
이 단계는 번역되지 않았습니다. 번역을 도와주십시오
-
To free the speaker assembly, you will need a #00 Phillips Head screwdriver.
-
Remove the two 1.75mm x 3mm Phillips Head screws from the speaker assembly.
-
-
이 단계는 번역되지 않았습니다. 번역을 도와주십시오
-
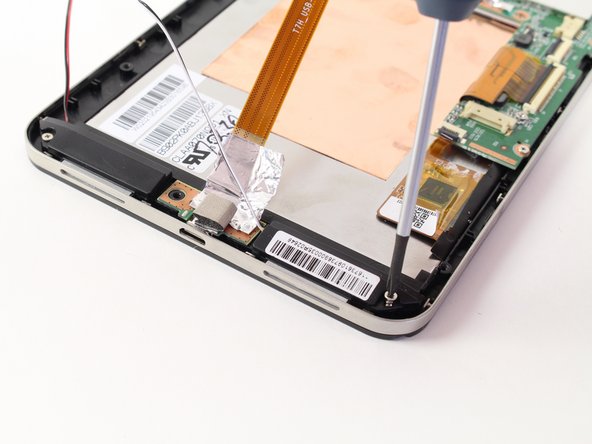
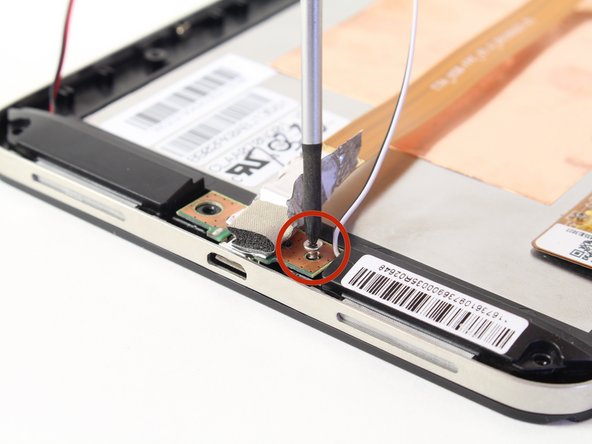
Pull back the foil overlapping the charging port to reveal another 1.75mm x 3mm Phillips Head screw.
-
Remove the screw with a #00 Phillips Head screwdriver.
-
-
이 단계는 번역되지 않았습니다. 번역을 도와주십시오
-
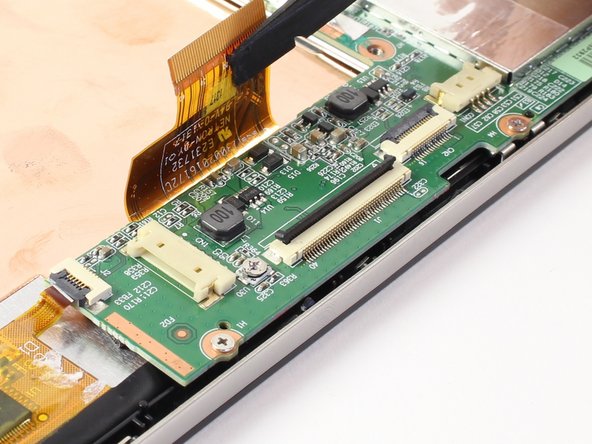
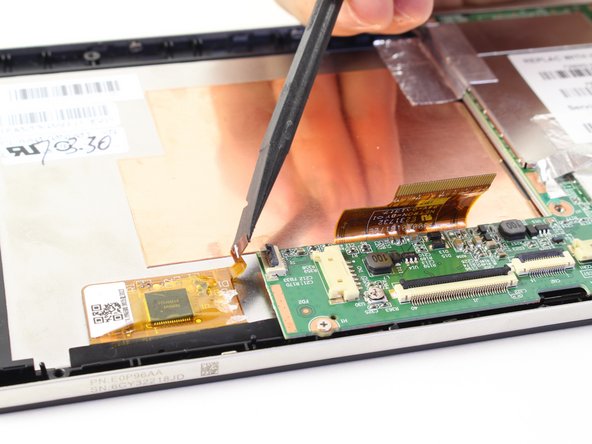
Disconnect the LCD screen ribbon by lifting up the black panel with the flat end of a spudger and sliding the gold strip out.
-
-
이 단계는 번역되지 않았습니다. 번역을 도와주십시오
-
Likewise, disconnect the square radio chip ribbon by lifting up the black panel with a spudger and sliding the gold strip out.
-
-
이 단계는 번역되지 않았습니다. 번역을 도와주십시오
-
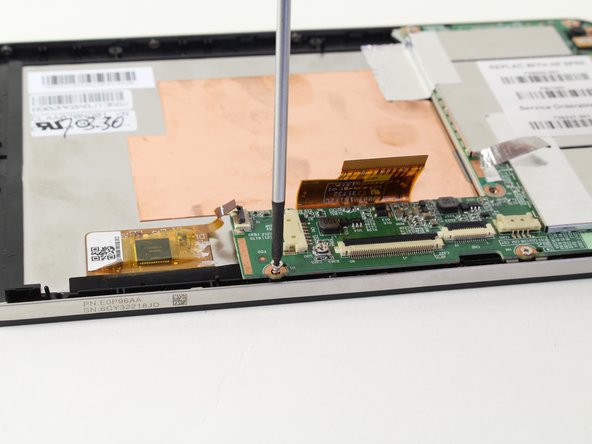
You will be using a #00 Phillips Head screwdriver to free the motherboard.
-
Remove the six 1.75mm x 3mm Phillips Head screws holding the motherboard to the screen.
-
-
이 단계는 번역되지 않았습니다. 번역을 도와주십시오
-
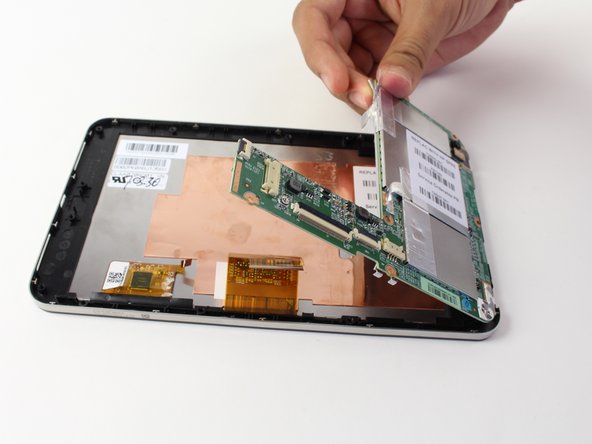
Using your hand, lift up the silver tape from the copper plate.
-
Lift the motherboard out of the device.
-
-
이 단계는 번역되지 않았습니다. 번역을 도와주십시오
-
Remove the metal band surrounding the device by lifting it up out of the placement pins. Begin at one end and work your way around.
-
-
이 단계는 번역되지 않았습니다. 번역을 도와주십시오
-
You now have access to the LCD screen.
-
You can replace the volume rocker by lifting it up and out of the device.
-


다른 14명이 해당 안내서를 완성하였습니다.

팀

Cal Poly, Team 13-30, Maness Spring 2014 Cal Poly, Team 13-30, Maness Spring 2014 회원
CPSU-MANESS-S14S13G30
3 회원들
안내서 8개 작성하였습니다