주요 콘텐츠로 건너뛰기

HP Stream 14-CB174WM Speakers Replacement

필요한 것

  1. HP Stream 14-CB174WM Speakers Replacement, Lower Case: 1 단계, 이미지 1/2 HP Stream 14-CB174WM Speakers Replacement, Lower Case: 1 단계, 이미지 2/2
    • Use an opening pick to gently pry up the edge of the rubber foot.

    • Grab the lifted edge of the foot and gently pull it away.

    • Repeat for the other rubber foot.

    • The oils on your skin can damage the adhesive on the rubber feet. Try not to touch the adhesive part of the feet with your hands.

  2. HP Stream 14-CB174WM Speakers Replacement: 2 단계, 이미지 1/2 HP Stream 14-CB174WM Speakers Replacement: 2 단계, 이미지 2/2
    • Use a Phillips screwdriver to remove the eight 6.6 mm screws that secure the lower case.

  3. HP Stream 14-CB174WM Speakers Replacement: 3 단계, 이미지 1/3 HP Stream 14-CB174WM Speakers Replacement: 3 단계, 이미지 2/3 HP Stream 14-CB174WM Speakers Replacement: 3 단계, 이미지 3/3
    • Insert an opening pick in the seam between the lower case and chassis.

    • Slide the opening pick around the perimeter, prying every couple of centimeters as you go.

    • You will hear "snaps" of the lower case retaining clips releasing.

    • Continue prying around the entire perimeter until the lower case fully releases.

    • Lift off the lower case.

  4. HP Stream 14-CB174WM Speakers Replacement, Battery: 4 단계, 이미지 1/3 HP Stream 14-CB174WM Speakers Replacement, Battery: 4 단계, 이미지 2/3 HP Stream 14-CB174WM Speakers Replacement, Battery: 4 단계, 이미지 3/3
    • Remove the following Phillips screws that secure the battery:

    • Three 2.9 mm

    • Two 6.8 mm

    • Be sure to keep different screw types separate from one another throughout the battery removal process.

  5. HP Stream 14-CB174WM Speakers Replacement: 5 단계, 이미지 1/2 HP Stream 14-CB174WM Speakers Replacement: 5 단계, 이미지 2/2
    • Use your fingers or the point of a spudger to slowly “wiggle” the battery connector directly out of its socket.

    • Do not pull on the wires.

  6. HP Stream 14-CB174WM Speakers Replacement: 6 단계, 이미지 1/2 HP Stream 14-CB174WM Speakers Replacement: 6 단계, 이미지 2/2
    • Gently unseat the battery connector wire out from under the two plastic tabs.

  7. HP Stream 14-CB174WM Speakers Replacement: 7 단계, 이미지 1/2 HP Stream 14-CB174WM Speakers Replacement: 7 단계, 이미지 2/2
    • Lift the battery up and out of the laptop.

    • The battery should lift out with very little effort. If the battery cannot easily be lifted out of the laptop chassis, check to see if you missed any screws.

  8. HP Stream 14-CB174WM Speakers Replacement, Speakers: 8 단계, 이미지 1/2 HP Stream 14-CB174WM Speakers Replacement, Speakers: 8 단계, 이미지 2/2
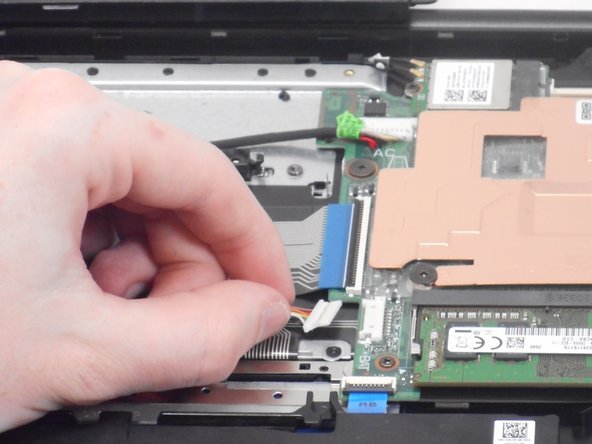
    • Use a Phillips screwdriver to remove the four 6.6 mm screws that secure the speakers.

  9. HP Stream 14-CB174WM Speakers Replacement: 9 단계, 이미지 1/1
    • Use two plastic opening tools to "walk" the speaker connector directly out of its motherboard port.

  10. HP Stream 14-CB174WM Speakers Replacement: 10 단계, 이미지 1/2 HP Stream 14-CB174WM Speakers Replacement: 10 단계, 이미지 2/2
    • Wedge an opening tool underneath one corner of the speakers and prop that side of the speaker upwards.

    • Repeat this for both sides of the speakers.

    • You will hear cracking sounds during this process. This is normal.

  11. HP Stream 14-CB174WM Speakers Replacement: 11 단계, 이미지 1/1
    • Lift the speakers up and out of the laptop chassis.

    • The speakers should be loose and easily come out of the laptop chassis with little to no force. If it does not, repeat the previous step.

결론

To reassemble your device, follow these instructions in reverse order.

Daniel Pickett

회원 가입일: 02/15/24

578 평판

안내서 4개 작성하였습니다

University of Memphis, Team 2-1, Sneed Spring 2024 University of Memphis, Team 2-1, Sneed Spring 2024 회원

UM-SNEED-S24S2G1

4 회원들

안내서 5개 작성하였습니다

댓글 0개

댓글 쓰기

조회 통계:

24 시간 전: 1

7일 전: 1

30일 전: 11

전체 시간: 48