소개
If your computer is running slower than usual, you may be overreaching its RAM capabilities. Here is some more information about what may be slowing down your computer. If you decide you need to replace or upgrade your RAM cards, follow this replacement guide!
필요한 것
-
-
Flip the laptop over.
-
Slide the lever with the battery symbol beside it firmly until the battery pops out.
-
Remove the battery from the laptop.
-
-
-
Slide the right lever firmly to the right.
-
Slide the cover towards yourself to remove it.
-
-
-
Remove the two 16mm screws with a Phillips #0 screwdriver.
Note that it is not necessary to completely remove these screws. They are meant to be 'captive' and not removed completely. If you unscrew them to that 'first thread' so they are loose and floppy, they are no longer holding the keyboard in place and it is safe to continue to the next step.
-
-
-
-
Flip the laptop over so the keyboard is visible.
-
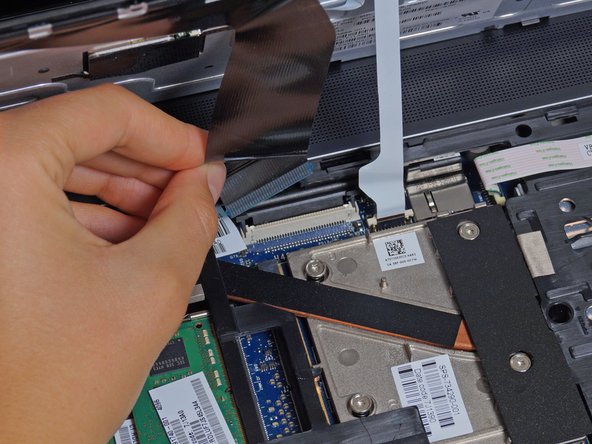
Insert the spudger under the left side of the keyboard.
-
Carefully raise the side of the keyboard and firmly pull the left corner of the keyboard until it pops up.
-
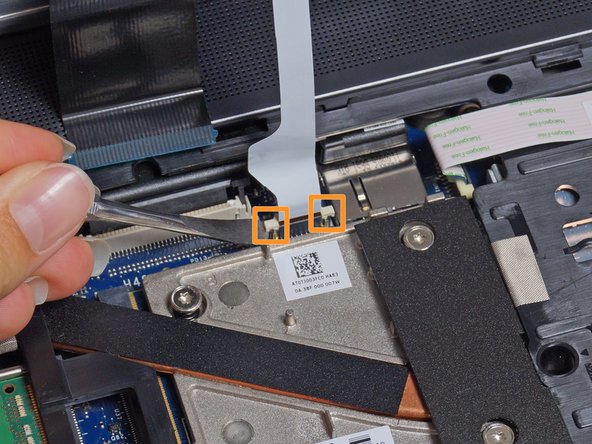
Run your fingers under the edges of the keyboard along the top edge of the keyboard, from the top left to the top right, to separate it from the remaining clips.
-
Carefully slide the keyboard up toward the screen and out of the case.
Please keep in mind that the keyboard comes with a metal plate. If you managed to pry one of the plastic rivets out of the keyboard, you've damaged the keyboard...
(I should have read the comments about taking the optical drive out first, haha...)
Brandon Lu - 답글
-
-
-
Pull the clips away from the RAM card and the module will pop out.
-
Lift the module out and repeat for the other RAM card.
Please add the step(s) to remove the keyboard before Step 4!
Also: ensure that the BIOS is updated before enlarging RAM capacity.
-
-
-
After removing the keyboard , flip the laptop over and remove the other two modules.
You’ll need to remove the keyboard to access the ram on the other side of the logic board. The procedure is here: HP ZBook 15 Keyboard Replacement
-


To reassemble your device, follow these instructions in reverse order.
To reassemble your device, follow these instructions in reverse order.
다른 4명이 해당 안내서를 완성하였습니다.
팀

Cal Poly, Team 8-43, Amido Winter 2015 Cal Poly, Team 8-43, Amido Winter 2015 회원
CPSU-AMIDO-W15S8G43
4 회원들
안내서 15개 작성하였습니다
댓글 4개
There is no cradle or however you name it under the keyboard, pls advise.
Step 4 should be “Remove the keyboard” and the present step 4 therby becomes step 5.
Note that this guide applies to quad-core models (Core i7-4800MQ and up). If you have a dual-core model (Core i7-4600M or less), you don’t have the two extra RAM slots under the keyboard, you only have the two slots from under the service door/cover.
So yeah, save yourself the hastle of removing the keyboard, and keep this in mind if you’re planning to go above 16GB of RAM.