소개
Hello everyone, in this guide I`ll be showing you how to open the laptop in order to change the thermal paste, as well as to possibly upgrade the RAM or the SSD inside.
필요한 것
-
-
Remove the 4 screws and slide the panel latch.
-
Slide the back panel to remove it.
-
-
-
Remove all the screws that hold the plastic protective cover and also remove the battery.
-
Remove the 3 screws below the battery and also unplug the connectors of the LAN and WAN modules if you have.
-
After all of the above has been done, you can lift the plastic protective cover. Be sure to do it carefully!
-
-
-
-
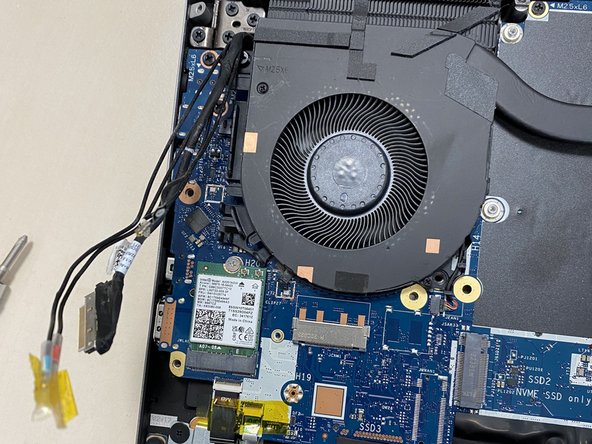
Unplug the display and fan cables and route them away.
-
Unscrew the fans and CPU pipes.
-
-
-
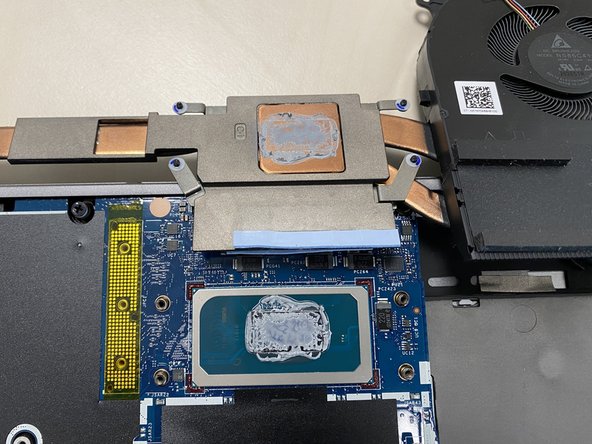
Clean the old thermal paste both from the cooler and the CPU. It is best to use isopropyl alcohol and cotton swabs or paper towel, but be careful not to go too hard on the CPU.
-
Don`t use too much thermal paste, just enough to cover some portion of the pad. If you have a spreader, use it. The thermal paste will apply evenly after you tighten the heatsink.
-
-
-
Once you opened the back cover, it is a good idea to upgrade the RAM or the SSD if you want.
-
This laptops has 4 DIMM slots. 2 in the back and 2 behind the keyboard.
-
Also 2 m.2 SSD slots: 1 in the back and 1 behind the keyboard. As well as a full size laptop SSD in the back, behind the battery.
-
It is also recommended to use compressed air to remove any dust in the laptop and the fans.
-


To reassemble your device, follow these instructions in reverse order.
To reassemble your device, follow these instructions in reverse order.
다른 한 분이 해당 안내서를 완성하였습니다.
