필요한 것
-
-
Flip the laptop bottom-upwards, and remove the two screws securing the bottom cover, and pull the bottom cover off.
-
-
-
Simply pull the hard drive upwards and out, there are no screws. Be sure to disconnect the connector from the board.
-
-
-
In order to remove the motherboard, you must remove the wireless card. Unscrew the single silver Philips screw holding the wireless card, pop each antenna off its connector with your fingernails, pull the wireless card out, and set it aside.
-
-
-
Remove the nine long Philips screws.
-
Remove the four medium-length screws from where the bottom cover was.
-
Remove the two short screws from where the hard drive was.
-
-
-
-
Simply slide out the optical drive, the screw holding it was removed in the last step.
-
-
-
Push the five keyboard clips towards the screen using a flathead screwdriver.
-
Once the keyboard is loose, release the locking connector for the keyboard, and pull the cable out.
-
-
-
Flip the laptop up, back to normal position, and open the screen.
-
Remove all cables indicated red in the picture. (There's no need to deal with the orange-marked one just yet.)
-
-
-
Remove all marked cables from the motherboard.
-
Also remove the single marked blue-painted screw.
-
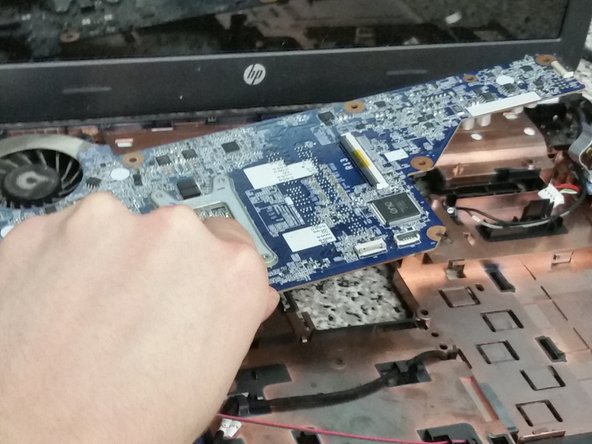
The motherboard can now be lifted upwards.
-
-
-
Pull upwards on the fan wires to remove the connector from the motherboard.
-
Remove the four screws from around the CPU socket.
-
At this point, you're done removing the heatsink/fan assembly from the motherboard. Continue if you want to remove dust from the heatsink, otherwise you may stop here.
-
-
-
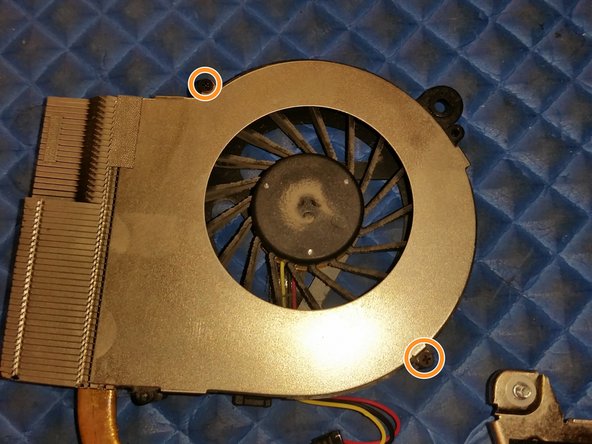
Bend the metal clip outwards.
-
Get out the Philips #0 bit, and remove the two very small Philips screws from the assembly.
-
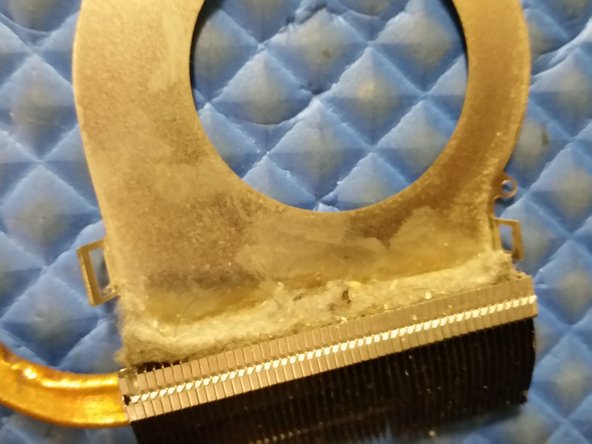
Wiggle the fan out, separating it from the rest of the assembly.
-
You're done! Check out that dust in this g4 in the third picture.
-


To reassemble your device, follow these instructions in reverse order.
To reassemble your device, follow these instructions in reverse order.
다른 4명이 해당 안내서를 완성하였습니다.
