주요 콘텐츠로 건너뛰기

이 안내서에는 최근 변경 사항이 더 있습니다. 최신 비검증 버전으로 전환하십시오.

HP iPAQ H2200 faceplate replacement

필요한 것

  1. HP iPAQ H2200 faceplate replacement, Battery: 1 단계, 이미지 1/1
    • Press and slide the battery cover tab to remove battery cover.

  2. HP iPAQ H2200 faceplate replacement: 2 단계, 이미지 1/2 HP iPAQ H2200 faceplate replacement: 2 단계, 이미지 2/2
    • Pull on the black tab to lift the battery out of the battery compartment.

  3. HP iPAQ H2200 faceplate replacement, Main Board: 3 단계, 이미지 1/1
    • Remove the stylus by sliding it out of the slot.

  4. HP iPAQ H2200 faceplate replacement: 4 단계, 이미지 1/1
    • Remove the CF card by sliding it out of the slot at the top of the device.

  5. HP iPAQ H2200 faceplate replacement: 5 단계, 이미지 1/1
    • Press down and push the black side strips toward the top of the device to remove them.

  6. HP iPAQ H2200 faceplate replacement: 6 단계, 이미지 1/3 HP iPAQ H2200 faceplate replacement: 6 단계, 이미지 2/3 HP iPAQ H2200 faceplate replacement: 6 단계, 이미지 3/3
    • Using the T5 Torx screwdriver, remove all six screws on the back and all screws on each side of the device.

  7. HP iPAQ H2200 faceplate replacement: 7 단계, 이미지 1/2 HP iPAQ H2200 faceplate replacement: 7 단계, 이미지 2/2
    • Remove the back faceplate by pushing and loosening the 4 side slots (2 on each side).

  8. HP iPAQ H2200 faceplate replacement: 8 단계, 이미지 1/1
    • Open the LCD connector, where the orange strip attaches to the main board.

  9. HP iPAQ H2200 faceplate replacement: 9 단계, 이미지 1/1
    • Carefully remove the orange LCD strip from the connector.

  10. HP iPAQ H2200 faceplate replacement: 10 단계, 이미지 1/1
    • Unscrew the 2 screws located at each top corner of the main board.

  11. HP iPAQ H2200 faceplate replacement: 11 단계, 이미지 1/1
    • Remove the main board by pushing outward on the two tabs located on each side near the bottom of the device.

  12. HP iPAQ H2200 faceplate replacement, LCD Screen: 12 단계, 이미지 1/1
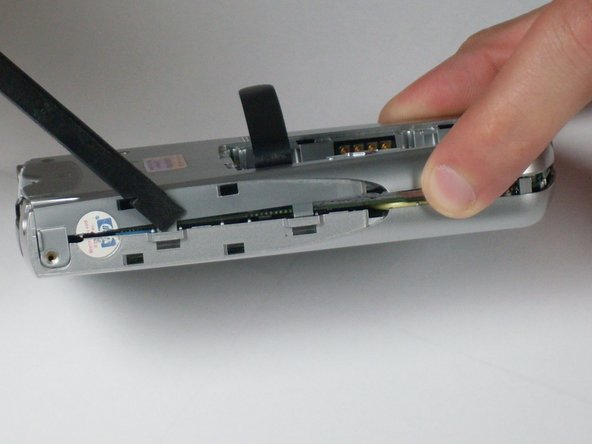
    • Unscrew the two bottom screws on LCD screen that were previously located under the main board.

  13. HP iPAQ H2200 faceplate replacement: 13 단계, 이미지 1/2 HP iPAQ H2200 faceplate replacement: 13 단계, 이미지 2/2
    • Press on side tabs to loosen and remove the LCD screen.

  14. HP iPAQ H2200 faceplate replacement, Faceplates: 14 단계, 이미지 1/1
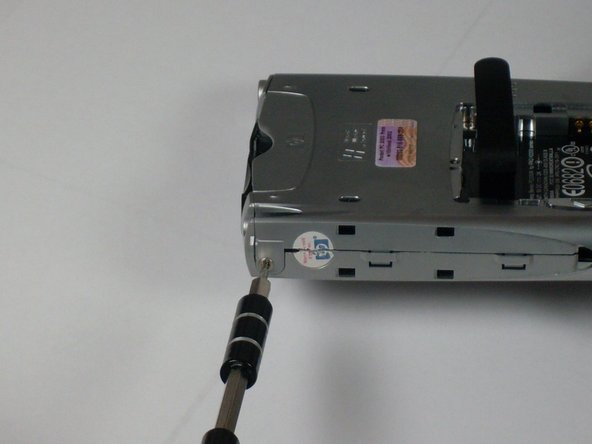
    • Remove the faceplate by unscrewing the green screw located on the top right of the front faceplate.

결론

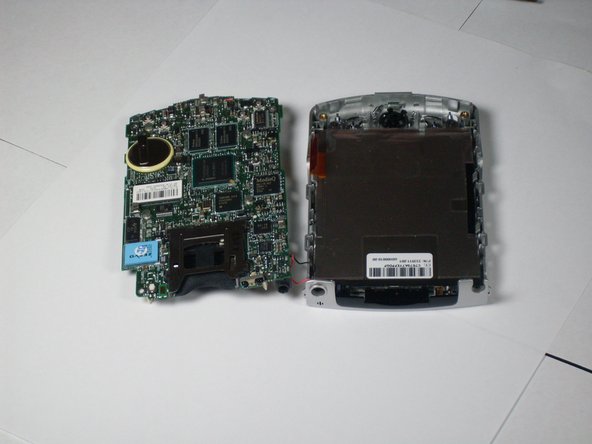
To reassemble your device, follow these instructions in reverse order.

Tyler Andrews

회원 가입일: 01/13/10

209 평판

안내서 5개 작성하였습니다

Cal Poly, Team 4-12, Forte Winter 2010 Cal Poly, Team 4-12, Forte Winter 2010 회원

CPSU-FORTE-W10S4G12

3 회원들

안내서 5개 작성하였습니다

댓글 0개

댓글 쓰기

조회 통계:

24 시간 전: 0

7일 전: 2

30일 전: 5

전체 시간: 1,498