이 버전에는 잘못된 편집 사항이 있을 수 있습니다. 최신 확인된 스냅샷으로 전환하십시오.
필요한 것
-
이 단계는 번역되지 않았습니다. 번역을 도와주십시오
-
Pull on the black tab to lift the battery out of the battery compartment.
-
-
이 단계는 번역되지 않았습니다. 번역을 도와주십시오
-
Remove the CF card by sliding it out of the slot at the top of the device.
-
-
이 단계는 번역되지 않았습니다. 번역을 도와주십시오
-
Press down and push the black side strips toward the top of the device to remove them.
-
-
-
이 단계는 번역되지 않았습니다. 번역을 도와주십시오
-
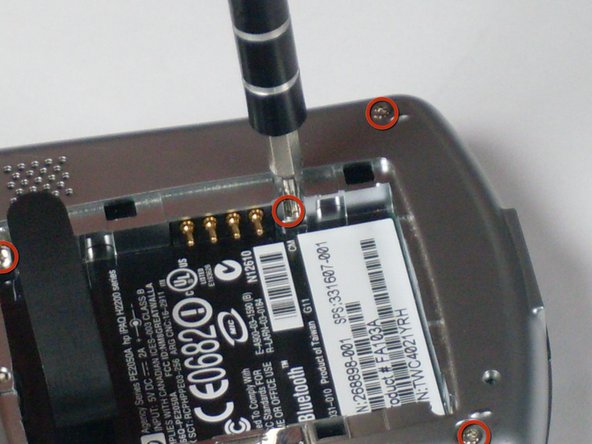
Using the T5 Torx screwdriver, remove all six screws on the back and all screws on each side of the device.
-
-
이 단계는 번역되지 않았습니다. 번역을 도와주십시오
-
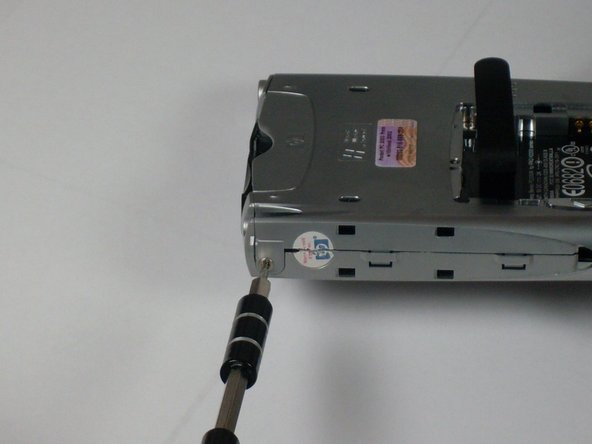
Remove the back faceplate by pushing and loosening the 4 side slots (2 on each side).
-
-
이 단계는 번역되지 않았습니다. 번역을 도와주십시오
-
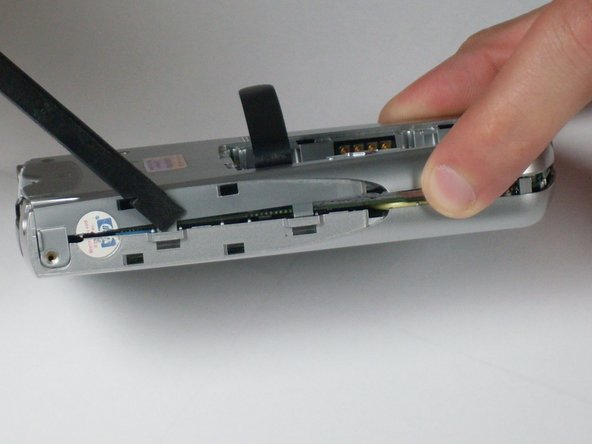
Open the LCD connector, where the orange strip attaches to the main board.
-
-
이 단계는 번역되지 않았습니다. 번역을 도와주십시오
-
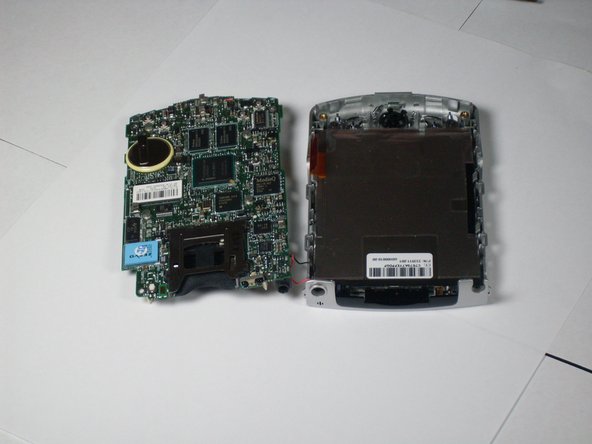
Remove the main board by pushing outward on the two tabs located on each side near the bottom of the device.
-
-
이 단계는 번역되지 않았습니다. 번역을 도와주십시오
-
Unscrew the two bottom screws on LCD screen that were previously located under the main board.
-
-
이 단계는 번역되지 않았습니다. 번역을 도와주십시오
-
Remove the faceplate by unscrewing the green screw located on the top right of the front faceplate.
-


팀

Cal Poly, Team 4-12, Forte Winter 2010 Cal Poly, Team 4-12, Forte Winter 2010 회원
CPSU-FORTE-W10S4G12
3 회원들
안내서 5개 작성하였습니다