소개
The computer case houses all the internal components of the computer that are essential to its operations. Certain cases may need thumb screw removal or maybe design so that they are tedious to be taken apart, however the HP rp5700 is designed to be easily disassembled.
Tip: If it doesn't come loose, wiggle it gently.
-
-
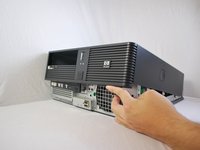
Make sure the computer is unplugged.
-
Make sure all auxiliary cords are disconnected from the desktop. If not, remove them using your hands.
-
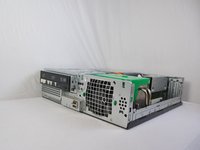
Set the desktop down horizontally with the front side facing you.
-
-


To reassemble your device, follow these instructions in reverse order.
To reassemble your device, follow these instructions in reverse order.
다른 11명이 해당 안내서를 완성하였습니다.
팀

Cal Poly, Team 6-23, Maness Winter 2014 Cal Poly, Team 6-23, Maness Winter 2014 회원
CPSU-MANESS-W14S6G23
4 회원들
안내서 9개를 작성함
댓글 한 개
Thank you! It's easy once you know how to do it, but I was stumped trying to figure it out.
John Evans - 답글