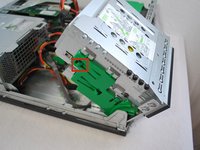
주요 콘텐츠로 건너뛰기

HP rp5700 Optical Disk Drive (CD Drive) Replacement

  1. HP rp5700 Optical Disk Drive (CD Drive) Replacement, Cover Removal: 1 단계, 이미지 1/1
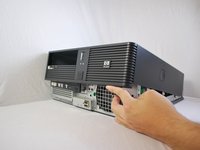
    • Make sure the computer is unplugged.

    • Be sure to touch any metal surface with your hand to discharge any static electricity that might have built up.

    • Make sure all auxiliary cords are disconnected from the desktop. If not, remove them using your hands.

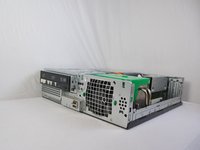
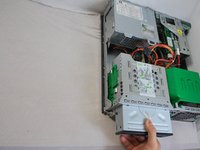
    • Set the desktop down horizontally with the front side facing you.

  2. HP rp5700 Optical Disk Drive (CD Drive) Replacement: 2 단계, 이미지 1/2 HP rp5700 Optical Disk Drive (CD Drive) Replacement: 2 단계, 이미지 2/2
    • Hold the desktop with two hands by grasping both sides of the desktop.

    • Press the buttons on both sides using your index fingers.

  3. HP rp5700 Optical Disk Drive (CD Drive) Replacement: 3 단계, 이미지 1/3 HP rp5700 Optical Disk Drive (CD Drive) Replacement: 3 단계, 이미지 2/3 HP rp5700 Optical Disk Drive (CD Drive) Replacement: 3 단계, 이미지 3/3
    • Slide the top cover about an inch forward using your thumb to push it towards you.

    • Make sure that the bottom is still secured by both hands.

    • Lay the desktop back on the table and pull the case forward as far as it can go.

    • Lift the cover up and off.

  4. HP rp5700 Optical Disk Drive (CD Drive) Replacement, Optical Disk Drive (CD Drive): 4 단계, 이미지 1/2 HP rp5700 Optical Disk Drive (CD Drive) Replacement, Optical Disk Drive (CD Drive): 4 단계, 이미지 2/2
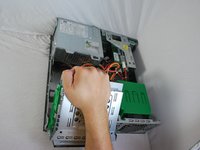
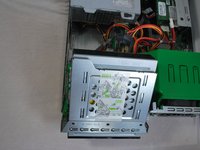
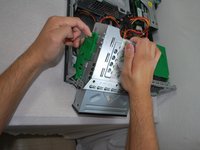
    • Using your hand, grip the Optical Drive and lift it up into a 45 degree angle.

  5. HP rp5700 Optical Disk Drive (CD Drive) Replacement: 5 단계, 이미지 1/1
    • Disconnect the power supply cord and the SATA cord using your hands to pull them out.

  6. HP rp5700 Optical Disk Drive (CD Drive) Replacement: 6 단계, 이미지 1/2 HP rp5700 Optical Disk Drive (CD Drive) Replacement: 6 단계, 이미지 2/2
    • Using your left index finger, lift the upper green tab found on the left side of the green piece.

    • Using your opposite hand, use your fingers to push the back of the drive forward and slide it out away from the desktop.

  7. HP rp5700 Optical Disk Drive (CD Drive) Replacement: 7 단계, 이미지 1/2 HP rp5700 Optical Disk Drive (CD Drive) Replacement: 7 단계, 이미지 2/2
    • Grasp the optical drive with your right or left hand and pull the drive out towards you.

    • It will help if you lay the device flat in order to remove the drive.

결론

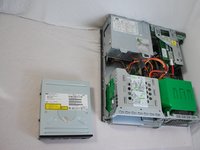
To reassemble your device, follow these instructions in reverse order.

다른 한 분이 해당 안내서를 완성하였습니다.

Alyssa Briones

회원 가입일: 01/21/14

1,699 평판

안내서 9개 작성하였습니다

Cal Poly, Team 6-23, Maness Winter 2014 Cal Poly, Team 6-23, Maness Winter 2014 회원

CPSU-MANESS-W14S6G23

4 회원들

안내서 9개 작성하였습니다

댓글 0개

댓글 쓰기

조회 통계:

24 시간 전: 1

7일 전: 1

30일 전: 2

전체 시간: 761