주요 콘텐츠로 건너뛰기

HP w2216h Video Port Board Replacement

필요한 것

  1. HP w2216h Video Port Board Replacement, Screen: 1 단계, 이미지 1/1
    • 'Make sure you are grounded, the power supply is not connected and you are wearing safety goggles.

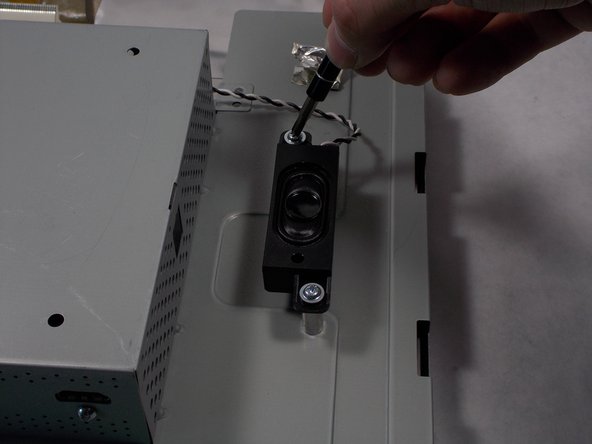
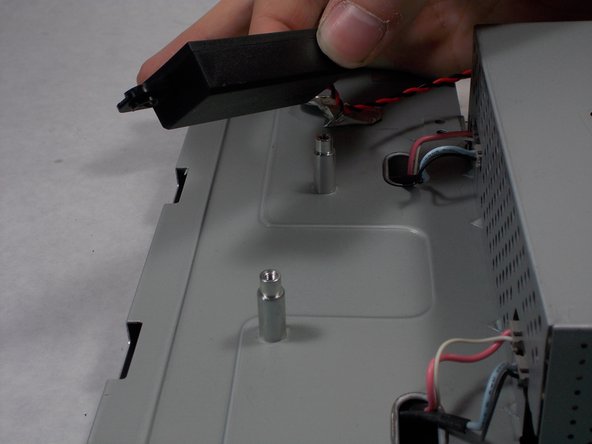
    • Use the Philips #000 screwdriver to remove the 4 round12mm screws on the back panel.

  2. HP w2216h Video Port Board Replacement: 2 단계, 이미지 1/2 HP w2216h Video Port Board Replacement: 2 단계, 이미지 2/2
    • Using a Philips #000 head remove 2 flat 12 mm screws above stand mounting bracket.

    • Using a PH1 Philips head with the 150 mm flexible extension remove 1 Philips head screw under the stand mounting bracket.

    • Stand will easily pull off.

  3. HP w2216h Video Port Board Replacement: 3 단계, 이미지 1/3 HP w2216h Video Port Board Replacement: 3 단계, 이미지 2/3 HP w2216h Video Port Board Replacement: 3 단계, 이미지 3/3
    • Do not put the metal spudger between the metal and the glass. It needs to go under the bezel and above the metal.

    • Turn monitor so that the screen is facing you.

    • Pry the black bezel from above the metal by placing your metal spudger between the bezel and the metal and twisting the tool slightly.

    • The best places to pry are in the lower left and lower right corners of the black bezel.

  4. HP w2216h Video Port Board Replacement: 4 단계, 이미지 1/3 HP w2216h Video Port Board Replacement: 4 단계, 이미지 2/3 HP w2216h Video Port Board Replacement: 4 단계, 이미지 3/3
    • Be careful of the wires attaching the power button and the control buttons. Show extreme caution to ensure the button is not damaged.

    • Lift the screen assembly from the plastic housing from the corners.

  5. HP w2216h Video Port Board Replacement: 5 단계, 이미지 1/2 HP w2216h Video Port Board Replacement: 5 단계, 이미지 2/2
    • Remove the 4 connectors from the left side of the monitor on the back.

  6. HP w2216h Video Port Board Replacement: 6 단계, 이미지 1/3 HP w2216h Video Port Board Replacement: 6 단계, 이미지 2/3 HP w2216h Video Port Board Replacement: 6 단계, 이미지 3/3
    • Lift the gray tape of the top of the monitor to expose the ribbon cable.

    • Remove the ribbon cable by sliding the connector towards the center of the screen assembly.

    • Lift the reflective tape next to the gray tape.

  7. HP w2216h Video Port Board Replacement: 7 단계, 이미지 1/3 HP w2216h Video Port Board Replacement: 7 단계, 이미지 2/3 HP w2216h Video Port Board Replacement: 7 단계, 이미지 3/3
    • Remove the 4 PH1 8mm Philips round screws on the outer edge of the screen's assembly.

    • Lift the screen from the screen assembly.

  8. HP w2216h Video Port Board Replacement, Speakers: 8 단계, 이미지 1/1
    • Remove the tape holding each speakers wire to the screen assembly.

  9. HP w2216h Video Port Board Replacement: 9 단계, 이미지 1/2 HP w2216h Video Port Board Replacement: 9 단계, 이미지 2/2
    • Remove the two 8mm Philips #000 head screws on each speaker.

  10. HP w2216h Video Port Board Replacement: 10 단계, 이미지 1/2 HP w2216h Video Port Board Replacement: 10 단계, 이미지 2/2
    • Remove the speakers by lifting them vertically from the screen assembly.

  11. HP w2216h Video Port Board Replacement: 11 단계, 이미지 1/1
    • Remove the cables that connects the speakers to the signal output board.

  12. HP w2216h Video Port Board Replacement, Video Port Board: 12 단계, 이미지 1/1
    • Remove the single Phillips #000 head screw above the HDMI port .

  13. HP w2216h Video Port Board Replacement: 13 단계, 이미지 1/1
    • Remove the two 2.5mm hex screws on either side of the VGA port

  14. HP w2216h Video Port Board Replacement: 14 단계, 이미지 1/3 HP w2216h Video Port Board Replacement: 14 단계, 이미지 2/3 HP w2216h Video Port Board Replacement: 14 단계, 이미지 3/3
    • Remove all 8mm Phillips #000 screws holding the board in place.

    • Remove the ribbon cable towards the bottom of the board by sliding the cable away from the board.

    • Remove both wire busses still on the board.

  15. HP w2216h Video Port Board Replacement: 15 단계, 이미지 1/1
    • Lift the board out of the screen assembly by first pulling the board away from the wall where the ports mount, then upward.

결론

To reassemble your device, follow these instructions in reverse order.

Branflakes222

회원 가입일: 03/25/16

396 평판

안내서 2개 작성하였습니다

UMass Dartmouth, Team 1-1, Miles Spring 2016 UMass Dartmouth, Team 1-1, Miles Spring 2016 회원

UMASSD-MILES-S16S1G1

4 회원들

안내서 12개 작성하였습니다

댓글 0개

댓글 쓰기

조회 통계:

24 시간 전: 0

7일 전: 0

30일 전: 4

전체 시간: 446