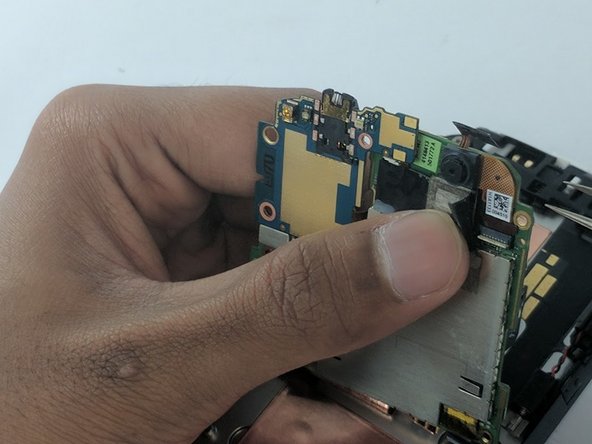
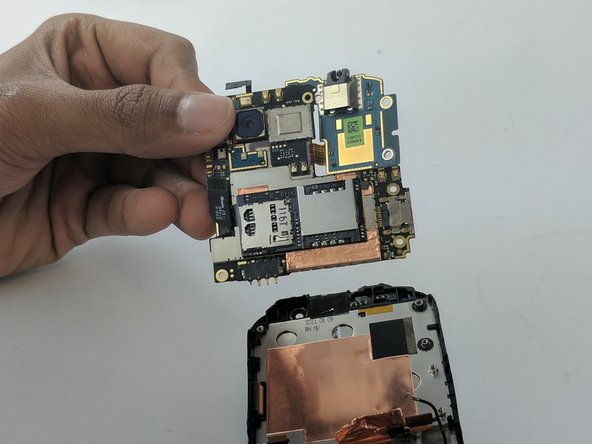
주요 콘텐츠로 건너뛰기

HTC Amaze Motherboard Replacement

필요한 것

  1. HTC Amaze Motherboard Replacement, Battery: 1 단계, 이미지 1/2 HTC Amaze Motherboard Replacement, Battery: 1 단계, 이미지 2/2
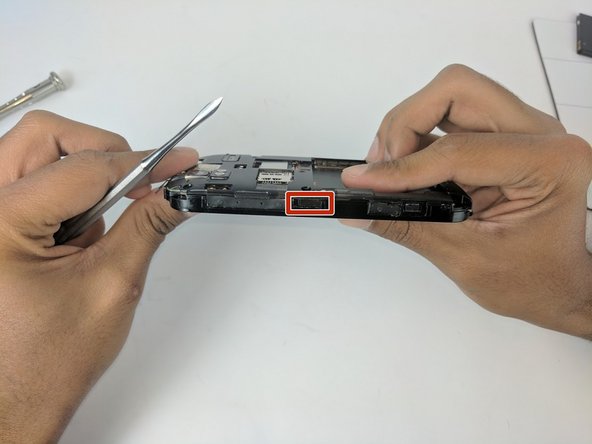
    • Gently press the Release Button located at the bottom of the phone in order to remove the back panel of the device.

  2. HTC Amaze Motherboard Replacement: 2 단계, 이미지 1/1
    • Once you locate the battery, look for a notch below it.

    • Gently insert your fingernails into the notch.

    • Lift the battery out of its recess.

  3. HTC Amaze Motherboard Replacement, HTC Amaze Back Panel Disassembly: 3 단계, 이미지 1/3 HTC Amaze Motherboard Replacement, HTC Amaze Back Panel Disassembly: 3 단계, 이미지 2/3 HTC Amaze Motherboard Replacement, HTC Amaze Back Panel Disassembly: 3 단계, 이미지 3/3
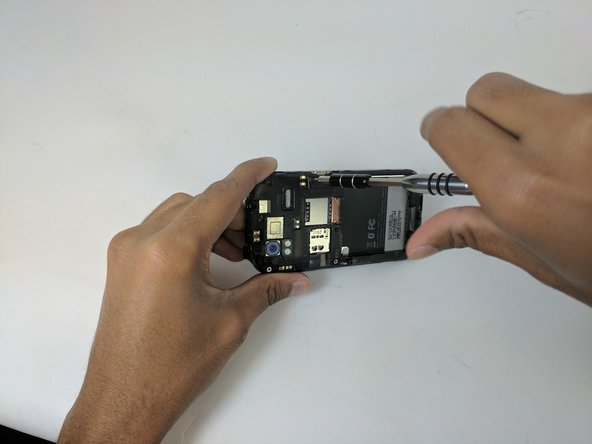
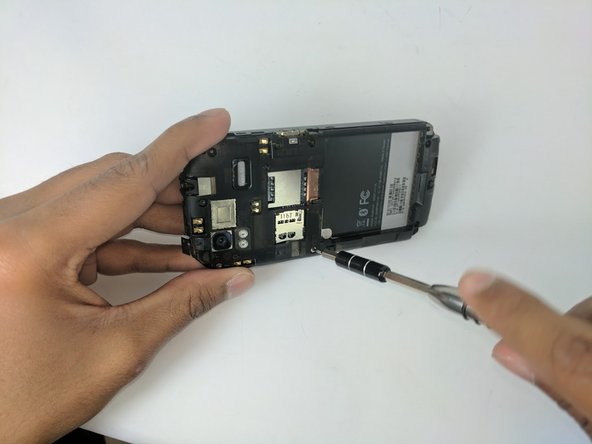
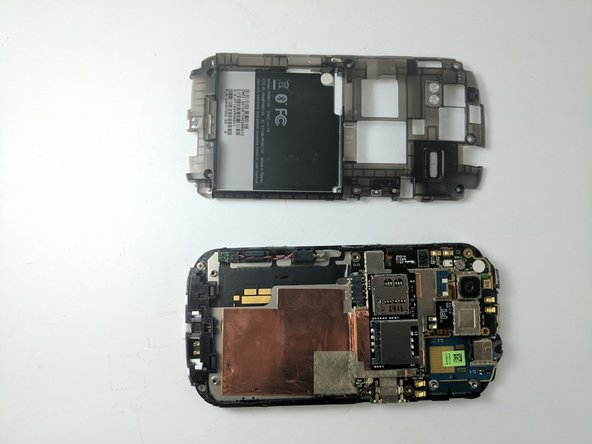
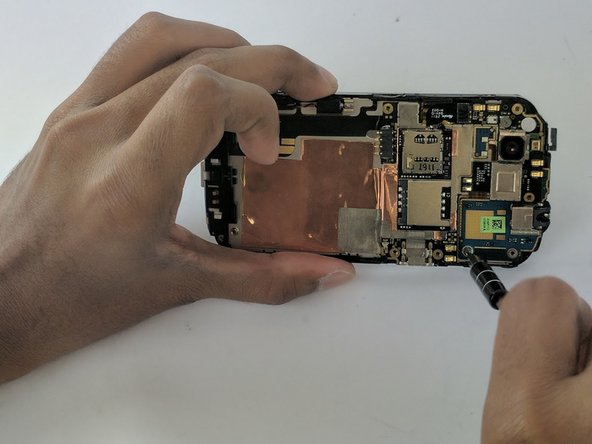
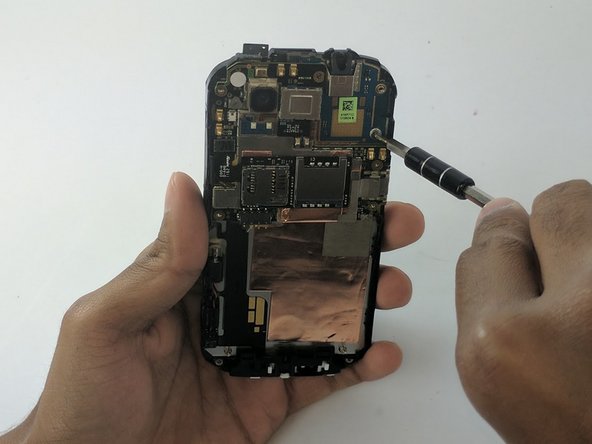
    • Use the Torx T5 screwdriver to remove the 7 Torx Screws (3mm) attached to the back housing of the device.

    • One of the Screws may have a tape attached to it that says void. Removing this screw will void the devices warranty.

  4. HTC Amaze Motherboard Replacement: 4 단계, 이미지 1/3 HTC Amaze Motherboard Replacement: 4 단계, 이미지 2/3 HTC Amaze Motherboard Replacement: 4 단계, 이미지 3/3
    • Proceed to remove the back housing by using the spudger to gently unclip each clip holding the back housing in place and then lift the outer edges of the back housing

    • If you're having trouble opening the back try using the spudger to gently pry all around the panel before you attempt to remove it.

  5. HTC Amaze Motherboard Replacement: 5 단계, 이미지 1/2 HTC Amaze Motherboard Replacement: 5 단계, 이미지 2/2
    • Now simply remove the back panel by gently pulling. This will make it easier to access the devices internal components.

  6. HTC Amaze Motherboard Replacement, Motherboard: 6 단계, 이미지 1/3 HTC Amaze Motherboard Replacement, Motherboard: 6 단계, 이미지 2/3 HTC Amaze Motherboard Replacement, Motherboard: 6 단계, 이미지 3/3
    • Locate and remove the Phillips J000 screw.

  7. HTC Amaze Motherboard Replacement: 7 단계, 이미지 1/2 HTC Amaze Motherboard Replacement: 7 단계, 이미지 2/2
    • Remove the power supply from the motherboard by gently pulling the end of the black wire with the precision tweezers.

  8. HTC Amaze Motherboard Replacement: 8 단계, 이미지 1/3 HTC Amaze Motherboard Replacement: 8 단계, 이미지 2/3 HTC Amaze Motherboard Replacement: 8 단계, 이미지 3/3
    • First, gently lift the black strip by pulling. It will take a little force and then it will disconnect.

    • Next remove the yellow mylar tape using the precision tweezers.

  9. HTC Amaze Motherboard Replacement: 9 단계, 이미지 1/3 HTC Amaze Motherboard Replacement: 9 단계, 이미지 2/3 HTC Amaze Motherboard Replacement: 9 단계, 이미지 3/3
    • Remove the jawbone connector that was under the mylar tape by gently pulling with the precision tweezers.

    • Now gently pull the motherboard away from its housing. You'll now have access to the bottom side of the motherboard.

  10. HTC Amaze Motherboard Replacement: 10 단계, 이미지 1/3 HTC Amaze Motherboard Replacement: 10 단계, 이미지 2/3 HTC Amaze Motherboard Replacement: 10 단계, 이미지 3/3
    • Locate a second jawbone connector covered by mylar tape at the bottom of the back of the motherboard.

    • Remove the tape by pulling gently with the precision tweezers.

    • Remove the jawbone connector with the precision tweezers.

  11. HTC Amaze Motherboard Replacement: 11 단계, 이미지 1/2 HTC Amaze Motherboard Replacement: 11 단계, 이미지 2/2
    • Carefully pull the motherboard out of its recess.

결론

To reassemble your device, follow these instructions in reverse order.

다른 2명이 해당 안내서를 완성하였습니다.

Akshat Shah

회원 가입일: 09/26/16

368 평판

안내서 3개 작성하였습니다

USF Tampa, Team 16-3, Eyestone Fall 2016 USF Tampa, Team 16-3, Eyestone Fall 2016 회원

USFT-EYESTONE-F16S16G3

2 회원들

안내서 10개 작성하였습니다

댓글 0개

댓글 쓰기

조회 통계:

24 시간 전: 0

7일 전: 0

30일 전: 5

전체 시간: 520