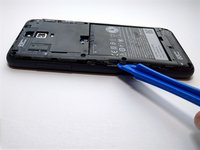
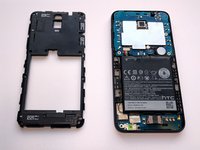
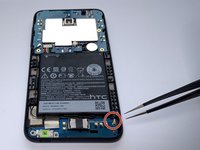
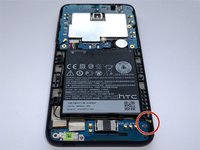
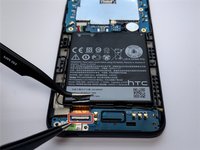
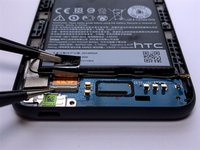
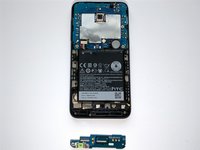
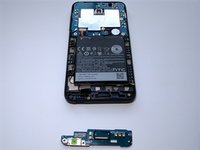
주요 콘텐츠로 건너뛰기

HTC Desire 610 Daughterboard Replacement

필요한 것

  1. HTC Desire 610 Daughterboard Replacement, Daughterboard: 1 단계, 이미지 1개 중 1개
    • Open the SD card slot.

  2. HTC Desire 610 Daughterboard Replacement: 2 단계, 이미지 3개 중 1개 HTC Desire 610 Daughterboard Replacement: 2 단계, 이미지 3개 중 2개 HTC Desire 610 Daughterboard Replacement: 2 단계, 이미지 3개 중 3개
    • Using plastic opening tool, take off the back cover of the phone.

  3. HTC Desire 610 Daughterboard Replacement: 3 단계, 이미지 1개 중 1개
    • Using Phillips #000 Screwdriver, remove the two 2.5mm phillips head screws.

  4. HTC Desire 610 Daughterboard Replacement: 4 단계, 이미지 1개 중 1개
    • Using Torx T5 Screwdriver, remove the four 5mm silver torx head screws.

  5. HTC Desire 610 Daughterboard Replacement: 5 단계, 이미지 1개 중 1개
    • Using Torx T5 Screwdriver, remove the four 4mm black torx screws

  6. HTC Desire 610 Daughterboard Replacement: 6 단계, 이미지 2개 중 1개 HTC Desire 610 Daughterboard Replacement: 6 단계, 이미지 2개 중 2개
    • Using plastic opening tool, remove the black plastic circuit cover.

  7. HTC Desire 610 Daughterboard Replacement: 7 단계, 이미지 1개 중 1개
    • Using Torx T5 Screwdriver, remove the 4mm black torx screw.

  8. HTC Desire 610 Daughterboard Replacement: 8 단계, 이미지 2개 중 1개 HTC Desire 610 Daughterboard Replacement: 8 단계, 이미지 2개 중 2개
    이 단계에 사용된 도구:
    Tweezers
    $4.99
    • Using Tweezers, disconnect antenna wire.

  9. HTC Desire 610 Daughterboard Replacement: 9 단계, 이미지 3개 중 1개 HTC Desire 610 Daughterboard Replacement: 9 단계, 이미지 3개 중 2개 HTC Desire 610 Daughterboard Replacement: 9 단계, 이미지 3개 중 3개
    • Using Tweezers, remove loud speaker that is being held by small adhesive.

    • When putting loud speaker back on, the prongs sticking up should be on the side closer to the top of the phone.

  10. HTC Desire 610 Daughterboard Replacement: 10 단계, 이미지 2개 중 1개 HTC Desire 610 Daughterboard Replacement: 10 단계, 이미지 2개 중 2개
    • Using Tweezers, peel back gray adhesive.

  11. HTC Desire 610 Daughterboard Replacement: 11 단계, 이미지 2개 중 1개 HTC Desire 610 Daughterboard Replacement: 11 단계, 이미지 2개 중 2개
    • Using Tweezers, flip the white strip upward so it sits 90°.

  12. HTC Desire 610 Daughterboard Replacement: 12 단계, 이미지 3개 중 1개 HTC Desire 610 Daughterboard Replacement: 12 단계, 이미지 3개 중 2개 HTC Desire 610 Daughterboard Replacement: 12 단계, 이미지 3개 중 3개
    • Using plastic opening tool, pry up green plate and pull outward.

    • Daughterboard is off. Get new daughterboard and reverse steps.

결론

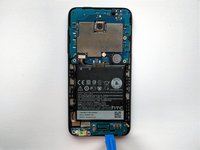
To reassemble your device, follow these instructions in reverse order.

다른 2명이 해당 안내서를 완성하였습니다.

작성자

3다른 기여자 명과 함께

Austin Phelps

회원 가입일: 01/31/16

194 평판

안내서 1개를 작성함

댓글 0개

댓글 쓰기

조회 통계:

지난 24시간: 0

지난 7일: 17

지난 30일: 19

전체 시간: 1,697