주요 콘텐츠로 건너뛰기

HTC Desire V Motherboard Replacement

필요한 것

  1. HTC Desire V Motherboard Replacement, Battery: 1 단계, 이미지 1/3 HTC Desire V Motherboard Replacement, Battery: 1 단계, 이미지 2/3 HTC Desire V Motherboard Replacement, Battery: 1 단계, 이미지 3/3
    • Gently pry back cover away from phone.

    • If you are having difficulty you may need to use a Spudger or plastic opener.

  2. HTC Desire V Motherboard Replacement: 2 단계, 이미지 1/3 HTC Desire V Motherboard Replacement: 2 단계, 이미지 2/3 HTC Desire V Motherboard Replacement: 2 단계, 이미지 3/3
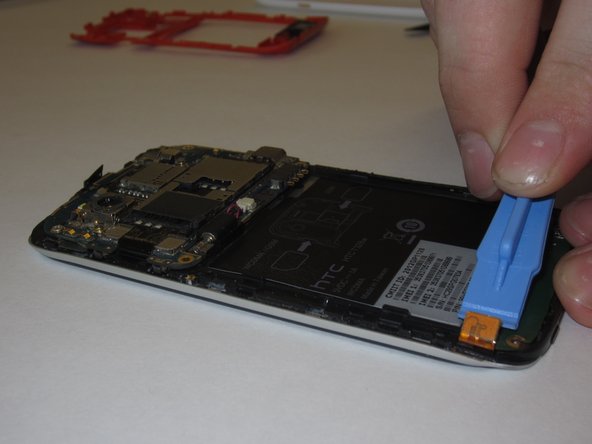
    • Lever the battery out from the bottom end first.

    • Do not bend or puncture the battery.

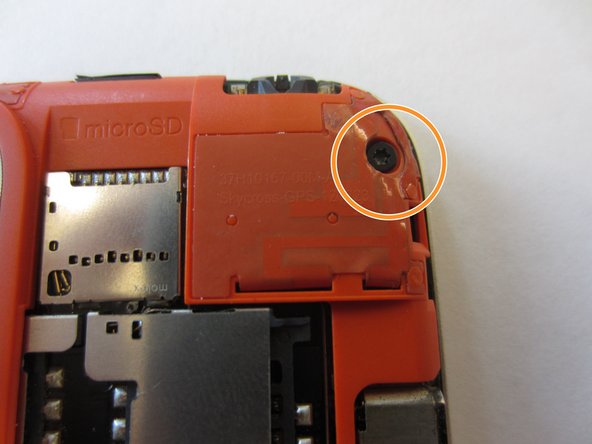
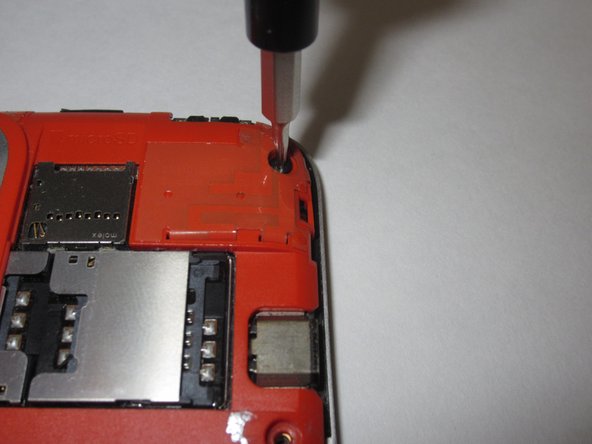
  3. HTC Desire V Motherboard Replacement, Midframe: 3 단계, 이미지 1/3 HTC Desire V Motherboard Replacement, Midframe: 3 단계, 이미지 2/3 HTC Desire V Motherboard Replacement, Midframe: 3 단계, 이미지 3/3
    • Use a Torx T5 screwdriver to unscrew and remove five 3.0 mm screws from the rear frame.

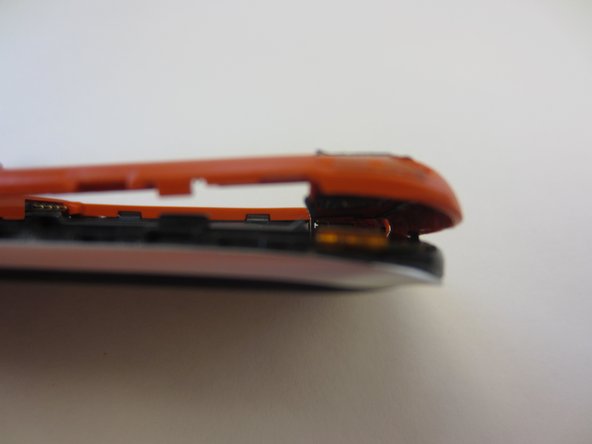
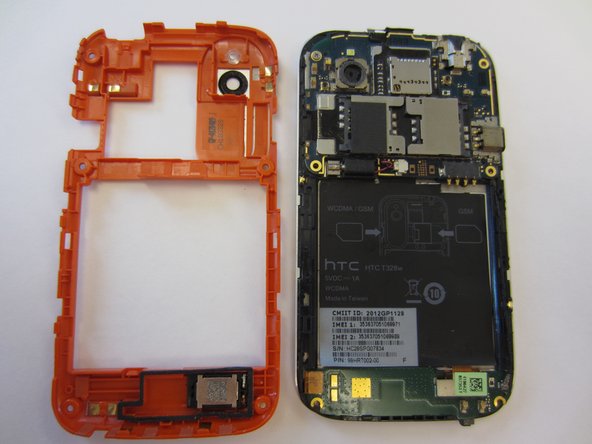
  4. HTC Desire V Motherboard Replacement: 4 단계, 이미지 1/3 HTC Desire V Motherboard Replacement: 4 단계, 이미지 2/3 HTC Desire V Motherboard Replacement: 4 단계, 이미지 3/3
    • Use an opening tool or a spudger to gently remove the rear frame.

  5. HTC Desire V Motherboard Replacement, Button Assembly: 5 단계, 이미지 1/2 HTC Desire V Motherboard Replacement, Button Assembly: 5 단계, 이미지 2/2
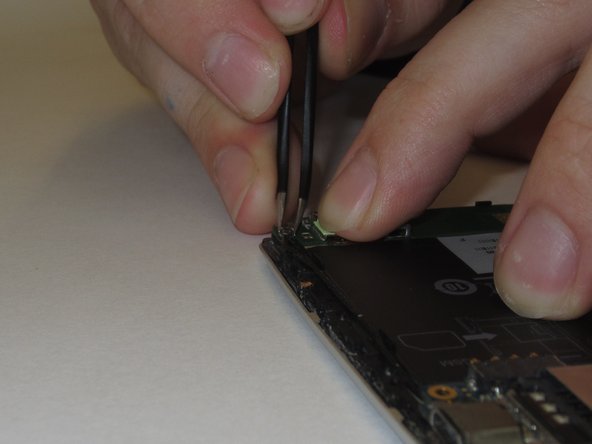
    • Remove the connector on left side of the Navigation board by unplugging/prying the orange ribbon.

  6. HTC Desire V Motherboard Replacement: 6 단계, 이미지 1/2 HTC Desire V Motherboard Replacement: 6 단계, 이미지 2/2
    • Gently unplug and remove aerial cable (black antenna) from bottom plug.

  7. HTC Desire V Motherboard Replacement: 7 단계, 이미지 1/2 HTC Desire V Motherboard Replacement: 7 단계, 이미지 2/2
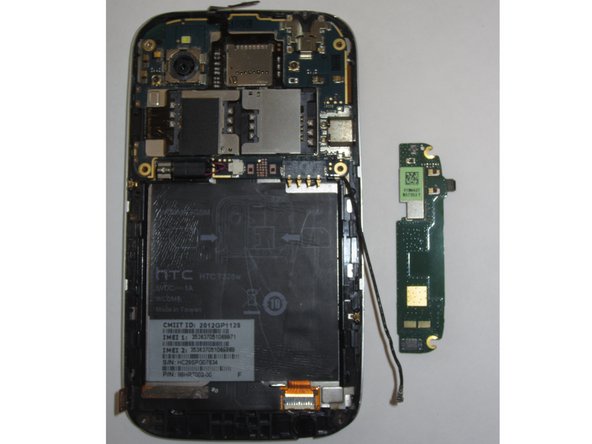
    • Nav Board will be stuck down by glue.

    • Pull gently from the right end of the board, being careful of its flexibility.

  8. HTC Desire V Motherboard Replacement, Vibration Motor: 8 단계, 이미지 1/2 HTC Desire V Motherboard Replacement, Vibration Motor: 8 단계, 이미지 2/2
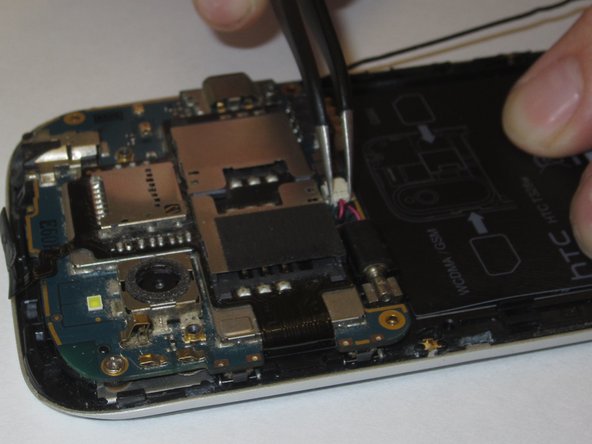
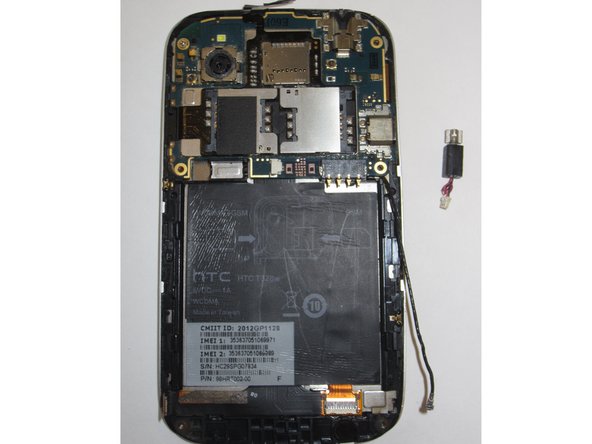
    • Unplug the vibration motor shown from the white plug on the motherboard.

    • You will probably need tweezers to do this.

  9. HTC Desire V Motherboard Replacement: 9 단계, 이미지 1/2 HTC Desire V Motherboard Replacement: 9 단계, 이미지 2/2
    • Gently remove the motor from its housing in the phone’s chassis.

    • The easiest way to do this is to lever the motor out by its rotating end using the tweezers.

  10. HTC Desire V Motherboard Replacement, Motherboard Assembly: 10 단계, 이미지 1/2 HTC Desire V Motherboard Replacement, Motherboard Assembly: 10 단계, 이미지 2/2
    • Remove the black information sticker if this is the first time opening the handset.

  11. HTC Desire V Motherboard Replacement: 11 단계, 이미지 1/3 HTC Desire V Motherboard Replacement: 11 단계, 이미지 2/3 HTC Desire V Motherboard Replacement: 11 단계, 이미지 3/3
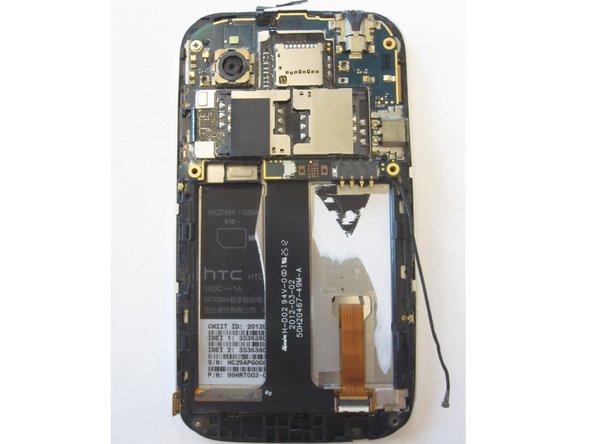
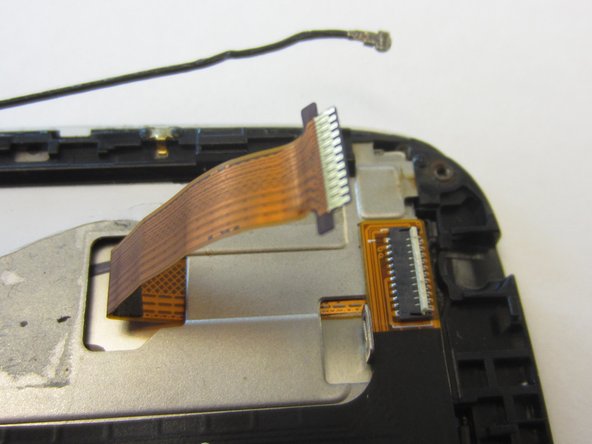
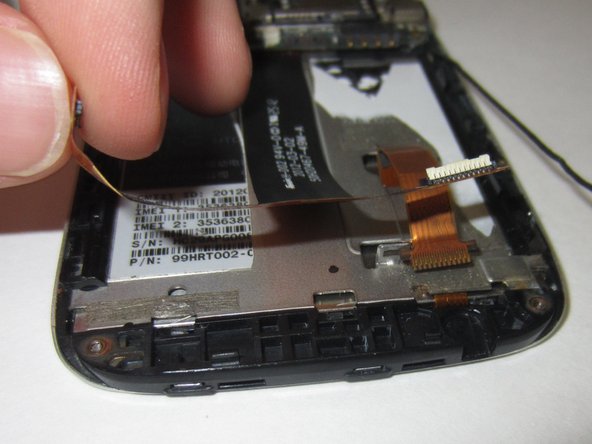
    • You should now see a black ribbon cable, which was connected at the left to the Nav board, and on the right, to a gold ribbon cable which goes to the screen.

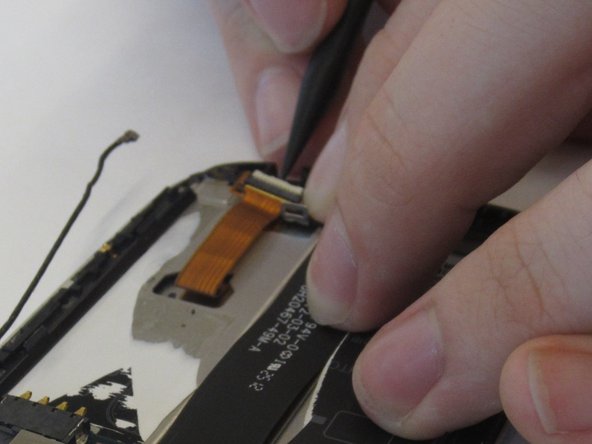
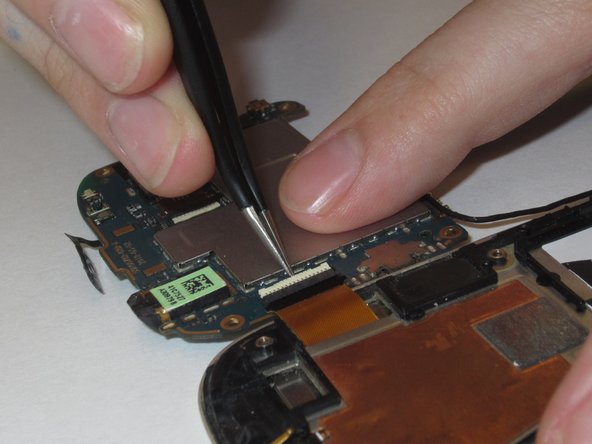
    • Unlock the gold ribbon cable connecting screen to logic board by lifting the locking tab at the back of the socket.

    • For this you may wish to use a spudger or tweezers.

  12. HTC Desire V Motherboard Replacement: 12 단계, 이미지 1/2 HTC Desire V Motherboard Replacement: 12 단계, 이미지 2/2
    • Disconnect gold ribbon cable connecting screen to logic board by pulling cable out gently.

  13. HTC Desire V Motherboard Replacement: 13 단계, 이미지 1/3 HTC Desire V Motherboard Replacement: 13 단계, 이미지 2/3 HTC Desire V Motherboard Replacement: 13 단계, 이미지 3/3
    • Gently unstick black ribbon cable from the chassis.

  14. HTC Desire V Motherboard Replacement: 14 단계, 이미지 1/2 HTC Desire V Motherboard Replacement: 14 단계, 이미지 2/2
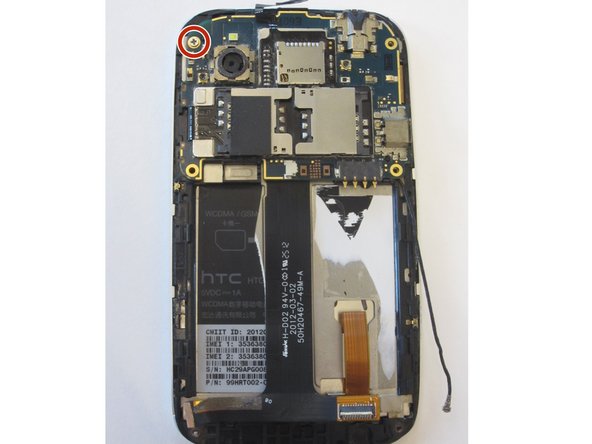
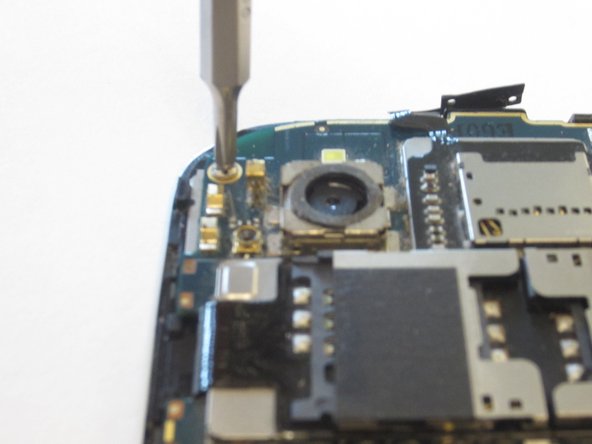
    • Unscrew the 2mm silver screw from top left.

    • Use a Phillips PH00 Screwdriver for this.

  15. HTC Desire V Motherboard Replacement: 15 단계, 이미지 1/2 HTC Desire V Motherboard Replacement: 15 단계, 이미지 2/2
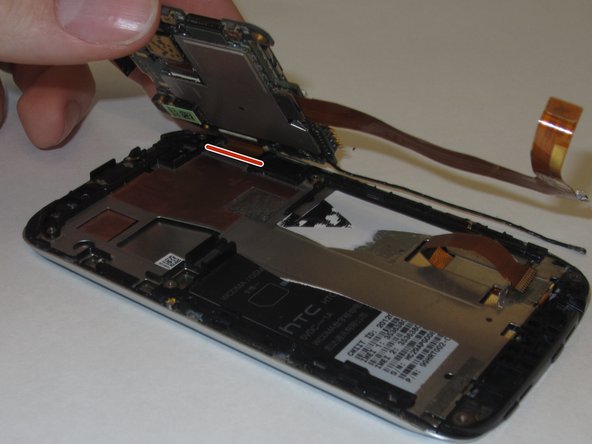
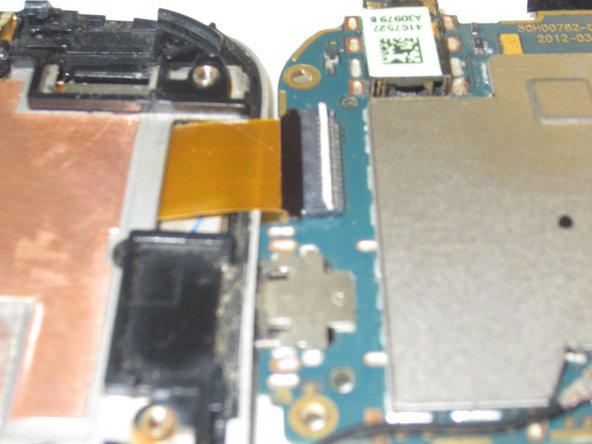
    • Gently pry logic board from the casing by lifting the left side up, as if there was a hinge on the right, folding it over the right edge where you will see a gold/orange ribbon cable.

  16. HTC Desire V Motherboard Replacement: 16 단계, 이미지 1/3 HTC Desire V Motherboard Replacement: 16 단계, 이미지 2/3 HTC Desire V Motherboard Replacement: 16 단계, 이미지 3/3
    • Remove the gold ribbon cable by lifting tab at the back of the socket, using a spudger or tweezers.

  17. HTC Desire V Motherboard Replacement: 17 단계, 이미지 1/2 HTC Desire V Motherboard Replacement: 17 단계, 이미지 2/2
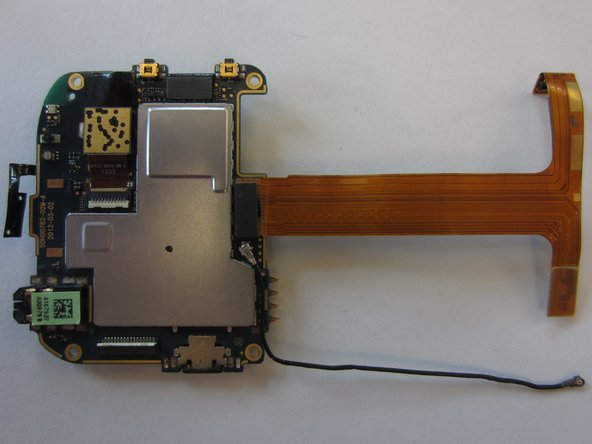
    • Gently pull the logic board to the right and it will disconnect from the chassis.

결론

To reassemble your device, follow these instructions in reverse order.

다른 한 분이 해당 안내서를 완성하였습니다.

William McCusker

회원 가입일: 01/29/15

1,096 평판

안내서 9개 작성하였습니다

Clemson, Team 14-3, Shirley Winter 2015 Clemson, Team 14-3, Shirley Winter 2015 회원

CLEM-SHIRLEY-W15S14G3

6 회원들

안내서 18개 작성하였습니다

댓글 0개

댓글 쓰기

조회 통계:

24 시간 전: 0

7일 전: 0

30일 전: 0

전체 시간: 259