이 버전에는 잘못된 편집 사항이 있을 수 있습니다. 최신 확인된 스냅샷으로 전환하십시오.
필요한 것
-
이 단계는 번역되지 않았습니다. 번역을 도와주십시오
-
Carefully pull the rear cover from the back of the phone.
-
Place a finger beneath the small lip on the left side of the battery.
-
-
이 단계는 번역되지 않았습니다. 번역을 도와주십시오
-
Lay the phone down on it's screen.
-
Lift up on the lip and pull the battery from the phone.
-
-
-
이 단계는 번역되지 않았습니다. 번역을 도와주십시오
-
Insert the flat end of a spudger between the midframe and the display.
-
Slide the spudger along the seam between the frame and the display.
-
Using the spudger for leverage, carefully pry the midframe away from the display assembly.
-
As it releases, pull the midframe away from the phone.
-
-
이 단계는 번역되지 않았습니다. 번역을 도와주십시오
-
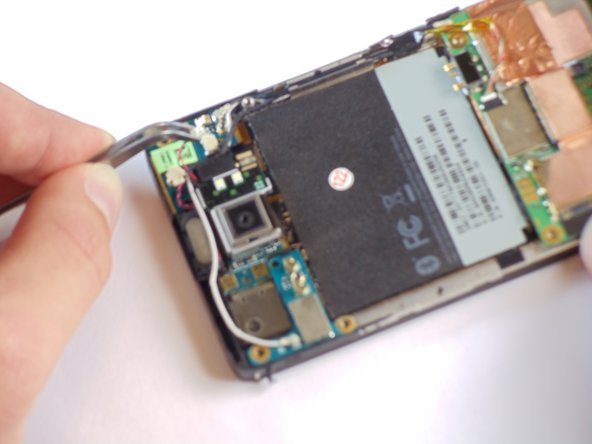
Set the phone down on its screen.
-
Using tweezers, unplug the small vibrator connector from its socket on the motherboard.
-


다른 한 분이 해당 안내서를 완성하였습니다.
팀

Cal Poly, Team 24-55, Amido Spring 2011 Cal Poly, Team 24-55, Amido Spring 2011 회원
CPSU-AMIDO-S11S24G55
5 회원들
안내서 16개 작성하였습니다