주요 콘텐츠로 건너뛰기

HTC One V Vibrator Replacement

필요한 것

  1. HTC One V Vibrator Replacement, Disassembling HTC ONE V Bottom Assembly: 1 단계, 이미지 1/3 HTC One V Vibrator Replacement, Disassembling HTC ONE V Bottom Assembly: 1 단계, 이미지 2/3 HTC One V Vibrator Replacement, Disassembling HTC ONE V Bottom Assembly: 1 단계, 이미지 3/3
    • Power off your device.

    • Remove the bottom cover by sliding it off.

  2. HTC One V Vibrator Replacement: 2 단계, 이미지 1/1
    • Remove the SIM card.

    • Remove the four screws securing the bottom casing.

    • Two 3.0 mm Phillips #0 screws in the top left and right corners.

    • Two 2.0 mm Phillips #0 screws in the bottom left and right corners.

  3. HTC One V Vibrator Replacement: 3 단계, 이미지 1/2 HTC One V Vibrator Replacement: 3 단계, 이미지 2/2
    • Remove the 2.0 mm Phillips #0 screws on either side of the phone.

  4. HTC One V Vibrator Replacement: 4 단계, 이미지 1/3 HTC One V Vibrator Replacement: 4 단계, 이미지 2/3 HTC One V Vibrator Replacement: 4 단계, 이미지 3/3
    • Use a plastic opening tool to pry open the bottom casing.

    • Remove the bottom casing by pulling it towards you.

  5. HTC One V Vibrator Replacement, Disassembling HTC One V Back Case: 5 단계, 이미지 1/3 HTC One V Vibrator Replacement, Disassembling HTC One V Back Case: 5 단계, 이미지 2/3 HTC One V Vibrator Replacement, Disassembling HTC One V Back Case: 5 단계, 이미지 3/3
    • Use the plastic opening tool to pry open the rear camera panel.

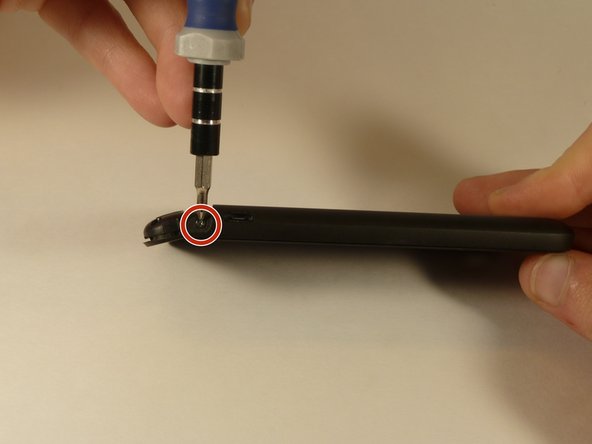
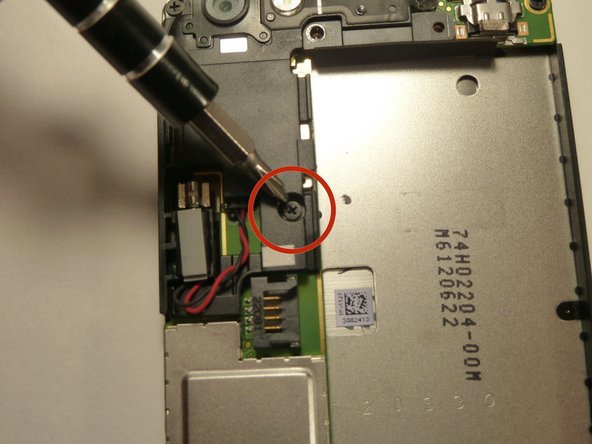
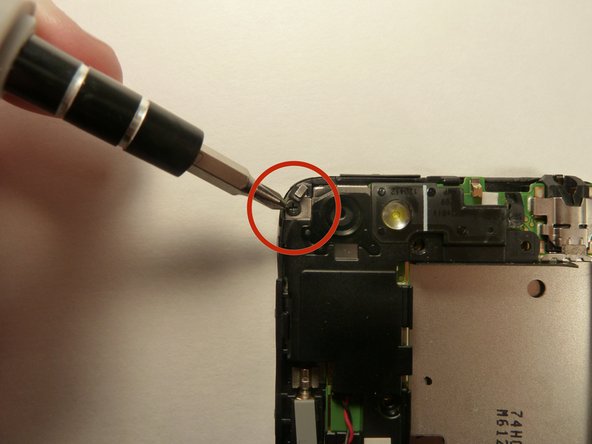
    • Remove both screws that are securing the back case.

    • One 4.0 mm Phillips #0 screw.

    • One 3.0 mm Phillips #0 screw.

  6. HTC One V Vibrator Replacement: 6 단계, 이미지 1/3 HTC One V Vibrator Replacement: 6 단계, 이미지 2/3 HTC One V Vibrator Replacement: 6 단계, 이미지 3/3
    • Use a Jimmy to pry up the OEM SIM and SD card reader contact.

    • Pry from right to left to avoid potential damages to the ribbon.

  7. HTC One V Vibrator Replacement: 7 단계, 이미지 1/3 HTC One V Vibrator Replacement: 7 단계, 이미지 2/3 HTC One V Vibrator Replacement: 7 단계, 이미지 3/3
    • Using both thumbs, gently push on the two bottom rear corners of the motherboard.

    • Gently and slowly pull the screen out from the front of the phone, while feeding the OEM reader contact through the opening.

  8. HTC One V Vibrator Replacement, Battery: 8 단계, 이미지 1/1
    • Pry up the battery with the flat end of the spudger.

  9. HTC One V Vibrator Replacement: 9 단계, 이미지 1/3 HTC One V Vibrator Replacement: 9 단계, 이미지 2/3 HTC One V Vibrator Replacement: 9 단계, 이미지 3/3
    • Gently lift up the battery away from the edge of its housing.

    • Use the point end of the spudger to push the connection out of its housing.

  10. HTC One V Vibrator Replacement, Camera Lens: 10 단계, 이미지 1/3 HTC One V Vibrator Replacement, Camera Lens: 10 단계, 이미지 2/3 HTC One V Vibrator Replacement, Camera Lens: 10 단계, 이미지 3/3
    • Remove the two 3.0 mm Phillips #0 screws, that are securing the camera lens.

  11. HTC One V Vibrator Replacement: 11 단계, 이미지 1/1
    • Pry off the camera lens using a plastic opening tool.

  12. HTC One V Vibrator Replacement, Vibrator: 12 단계, 이미지 1/2 HTC One V Vibrator Replacement, Vibrator: 12 단계, 이미지 2/2
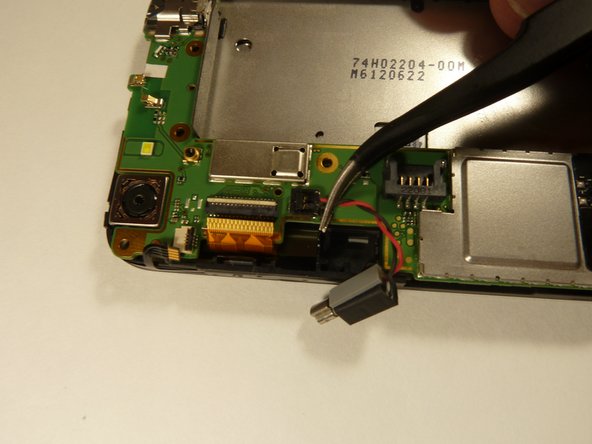
    • Pry the vibrator out of the housing with a spudger.

    • Using the tweezers, pull up on the connecting wires detaching the vibrator from the motherboard.

결론

To reassemble your device, follow these instructions in reverse order.

Michael Lucido

회원 가입일: 01/20/15

852 평판

안내서 6개 작성하였습니다

USF Tampa, Team 1-3, Blackwell Winter 2015 USF Tampa, Team 1-3, Blackwell Winter 2015 회원

USFT-BLACKWELL-W15S1G3

4 회원들

안내서 16개 작성하였습니다

댓글 0개

댓글 쓰기

조회 통계:

24 시간 전: 0

7일 전: 1

30일 전: 4

전체 시간: 321