이 버전에는 잘못된 편집 사항이 있을 수 있습니다. 최신 확인된 스냅샷으로 전환하십시오.
필요한 것
-
이 단계는 번역되지 않았습니다. 번역을 도와주십시오
-
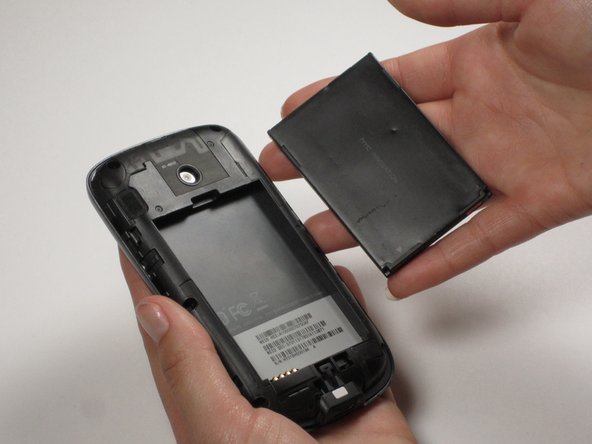
Using both thumbs, push the back side of the phone's exterior up and remove the front face of the phone.
-
-
이 단계는 번역되지 않았습니다. 번역을 도와주십시오
-
Insert your finger or a pry tool into the slot above the battery. Remove it and set aside.
-
-
-
이 단계는 번역되지 않았습니다. 번역을 도와주십시오
-
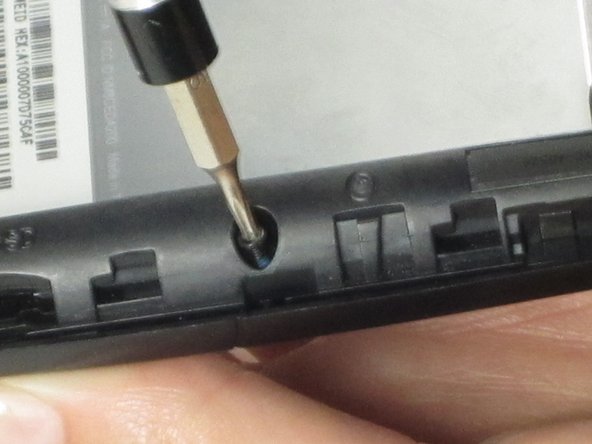
To remove the case, use a small, pentagonal screwdriver to unscrew the 6 screws that can be found around the edges.
-
-
이 단계는 번역되지 않았습니다. 번역을 도와주십시오
-
Next, unscrew the top screw using a small, Philips screwdriver.
-
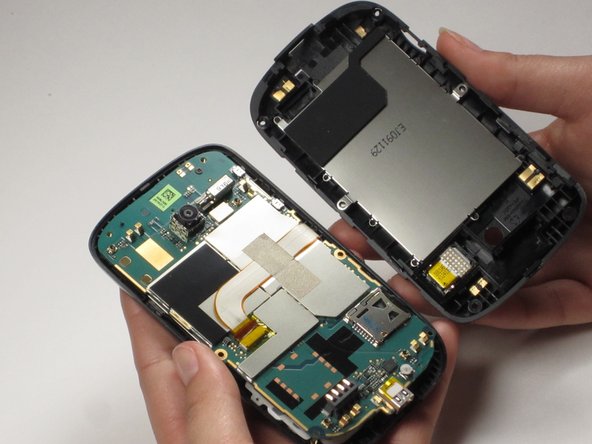
Pull back the motherboard.
-
-
이 단계는 번역되지 않았습니다. 번역을 도와주십시오
-
Using a spudger, remove the display screen from its cell within the front case. Insert the spudger next to the LCD on the opposite side of where the motherboard is attached.
-
-
이 단계는 번역되지 않았습니다. 번역을 도와주십시오
-
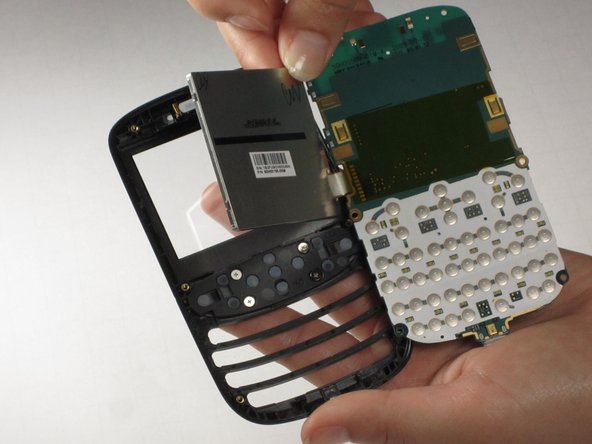
Place the motherboard down on top of the LCD. Using tweezers, remove the yellow piece of tape covering the end of the flat ribbon cable.
-
-
이 단계는 번역되지 않았습니다. 번역을 도와주십시오
-
Peel off the silver tape covering the flat ribbon cable. The motherboard is now free from the rest of the phone.
-


다른 한 분이 해당 안내서를 완성하였습니다.
팀

Cal Poly, Team 25-29, Garner Spring 2011 Cal Poly, Team 25-29, Garner Spring 2011 회원
CPSU-GARNER-S11S25G29
3 회원들
안내서 10개 작성하였습니다