이 버전에는 잘못된 편집 사항이 있을 수 있습니다. 최신 확인된 스냅샷으로 전환하십시오.
필요한 것
-
이 단계는 번역되지 않았습니다. 번역을 도와주십시오
-
Remove the back cover of the device to access the internal components of the HTC 7 Surround.
-
To remove the back cover, use the circular hole to lift up the cover while holding the front of the device down.
-
-
-
이 단계는 번역되지 않았습니다. 번역을 도와주십시오
-
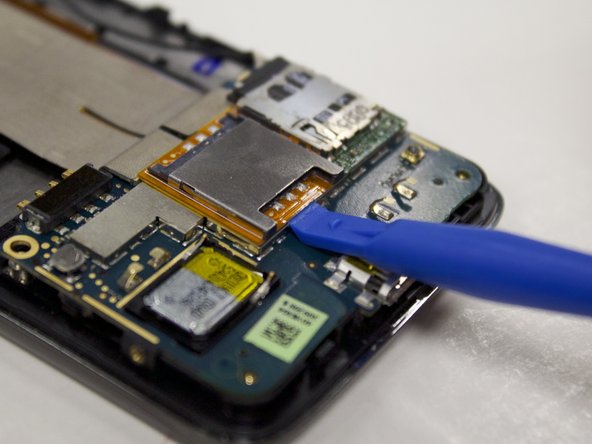
Look at the bottom right hand corner of the device and remove the silver tape covering the SD card slot with your fingers.
-
Insert the plastic opening tool directly underneath the orange surface below the SIM card until its removed from the surface of the device.
-
-
이 단계는 번역되지 않았습니다. 번역을 도와주십시오
-
To get to the attachment that the SD/SIM card is attached to; insert the plastic opening tool underneath the lower motherboard until it is removed from the bottom half of the device.
-
You will notice the SD/SIM card is attached to the lower motherboard by a yellow piece of tape. Remove the tape from the back of motherboard with your fingers.
-


